Thursday, February 28, 2013

This Week's Menu

There's a crap-ton of snow on the ground.  It's cold, and wet, and heavy as hell.  It's also hilarious to watch my older son teach my younger son how much fun it is to play in it.


I need to make sure that I'm stocked up on hot chocolate fixings for post-snow-play warm-ups before I get groceries for my meals this week!

  • Thursday: I happen to a surplus of tortillas in my pantry, plus a stash in my freezer.  Because apparently you can never have too many tortillas?  Taco Night it is! And there's a New Recipe! slow cooker refried beans recipe I want to try anyway.
  • Saturday: New Recipe! Sesame Chicken with Broccoli
  • Monday: Leftovers
Happy planning!!
Pin It

Wednesday, February 27, 2013

Chicken Pot Pie Soup

Every year for our birthdays, Mom would let us choose whatever we wanted for dinner.  Didn't matter what it was, she would make it for our Birthday Dinner.  I don't think my brother ever chose anything but Swiss Chicken.  When I was very little I usually asked for "roast beast" with mashed potatoes.  But later I remember asked for chicken pot pie.

Mom did not like to make chicken pot pie.

Don't get me wrong we all loved to eat this heavenly concoction of comfort food!  But the recipe my mom used was a seriously From Scratch Recipe and it was pretty time-consuming.  She lovingly labored over making the crust, chilling the crust, rolling out the crust, and setting it in the pan.  Sometimes she'd even do a lattice top.  She'd poach a couple of chicken breasts, chop up the meat, and then get started on the filling for my beloved birthday dinner.  Whew!!
My little dino-lover got a stegosaurus pastry.


And as much as I loved and still love this pie, I like to think that if I'd truly realized all the work that went into this one dinner, I would have asked her to look for a soup recipe like this one instead.
I thought my little Padawan would appreciate a TIE fighter pastry.


Exact same flavor. SO. MUCH. EASIER!!

Chicken (or Turkey) Pot Pie Soup
Recipe adapted from Taste of Home Magazine
Prep time: 20 minutes   Cook time: 30 minutes

2 tbsp butter
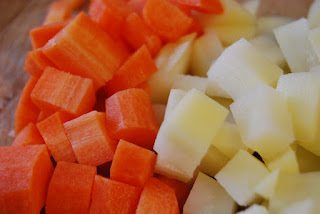
1 cup peeled, diced potatoes (about 1/2" little cubes)
1 medium onion, chopped
3 medium carrots, diced
1/2 cup flour
Salt and freshly ground black pepper
3 cups chicken stock
2 1/2 cups milk
2 cups shredded or chopped cooked chicken or turkey 
1 cup-ish frozen peas
1 cup-ish frozen corn
Prepared pie crust [This could be store-bought or a secret family recipe. Whatever YOU prefer!]

1.  In a Dutch oven, melt the butter over medium-high heat.  Add the potatoes, onion, and carrots; cook and stir until the onion is tender, 5-7 minutes.
To keep this soup quick-cooking, do a smaller dice on your veggies.

Potatoes chopped but have to wait?  Keep them in a bowl of cold water to prevent oxidizing.


2.   Stir in the flour and season with salt and pepper; let the flour toast a few minutes.  Gradually whisk in the chicken stock and milk.  Bring to a boil, stirring occasionally.  Reduce heat; simmer, uncovered for about 15-20 minutes or until potatoes are tender.  Stir in the remaining ingredients and heat through.
Toasting the flour so the soup doesn't taste like flour.

I used leftover Christmas turkey for this actually.

Dump. Stir. Done.


3.  Preheat the oven for 425.  While the soup simmers and oven heats up, roll out your preferred pie crust to your desired thickness.  I like a thicker pastry for this so mine was about 1/4" thick.  Using cookie cutters, cut out pieces of dough and lay on a baking sheet. You could use a round cutter, heart shape, star shape, or completely embrace whatever dorkiness lies within you and your family and have some fun with the shapes.  In my house, that meant making train, dinosaur, and Star Wars shaped pastries.
Whenever I deviate from my Preferred Crust Recipe, it never turns out quite right.
But I still managed to get some shapes cut out.


4.  Bake the pastries until golden.  The time will vary depending on the thickness of the dough.  For thinner (1/8") pastries, about 10 minutes.  For thicker (1/4") crust, more like 15-17 minutes. Serve the soup topped with your fun-shaped pastries.
FUN!!

For you Thomas-aficionados out there, yes that is Percy.


I'm not sure who got the bigger kick out of the pastries: my kids or my Star Wars-loving husband who also got a TIE fighter on his soup.  It definitely added a fun element to dinner!  The soup itself is this thick, creamy, comforting bowl of goodness that warms you, heart and soul.  The pastries are flaky, but crunchy enough to  resist turning into a soggy mess. 

I think I found my new birthday dinner!
Pin It

Tuesday, February 26, 2013

Buffalo Chicken Dip

Anyone else dealing with a serious junk food craving?  Yeah, me too.  For me, that often means chips and some kind of dip, usually of the Mexican variety.

But sometimes I want something a little hot, a little spicy, a little creamy and comforting.
Had to snap a quick pic on my phone before we ate it all!


Like this.  Yeah, this'll do.

Buffalo Chicken Dip
Recipe adapted from Food Network Magazine
Prep time: 10 minutes   Cook time: 20 minutes

8 oz (1 brick) cream cheese OR neufchatel cheese, softened
1/2 sour cream
1/2 cup Frank's RedHot sauce
2 cups shredded cooked chicken
1/2 cup shredded cheddar cheese
1/4-1/2 cup crumbled blue cheese
1.  Preheat oven to 425.
How can a recipe be bad when it starts with cream cheese and sour cream?

2.  In a medium bowl, mix together the cream cheese, sour cream, and hot sauce. Fold in the shredded chicken.
Shredded chicken soaks up all that creamy, spicy cheesiness.
2.   Spread in a small, greased baking dish, sprinkle with shredded cheddar and blue cheese crumbles and bake for 20 minutes, until hot and bubbly.  Serve immediately.


You can wait until after it's baked to top with the crumbles too.

I love that you can eat this with pretty much whatever you want: celery or carrot sticks, crackers, or (my fav!) tortilla chips.  This dip is an awesome crowd-pleaser.  Or if you've had a rough week or just the blahs lately from the NEVER-ENDING winter, there's nothing quite like hot, melty, spicy chicken and cheese with an ice cold beer for dinner.  Just sayin... ;)
Pin It

Thursday, February 21, 2013

This Week's Menu

Every time I dwell on how difficult it is to travel, by myself, with two small children, I'm going to think about my living and sun rooms.  While we were gone last weekend, Rob painted those rooms a GORGEOUS warm yellow.  I feel like I'm sitting in sunshine, even when it's gray and snowy outside!  Love, love, LOVE the fresh paint in our main living space.

And planning meals is SO MUCH EASIER when I'm happily in love with the space around me!

  • Friday: Pizza and popcornA couple weeks ago Gavin responded really well to one of my childhood favorites, The Dark Crystal.  I think maybe we'll continue the fantasy-bent with Labyrinth.
  • Sunday: Cheeseburgers (maybe with some pepper jack tucked inside the patties?), twice-baked potatoes, and tossed salad
  • Monday: Date Night!!!!!
  • Tuesday: Leftovers
Happy planning!!
Pin It

Wednesday, February 20, 2013

Strawberry Yogurt Muffins

I am always on a quest for easy, tasty, HEALTHY breakfast items that could be enjoyed at home OR quickly grabbed as we race out the door.


Bingo!!

Strawberry Yogurt Muffins
Recipe from The Dashing Dish
Prep time: 10 minutes   Cook time: 25 minutes

2 1/2 cups oats
1 cup plain Greek yogurt
2 eggs
1 cup sugar
1 1/2 tsp baking powder
1/2 tsp baking soda
1 1/2 cup strawberries

1.  Preheat oven to 400 degrees. Line 12 muffin tins with silicone or foil liners, (or just use a silicone muffin pan).
2.  Place all of the ingredients (except the strawberries) in a blender or food processor, and blend until oats are smooth. Pour mixture into a medium sized bowl, and stir in strawberries.


3Divide batter among cupcake liners, and bake for 20-25 minutes, or until toothpick comes out clean.


Not only are these easy to make (dump in the FP and push a button),they are CHOCK FULL of healthy ingredients that I always keep around anyway!  And you could really use any fruit you happen to have on-hand.  I still have some strawberries from our jam adventures last summer, but blueberries, peaches, raspberries, or cooked apples would all be good.  If you're using a frozen fruit, just be sure to that them out first before stirring them into the batter.


Pin It

Tuesday, February 19, 2013

Baked Chicken with Parmesan Crust

In between massive mouthfuls of food, Gavin kept repeating variations of how much he liked this and that I should make this again.


Need I say more?

Baked Chicken with Parmesan Crust
Recipe slightly adapted from Food Network Magazine
Prep time: 10 minutes  Cook time: 20 minutes

2 tbsp Dijon mustard
1/4 tsp dried thyme 
Salt 
Pinch of cayenne pepper
4 boneless, skinless chicken breast halves (about 8 ounces each)
3/4 cup grated Parmesan cheese
3/4 cup panko
Cooking spray
1.  Preheat the oven to 450 degrees F. 
2.  Mix the mustard, thyme, 1/2 teaspoon salt and the cayenne in a medium bowl. Add the chicken breasts and turn to coat completely; set aside.
There's just enough to lightly coat the chicken.


3.  In a medium shallow bowl, combine the Parmesan and panko. Dredge the chicken pieces in the panko mixture, coating evenly and heavily, and pressing the coating into the meat.
Crunchy!!


4.  Put the chicken on a rack set over a baking sheet, spray with a quick burst of cooking spray and put the sheet in the middle of the oven. Bake until the chicken is golden and cooked through, 15 to 20 minutes. Let rest 5 minutes before cutting or serving.
Golden crusty perfection.

Yes, this is yet another variation on Chicken Parm.  But I really, really like this one!  I love when the breading process is simple and minimal.  I love baking instead of frying.  And I really love when my kids pretty much do a happy dance in their chairs in between bites.  This one's a winner!!
Pin It

Thursday, February 14, 2013

This Week's Menu

For whatever reason, Gavin has a super long weekend coming up so the boys and I are taking off while Rob works on some of those never-ending house projects.  As a result, there's not a whole lot of cooking going on for me this next week.  And as I seem to be fighting off a bit of a seasonal funk, this makes for a well-timed and MUCH-appreciated break.

  • Thursday: On the road again...
  • Friday: Last time I was at my parents' house for Movie Night, Mom introduced me to chicken taco pizza.  I wonder what she has in store for me this time!!
  • Saturday: Still with my parents
  • Sunday: Not home yet, but soon...
  • Monday: Tator Tot Casserole and steamed veggies. This recipe is so easy, half the time I don't even think of it as cooking. 
  • Tuesday: Freezer Find.  I have to make room so I can add more stuff!  I have quite the stash of casseroles, soups, grillables, and various other goodies; it's time to use them up.
  • Wednesday: Freezer Find.  
Happy planning!!
Pin It

Wednesday, February 13, 2013

Honey Ale Bread

I have a feeling that when Rob showed me this recipe that he wasn't exactly expecting me to make it. 


I like surprising him, especially with something as tasty as this!

Honey Ale Bread
Recipe adapted from Sugar & Brews
Prep time: 15 minutes   Cook time: 1 hour

2 1/2 cups all-purpose flour
1/2 cup whole wheat flour
2 tbsp sugar
1 tbsp baking powder
1 tsp salt
2 tbsp honey
1 bottle (12 oz) ale [strongly recommend New Glarus Spotted Cow]
4 tbsp butter, melted

1.  Preheat the oven to 350 degrees F. Grease a 9 x 5 x 3-inch loaf pan.
Is it weird that I think dry ingredients can make such a pretty picture?


2.  In a medium bowl, mix together the flour, sugar, baking powder and salt. Next, stir in the beer and honey into the dry ingredients. Yes, the dough will be sticky and thick.  Keep mixing though, and consider the workout you're getting by making bread!
I love that I live in Wisconsin, the land of AWESOME BEER.

Arm, meet your workout.


3.  Pour half the melted butter into the greased pan. Then place the batter into the pan.  Spread out the batter and brush the top with the remaining butter.
Mmmmmmm, butter......


4.  Bake for 50 to 60 minutes, until top is golden brown and a toothpick inserted in the middle comes out clean.
I'd make this again just because this is so pretty!


This bread is so pretty and rustic and wonderful.  Whether you eat it warm from the oven with really good butter, or 3 nights later smeared with dark chocolate honey that you picked up at a farmer's market, it's AWESOME!
Pin It

Tuesday, February 12, 2013

Chocolate Blackout Cake

Ok, after much hype, here it is....
 

Chocolate Blackout Cake
Recipe slightly adapted from Food Network Magazine
Prep time: 2 hours   Chill time: 1 hour   Cook time: 50-60 minutes

For the cake:
Cooking spray
1 cup unsweetened cocoa powder
1 1/2 cups boiling water
2 cups all-purpose flour
1/2 cup whole wheat flour
2 cups sugar
1 1/2 tsp baking powder
1 tsp baking soda
1 tsp salt
3 eggs
3/4 cup canola oil (OR split this in half between oil and unsweetened applesauce)
1/2 cup sour cream
2 tsp vanilla extract

For the filling:
1 cup whole milk
1/3 cup sugar
2 tbsp cornstarch
1 tsp vanilla extract
1 egg
2 oz semisweet chocolate, finely chopped

For the ganache:
12 oz semisweet chocolate, finely chopped
Pinch of salt
1 1/2 cups plus 2 tbsp heavy cream, divided

1.  For the CAKE: Preheat the oven to 350 degrees F. Coat two 9-inch-round cake pans with cooking spray. 
 
2.  Whisk the cocoa powder and the boiling water in a medium bowl until smooth; set aside. 
It's so easy to hide healthy bits, like wheat flour, in chocolate.
 
 
3.  Whisk the flours, sugar, baking powder, baking soda and salt in a large bowl until combined. Add the eggs, vegetable oil, sour cream and vanilla and beat with a mixer on medium speed until smooth, about 1 minute. 
Can you tell I used light sour cream here?
 
 
4.  Reduce the mixer speed to low; beat in the cocoa mixture in a steady stream until just combined, then finish mixing with a rubber spatula. (The batter will be thin.)
I need a straw.


5.  Divide the batter between the prepared pans and tap the pans against the counter to help the batter settle.  Put both pans on a cookie sheet in case of spills.  Bake until a toothpick inserted into the middle comes out clean, about 40 minutes (closer to 50 though if you're like me and only have 8-inch pans). Transfer to racks and let cool 10 minutes, then run a knife around the edge of the pans and turn the cakes out onto the racks to cool completely.
Mine puffed up quite a bit.

 
6.  For the FILLING: Bring the whole milk to a simmer in a medium saucepan over medium heat. Whisk the sugar, cornstarch, vanilla and egg in a medium heatproof bowl until smooth. 
The beginnings of a beautiful pastry cream.
 
 
7.  Gradually whisk half of the hot milk into the sugar mixture, then return that mixture to the pan with the remaining milk. Reduce the heat to medium low and cook, whisking constantly, until the mixture boils and thickens, 2 to 3 minutes. 
Your arm will get sore but your efforts WILL be rewarded.
 
 
8.  Transfer to a bowl (strain through a fine-mesh sieve if it looks lumpy), then stir in the chocolate until melted. Press plastic wrap directly onto the surface and refrigerate until cold, at least 1 hour. 
Tell me again why I shouldn't just dig in?
 
 
9.  For the GANACHE: Put the chocolate and salt in a large heatproof bowl. Bring 1 1/2 cups heavy cream to a simmer in a saucepan over medium heat; pour over the chocolate and whisk until smooth. 
I have no words.  Dear God....
 
 
10.  Pour 3/4 cup of the ganache into a liquid measuring cup and set aside at room temperature. Refrigerate the remaining ganache in the bowl until thick but not set, about 1 hour.
Same stuff, two different frostings.


11. Cake ASSEMBLY: Trim the tops of the cakes with a long serrated knife to make them level.  Put 1 cake layer on a platter, cut side up; spread the filling on top, stopping about 1/2 inch from the edge. Top with the second cake layer, cut side down, and press down gently.


It's coming together!!


12.  Add the remaining 2 tablespoons heavy cream to the chilled ganache and beat with a mixer on medium speed until just fluffy, about 1 minute (do not overbeat). 
I gave Kieran a taste of this.  His reaction was priceless!!
 
 
13.  Frost the whole cake with the whipped ganache. Pour the room-temperature ganache on top, letting it drip down the sides. Let set before slicing, about 30 minutes.
Obviously I'm not an expert froster.  Don't really care either.

Go ahead.  Lick the screen. I won't tell.
 

Ok so if you couldn't tell, this isn't a run-of-the-mill, ordinary, hey-let's-celebrate-Wednesday kind of cake.  However, DON'T BE INTIMIDATED by the number of steps!  Every bit of this cake is very easy to assemble; if you can chop, scoop, stir, and spread you can make this cake.  
 
And actually, there are some very simple, "Everyday" swaps you could make for this cake to come together a little faster if you like.  Use a box mix if you like!  I have nothing against box cake mixes.  The filling here is this gloriously decadent pastry cream, which is similar to pudding.  For the frosting, if you don't want to mess around with ganache then use a regular chocolate frosting.  But whipping some ganache and then drizzling more on top just totally MAKES this cake!  It becomes a truffle-coated cake.  H-E-A-V-E-N!!!!

Oh, and in case you're wondering, here's some photographic results by my resident food critics.  Remember, a picture is worth 1,000 words. ;)
Kieran wastes no time getting chocolate EVERYWHERE

Gavin had trouble taking small bite; just wanted to eat this in great big gulps!

Pin It

Thursday, February 7, 2013

This Week's Menu

And the birthday cake winner is......
Chocolate Blackout Cake!!!

Yaaay!!!  This looks absolutely AMAZING and I'm super excited to make it this weekend. :)  Thank you so much for helping me with this sweetly difficult decision!

Oh yeah... my list of upcoming regular food that's not cake
  • Saturday: Simple Perfect Enchiladas.  I made this a while back but never blogged about it because it's pretty involved and I needed both hands to focus on putting it together.  Now, though I'm ready to make it while keeping my camera handy!
  • Monday: Leftovers, followed by BIRTHDAY CAKE!!  Yes, my birthday dinner isn't very exciting but hey, I'm not planning on cooking at least.  And we have plans to go out for my birthday/Valentine's day later this month.  
  • Tuesday: New Recipe! Cajun Chicken Pasta
  • Wednesday: New Recipe! Pecan Chicken Tenders, rolls, and tossed salad.
Happy planning!!
Pin It