Showing posts with label chicken. Show all posts

Wednesday, May 28, 2014

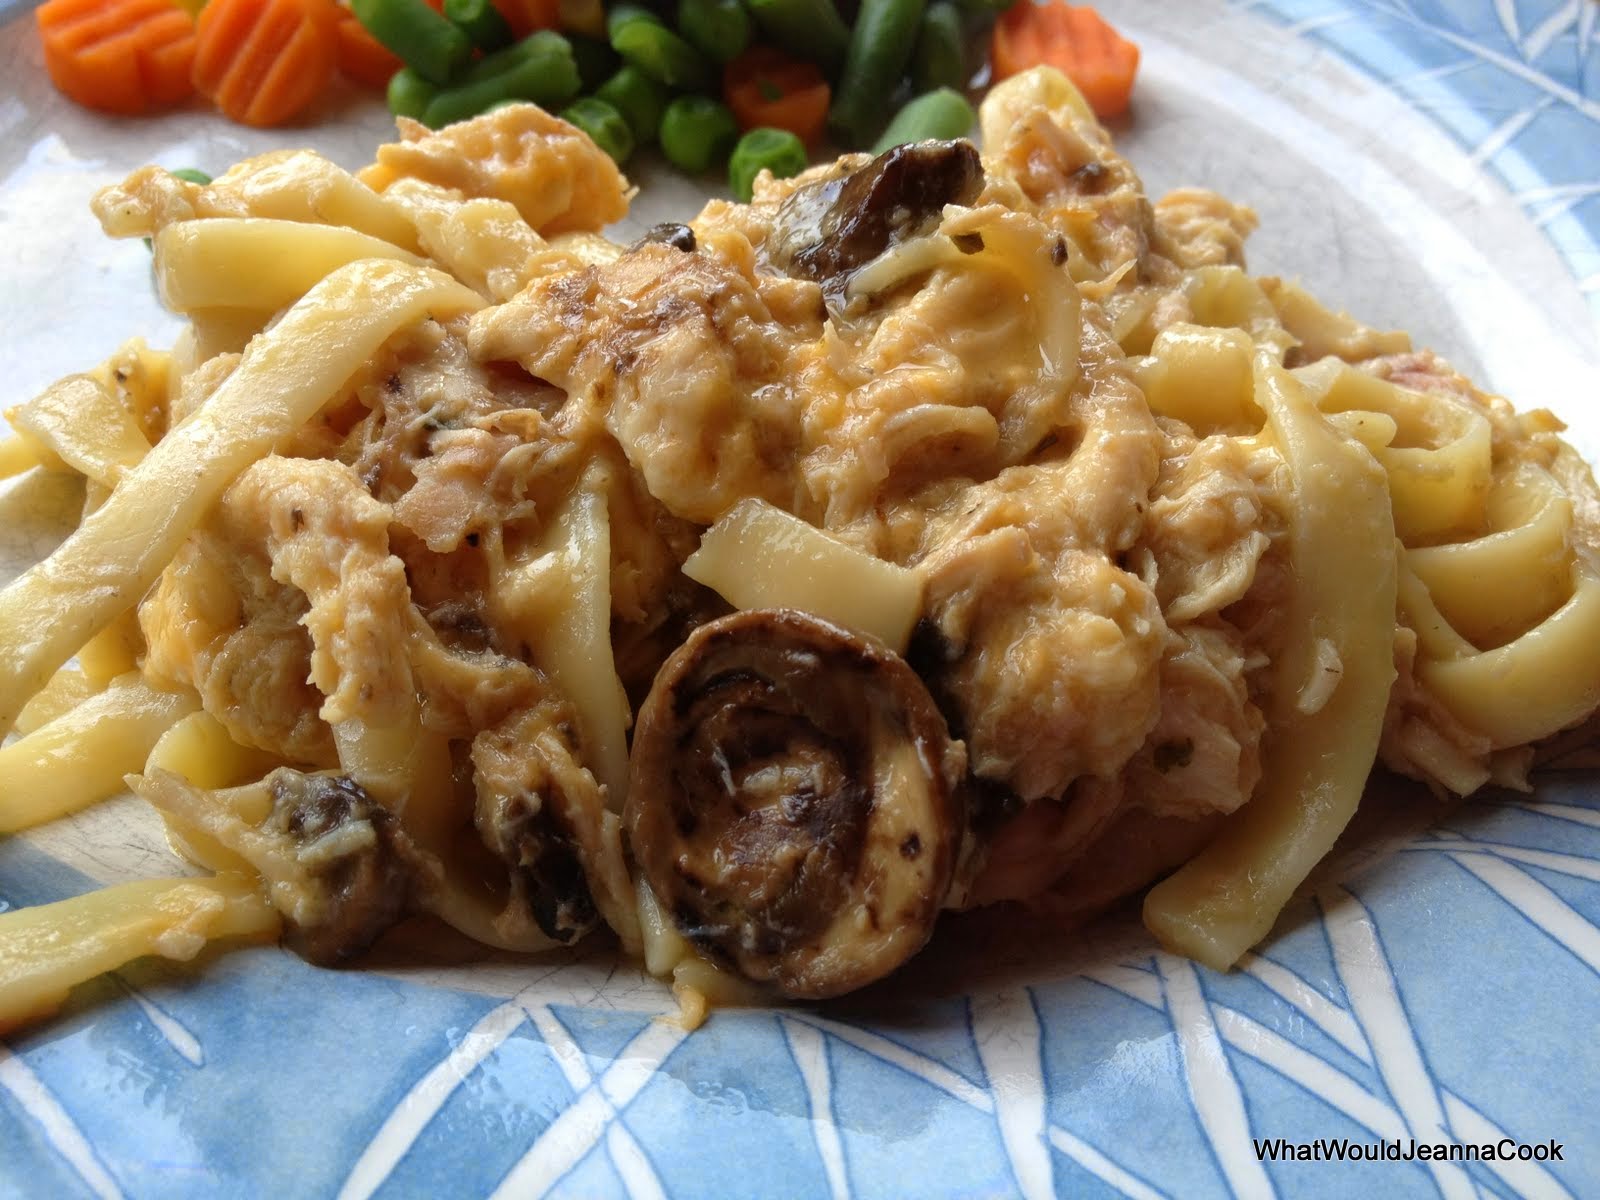
Turkey or Chicken Tetrazzini

I'm really beginning to believe that the Cooking Gene is real. It exists. And both my brother and I have it.


I love any recipe he shares with me, like this one!

Turkey Tetrazzini
Recipe adapted from my brother
Prep time: 15 minutes   Cook time: 50ish minutes

8 oz fettuccine
2-3 cups cooked turkey or chicken, chopped or shredded
1 tbsp minced onion
8 oz sliced fresh cremini mushrooms
1 cup shredded cheddar cheese
1/2 cup shredded Gruyere or Swiss cheese
4 tbsp grated Parmesan cheese, divided
1 can condensed cream of chicken soup
1/2 cup chicken stock
1/4 cup white wine
3/4 tsp Italian seasoning
Salt and freshly ground black pepper

1.  Preheat oven to 350.  Bring a large pot of water to boil over high heat. Cook the fettuccine according to package directions, draining it just before it reaches al dente.

2.  While the pasta cooks, in a large bowl combine the turkey, onion, mushrooms, cheddar and Gruyere cheeses, and 2 tbsp of Parmesan.
Meat and mushrooms.

Cheeeeeeeeeeeeeeeese!

Kieran learns how to "stir gently" so as not to decorate Mama's kitchen in sauce & cheese.


3.  In a medium bowl, whisk together the cream of chicken soup, stock, wine, and Italian seasoning.  Pour the sauce over the turkey mixture and stir to coat.
I whisked this in the bottom of my big bowl. Because that works too.


4.  Add the hot, cooked pasta to the turkey mixture and gently toss to combine everything.  Pour into a lightly greased 9x13 baking dish.  Sprinkle with remaining Parmesan. Bake for 45 minutes.
Kieran did a good job stirring gently.

A pan for now....

...and a pan for later! I love Get Ahead options.


This recipe is super easy to adapt to any taste. Don't like mushrooms? Leave them out. Or maybe you do but prefer a variety, or just simple button mushrooms. Or consider using a different veg altogether like green beans or broccoli or peas. Feel free to switch up the cheeses, and use all chicken stock if wine isn't your thing. Don't have Italian seasoning? Use a different herb & seasoning blend. Or grab a can of cream of chicken with herbs soup.

The point is: be creative! Make this your own.
Pin It

Wednesday, April 30, 2014

One Pot Spicy Chicken Riggies

I have a Twin Cousin.

Or at least that's how I think of her anyway. We're only two months apart in age, share a lot of the same interests, and our moms happen to be identical twins. I love having a Twin Cousin!

A few years ago, my TC and her family moved to New York State for a brief time. Because she's just as food-obsessed as I am, she raved about many of the new dishes she discovered while they were there.


One of them happened to be this thoroughly revolting-sounding dish called chicken riggies. I don't even want to tell you what went through my mind when I saw "riggie." I can say it was something to the effect of: what on earth are riggies and which part of the chicken did they come from??

Thankfully I've been educated! Now I know that "riggies" is just another term for rigatoni pasta. And after finding this One Pot Wonder Recipe of this favored regional dish, I can see why it's so popular!

One Pot Spicy Chicken Riggies
Recipe adapted from Host the Toast
Prep time: 15 minutes   Cook time: 45 minutes

2 tbsp EVOO
1.5 lbs boneless, skinless chicken breasts, cut into bite-sized pieces
5 cloves of garlic, minced
3 jalapenos
2 (14.5oz) cans diced tomatoes
1 cup white wine
1 cup water
3/4lb rigatoni pasta
1/4 cup butter (1/2 a stick)
1 tsp dried basil (or 2 tsp fresh)
1/2 tsp salt
Crushed red pepper flakes, optional
1/4 cup half & half
1 cup grated Parmesan

1. Preheat the EVOO in a large pot over medium heat. Add the chicken and cook until just browned, but not cooked through. Add the garlic and cook another 30 seconds.
I diced the chicken kinda small. I don't always like biting into big chunks of chicken.


2. OPTIONAL "ROASTING" STEP: If you'd like to add a little flavor-depth to the jalapenos, and you have a gas stove, turn on one of the burners to medium low. Spear one end of a jalapeno with a fork and hold it over the flame. As the skin blisters and blackens (this will make popping sounds too), rotate it to roast all sides. Place the roasted peppers in a bowl and cover tightly with plastic wrap. After a few minutes to steam, the peels will easily slide off. Seed and chop the peppers.
Watch your fingers

I should have let these blacken a bit more, but they were still good!


3. Add chopped, roasted peppers to the chicken, and saute for a minute. Add the diced tomatoes, wine, and water and stir to combine.
Mmmmmmmmmmmm...chicken and peppers and garlic...mmmmmmmm.

I know, this looks like soup. Don't panic! The pasta will soak up a lot of this.


4. Add the dry pasta to the pot and bring to a low boil. If the liquid looks low, add a bit more water. Continue to boil, stirring often, until the pasta is cooked to al dente, about 15-20 minutes.
I heart One-Pot Meals

My almost 7 year-old is obsessed with butter now.
Apparently having the word "butt" in it makes it fabulously funny.


5. Reduce heat to low and add in the butter, basil, salt, and some red pepper flakes, if using. When the butter completely melts into the pasta, add in the half & half and Parmesan, and heat through.
Oh Dairy State. I heart you too!


Now, before any Heat Lovers out there start piling on the red pepper flakes, taste this first!! I used what I though were fairly mild jalapenos. They weren't that mild. And there were three of them. I can honestly say that I LOVED this dish, but truth-be-told my eyeballs were sweating about halfway through it. It had some zing!

I think the heat is what makes it so fantastic though. Here is this wonderfully creamy, cheesy, pasta-y, tomato-y, chicken-y hot dish of comfort that is totally warming on it's own. But then you add this slow building heat from the peppers and suddenly you realize that no, it really is getting warm in here and WOW my sinuses are suddenly very clear!

I absolutely cannot WAIT to make this one again.

p.s. This makes a TON. Enough that I will be freezing half of this the next time around.
Pin It

Friday, February 21, 2014

Four-Cheese Chicken Lasagna

If you followed our CSA adventures at all, you'll know that we got a lot of kale.  A. Lot.  Bunches.  Oodles and oodles of kale.  I barely knew what kale was before last summer, now my 6-year-old likes to remind me periodically that he hates kale.

Needless to say that with so much kale coming into our house, I had to get creative with what to do with it. So when I saw this recipe in a magazine, I knew I had to try it.  Just because it called for kale.
I am incredibly talented at wrecking pretty lasagna layers when scooping.


And, once again, I LOVE when I'm forced to try something new and the experiment totally pays off!

Four-Cheese Chicken Lasagna
Recipe slightly adapted from Food Network Magazine
Prep time: 30-40 minutes   Cook time: 1 hour, 25 minutes   Bake time: 1 hour, 5 minutes   Rest time: 30 minutes

For the sauce:
2 tbsp EVOO
1 1/2 lbs boneless, skinless chicken thighs
1 small onion, chopped
4 cloves garlic, chopped
3 tbsp tomato paste
1/2 cup white wine
3 cups water
28 oz (one can or two 14oz cans) crushed tomatoes
3 bay leaves
1/4 cup roughly chopped fresh parsley
Salt and fresh ground black pepper

For the lasagna:
2 bunches of fresh kale, stems removed and leaves finely chopped*
2 large eggs, lightly beaten
2 15oz containers cottage cheese
3/4 cup grated Parmesan cheese, divided
1/4 cup roughly chopped fresh parsley
Freshly ground black pepper
2 cups grated mozzarella cheese
1 cup grated asiago OR cheddar
1 lb lasagna noodles (whatever you prefer, whether it's the boil or no-boil kind)

*The fresh kale is AMAZING but this can be substituted with frozen. OR if kale really isn't your thing you can use spinach too, fresh or frozen. Using frozen greens would allow you to skip Step #5 altogether.

1. For the sauce: Heat the EVOO in a large skillet over medium heat. Add the chicken thighs and cook until browned, turning once (about 5 minutes).
I used a combo of thighs and breasts for this actually.


2. Add the onion, garlic, and tomato paste and cook, stirring, until the onion softens, about 5 minutes. Add the wine and cook until mostly evaporated, about 5 minutes.
When dealing with only tablespoons, invest in a tube of tomato paste. Save your cans!


3. Stir in the water, crushed tomatoes, bay leaves, parsley, 1 tsp salt, and 1/4 tsp pepper; bring to a boil. Reduce the heat to medium low and simmer 50 minutes.
It's hard to get a clear shot when steam gets in my way.


4. Remove the chicken thighs and shred. Return the shredded chicken to the pan and cook until thickened, about 20 more minutes. Remove the bay leaves.
You could chop this instead, but I love how shredded chicken soaks up more sauce.


5. Optional Step (can be skipped if using frozen greens): While the sauce simmers, steam the chopped kale in the microwave until tender. Drain and rinse under cold water and squeeze dry.
I feel healthier just looking at this.


6. Place the kale in a bowl, and stir in the eggs, cottage cheese, and half of the Parmesan and parsley. Add a little salt and pepper and stir to combine. Set aside.
Rule of thumb: don't like something? Just add cheese.


7. In a medium bowl, combine the shredded mozzarella, shredded asiago, and remaining Parmesan. Set aside.
I was fully prepared to use Cheddar, but rejoiced when I found some pre-shredded Asiago.


8. For the lasagna build: [NOTE: I used no-boil noodles, but if you can't find those, make sure your noodles are boiled, drained, and tossed with a teensy EVOO to prevent sticking before you build.] Preheat oven to 350.
My setup station!


9. Spread 3/4 cup of the sauce in a 9x13 baking dish. Top with one-third of the noodles. Cover with half of the kale mixture, then two more cups of sauce. Sprinkle with one-third of the mozzarella mixture. Repeat the layers (noodles, kale mixture, sauce, mozzarella mixture). Top with a final layer of noodles, the remaining sauce, and the remaining mozzarella mixture.
Sauce

Layer  Set 1: Noodles

Layer Set 1: Kale

Layer Set 1: Sauce

Layer Set 1: Mozzarella. Repeat layer sets starting at Noodles a couple more times

Finish with Parmesan


10. Set on a baking sheet to help keep any bubbling drips from baking onto your oven. Loosely cover with foil and bake 40 minutes. Then uncover and bake until golden and bubbly, about 25 more minutes. Let stand 30 minutes before serving. Total time to allow in this step is 1 hour and 35 minutes!!
I'm fairly neurotic when it comes to labeling and details.

I froze one and baked up one right away as a reward for my day's work.


So by now if you weren't intimidated by the number of steps I listed, you probably just freaked out over the time necessary for that final step alone. But trust me when I tell you that this dish is WORTH IT. Totally, totally, totally worth the time and effort to prepare. To make this even more worth your while though, consider splitting this into two 8x8 or 9x9 dishes and freezing one after assembling it to bake up later. If your family can inhale a 9x13 pan of lasagna in one sitting, then definitely consider doubling, or even tripling this to have some spare pans in the freezer.

If I haven't made it obvious enough, I'm a big fan of making the most of what cooking time I have. That means if I'm going to spend the many minutes necessary to simmer a sauce and build a lasagna, then I want to eat it as often as possible! Investing an extra 10-15 minutes to build a second pan is worth the hours I'll save in the long run.

Still don't believe that this meal is worth the time? Let me just leave with an idea of the taste. This dish is delightly cheesy, thanks to the variety of cheeses used. The sauce has that tangy, tomato-y zing to it, but with the lightness that comes with using chicken instead of ground beef. And the kale adds this healthful aspect, but without any bitter taste, that made me want to stand up and do a happy dance. I loved this so much that on my next "Stock the Freezer with Lasagna" Day, I fully plan on doing a double batch of this, along with my usual beef lasagna, so I've got some happy, healthy options for those busy days to come!
Pin It

Wednesday, October 30, 2013

Parmesan Chicken in Cream Sauce

It's recipes like this that remind me that good food does not have to be complicated food.


Nor does it require many hours in the kitchen.  How does 20 minutes sound?

Parmesan Chicken in Cream Sauce
Recipe slightly adapted from Kraft, by way of my mother-in-law
Prep time: 5 minutes   Cook time: 15 minutes

2 tsp canola oil
1/4 cup Panko (or breadcrumbs, or cracker crumbs, or leftover oven-toasted quinoa)
2 tbsp Parmesan
4 boneless, skinless chicken breasts
Salt & freshly ground black pepper
1/3 cup chive and onion cream cheese (or another savory flavor of your choice)
1/2 cup chicken stock

1.  Preheat the oil in a large skillet over medium-high heat.
Panko is the easiest for me to keep on-hand


2.  Combine the Panko and Parmesan in a shallow dish.  Season both sides of the chicken breasts with salt & pepper.  Dredge the chicken in the Panko mixture, coating evenly.
That looks pretty even to me, don't you think?


3.  Cook the chicken in the hot oil about 5-6 minutes per side, or until cooked through (lower the heat to medium if the outside gets too brown).  Remove chicken from the skillet and keep warm on a plate.
Golden brown, crispy chicken.  *DROOOOLING*


4.  Add the cream cheese and chicken stock to the skillet and whisk to combine, gently scraping up any brown bits from the chicken.  Bring to a boil and simmer about 3 minutes until thickened.  Spoon the cream sauce over the chicken and serve!
Just cream cheese and stock; no need to get complicated.

Whisking!


I love this one.  I love this recipe for it's simplicity, it's ease, and it's versatility.  I can switch up the sauce flavors just by changing the cream cheese.  My boys can enjoy their crispy chicken un-sauced while my husband and I go for an extra spoonful or two.  AND I can have it done, ready, and on the table in less time than it takes to watch the evening news.  BONUS!!
Pin It

Wednesday, September 11, 2013

Crispy Southwest Chicken Wraps

At long last I have found the elusive pictures of this truly AMAZING wrap filling.

And when I say wrap, honestly you could use this filling for whatever you want: wraps, quesadillas, nacho topping, just plain on a spoon..... there's no judgement here!

So easy. So good!

Crispy Southwest Chicken Wraps
Recipe slightly adapted from Mel's Kitchen Cafe
Prep time: 15 minutes   Cook time: 5 minutes

1 cup cooked quinoa, warm or at room temperature
1 cup cooked, shredded chicken
1 can black beans, rinsed and drained
1 green onion, finely sliced (white and green parts)
1/4 cup fresh cilantro, chopped
Juice of 1 lime
1/2 tbsp chili powder
1 tsp ground cumin
1/2 tsp garlic salt
2 cups shredded cheese
Sour cream (optional)
6 burrito-sized flour tortillas

1.  Mix quinoa together with chili powder, cumin and garlic salt. Add remaining ingredients except for cheese and sour cream. 
Quinoa is so much like rice. But BETTER.

Admit it. You could eat this as is.


2.  Sprinkle cheese over tortillas, leaving 1/2-inch border around edges, then arrange chicken and rice mixture down the center of each tortilla. (Option: dollop little bits of sour cream over the cheese before arranging chicken mixture down the center for a creamier filling) Roll stuffed tortillas, leaving edges open and slightly flatten the wraps with the palm of your hand. Spray seam-side of the wrap lightly with cooking spray.


Special thanks to my 6 year-old for helping me with the pics of this process.


3.  Heat a large non-stick skillet (or griddle) over medium heat for 1 minute. Arrange wraps, seam-side down, in pan or griddle and cook until golden brown and crisp, about 2-3 minutes per side. Cooking them seam-side down first helps seal the long edge so they don’t fall apart. Transfer to a plate and repeat with remaining wraps. Serve warm.

Cooking seam-side down first ensures they won't open when you flip them.


I just have to say again how much I love the versatility of this recipe.  Even if you stick with using this as filling for wraps, you can still play around with it!  The recipe calls for burrito-sized tortillas, however I used smaller, taco-sized ones and thought they were perfect for small kids OR appetizers at a party.  I also found myself wishing I had the bigger ones to wrap up some extras for my freezer.  And a couple days later when it was leftover night, I was too tired to even make wraps.  But slapping the filling in between tortillas and cheese for quick quesadillas was just as good!  Sadly I think we finished this off that night so I could really test the nacho idea but rest assured I will!
Pin It