Thursday, March 31, 2011

Update to Grapefruit Scones

Since Blogger and I are having a disagreement about pictures, I guess the Lemon Pasta with Roasted Shrimp recipe will have to wait for another day.  ;)

Not to worry though!  I have an update to the Grapefruit Honey Yogurt Scones.  I was watching Food Network over the weekend, which is incredible in and of itself because I never have time to watch my fav cooking shows any more.  Anyway, I saw Giada was making scones so I decided to clue in to her technique and see if there was a less messy way to pull them together than what I tried originally.  And yes there is a way!!

If you have one, process the flour mixture and butter together in a food processor until the butter is the size of small peas.  Pour this into a bowl and add the wet ingredients.  Mix together with a fork until moistened (if the dough is too dry, add a little of the grapefruit juice from the segmenting process).  Using your hands, scoop out handfuls of the dough and drop onto a baking sheet that's been lined with parchment paper.  Pat down slightly.  Brush the six dough balls with a little milk and sprinkle with the grapefruit sugar.  Bake as directed.

Did you see that?  NO MESSING AROUND WITH A FLOURED BOARD!!!  Wahoo!!!!!  Less dishes to wash and less overall mess to deal with.  Gotta love it right?

If you still haven't tried these yet I'm going to recommend, yet again, that you do.  I made them again over the weekend and Rob and I love that we can grab these quick on the way to work.  I'm considering making them again but using tangerines instead of grapefruit, just to try a little sweeter flavor.
Pin It

Wednesday, March 30, 2011

Chicken Azteca

I haven't been doing this whole blog thing very long but I already like you guys.  Does that make me weird?  Well, if it does I'm ok with that.  But what's not to like about a group of people who find food fascinating?!  And because I like you, I'll go ahead and share a slow cooker recipe that I think EVERY busy cook should have, especially the busy cook who likes to entertain a crowd of people on occasion.

This is one of those recipes in my life that had I known one little piece of information, I never would have made it.  My parents were visiting for the weekend and helping with some things around the house.  I really wanted a dinner recipe that would make a lot, preferably in a slow cooker since we were all busy with various chores and projects.  This one had caught my eye from one of my mom's cookbooks so I wanted to try it.  Little did I know that not only does my dad not care much for Mexican flavors, but he also doesn't like cream cheese very much.

Thank goodness for ignorance!  Not only did my dad eat and LIKE this recipe (wahoo!!) but it's become a huge favorite of mine and Rob's.
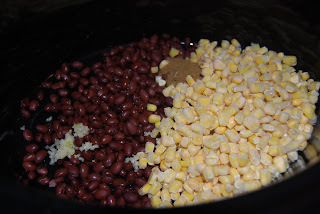
Dark beans meets sunny yellow corn.  Contrast is just so much fun!

Chicken Azteca
Recipe adapted from Fix It and Forget It for Entertaining

1 can black beans, drained & rinsed
2 cups frozen corn kernals
1-2 cloves garlic, minced
3/4 tsp cumin
1 (16 oz) jar of salsa, divided
5 boneless, skinless chicken breasts
1 (8oz) brick of cream cheese


1.  In a slow cooker, combine beans, corn, garlic, cumin and half of the salsa.
Doesn't this just scream FESTIVE?


2.  Lay the chicken breasts on top of the bean/corn mixture.  Pour on remaining salsa.
I love combining chicken and salsa together

3.  Cover and cook on HIGH for 2-3 hours or on LOW for 4-6 hours.

4.  Remove the cooked chicken and shred.  Add shredded chicken back to the slow cooker and stir to combine with the bean/corn/salsa mixture.

5.  Cube the cream cheese and add to slow cooker; stir.  Cover and let sit at WARM or LOW setting just until the cream cheese has melted (about 30 minutes).  Stir to make sure everything is well combined.

I like to eat this comforting concoction on top of hot rice and smothered with cheddar cheese.  Rob likes to use it as a burrito filling.  We both enjoy it as a fun twist on nachos also.  The best part is normally we would fight over the leftovers, however it makes soooooooooooooo much that there is plenty to go around.
*Drooooooooooooooooooooooooooooooooooooooooool*
Oh, and bonus preparation option?  Rob's taken this recipe camping too.  It comes together quite well in a Dutch oven and takes about 30 minutes to an hour to cook, depending on how hot the campfire is.  So for you crazy campers out there (God knows I am SO not one of you; sorry), give this a shot.
Pin It

Tuesday, March 29, 2011

My Favorite Chili

There are some recipes that every household has their own favorite version of.  To me, chili is one of them.  My mom makes a great chili, and I've attempted my mother-in-law's recipe several times (hers always turns out better than mine though).  So I've blundered along, keeping an eye out for what I'd hoped would become Our Family Chili recipe.
I cannot eat chili with a spoon; I use tortilla chips instead
My various experiments over the years have helped me figure out things I liked and didn't like.
  • I really love recipes that use beer.  Wine is great too in chili but I think beer adds this fabulous tang in the background to balance that spice.  
  • Another thing I was looking for in That Family Recipe was beans.  I have to have beans in chili.  Not only do I love the taste with beans (sorry to any Texas readers), but it's also a great way to stretch the dollar.  
  • Because both Rob and I grew up with red chili, we knew we didn't much care for white chili (nothing wrong with white chili though!).  
  • Finally, Rob doesn't like the texture (or taste really) of bell peppers.  So whatever recipe I'd find I would need to find a heat source other than using an actual pepper.

Boy do I sound picky or what?
 I could never live in Texas...I love beans in my chili!
A few months ago my cousin was bragging online about making a big pot of his favorite chili.  Me being me of course I begged for the recipe.  His exact version wasn't something that I thought my little family would go for, however I saw through some of the various ingredients to what I believed was the heart of the recipe; and that heart had everything I was looking for.  Yippee!!!  I eagerly gave it a try, adapting it as I went with what I had on-hand in my fridge and pantry at the time.  The result was this extra spicy, deep rich flavor that was just amazing!  We have a winner!!!

One of the things I love about chili recipes is how you can keep changing them, while still keeping that core flavor intact.  After writing down my version of my cousin's recipe, I realized the other night when I made it that I'd have to make some other adjustments, again based on what ingredients I had available.  So rather than give you 2 different recipes and make this confusing, I'll give you my first adaptation, and make notes next to the ingredients I changed for my second version.

Josh's Chili
Recipe adapted from my cousin's favorite recipe

2 tsp oil
2 onions, chopped
3 cloves garlic, minced
1 lb lean ground beef, OR 1 container of cremini mushrooms, ground
3/4 lb beef sirloin, cubed [2nd version: I used leftover French Dip beef]
1 (14 1/2 ounce) can diced tomatoes with green chilies [2nd version: I used plain diced tomatoes]
2 cups dark beer
2 (6 ounce) cans tomato paste
1 can beef broth [2nd version: I used leftover jus from the French Dip]
1-2 tsp sugar [2nd version: I used brown sugar]
1 tbsp cumin
1 tbsp cocoa
1 tsp oregano
1 tsp cayenne pepper
1 tsp coriander
1 tsp salt
2 (15 ounce) cans kidney beans [2nd version: I didn't have kidney so I used black beans instead; I think it'd be fun to use 1 can of each for future variations]

1.  Heat oil in a large Dutch oven over medium-high heat. 
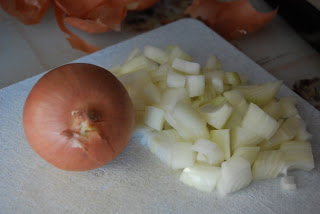
What chili doesn't have onions in it?

2.  Cook onions, garlic and meat until brown.  If you are using a leftover meat that is already fully cooked, add that just as the beef is cooked and onions are translucent. 
 I love the smell of beef and onion cooking together

3.  Add tomatoes, beer, tomato paste and beef broth.  Add spices. Stir in kidney beans. 

BEER!

4.  Reduce heat and simmer for 1 1/2 hours. 

If you aren't a fan of excessive heat, I'd suggest using plain diced tomatoes instead of the ones with green chilies.  Cayenne pepper packs quite a punch and one teaspoon in this big pot of goodness goes the distance.  The first time I made this I used ground mushrooms instead of ground beef, and leftover grilled steak instead of the sirloin.  Using leftover grilled anything adds an extra smokiness that is quite simply AMAZING!  The French Dip meat was just as fabulous.  
Behold the power of Leftovers!
You're probably wondering about the cocoa powder though.  Try it.  No, I'm serious...give it a shot.  Chocolate and chilies have this incredible understanding of one another that I'm not sure many people have realized.  Have you ever tried a piece of chocolate that's been spiked with chili powder?  This is the same idea but in reverse....a chili that's been spiked with cocoa.  The result is this additional depth and warmth that truly can only be experienced.
Pin It

Friday, March 25, 2011

Soft Vegan Ginger Cookies

I know, I know...vegan, right?  I'm not a vegetarian.  I have no plans to be a vegetarian or vegan.  But I do like to play around with veggie recipes from time to time.  I am especially intrigued by vegan baked goods.  I mean, I know that you can use apple sauce in place of fat ingredients like butter, but what about eggs?  Can a cookie or cake really taste good without eggs?
Easiest way to mince crystallized ginger?  Scissors.
In a word?  Yes.
Your eyes do not deceive...that is a CUP of ginger
This is a really neat recipe.  It has a nutty, sweet flavor with a hint of that ginger zing in the background.  But it's not a delicate cookie either; it's got substance...dare I say hearty?  Despite the density of it, I'd absolutely say this is a girly cookie.  My son loves them, however I'd be a bit surprised if Rob asked me to whip up a batch of these just to have around. 


Soft Vegan Ginger Cookies 
Recipe from Joy the Baker

1 1/2 cups all-purpose flour
1 1/2 whole wheat flour
1 teaspoon baking powder
1/2 teaspoon baking soda
1/2 salt
1 teaspoon ground ginger
1 cup minced candied ginger
1 1/4 cups granulated sugar, divided
2 tablespoons ground flaxseed
1/2 cup unsweetened applesauce
1/4 cup canola oil
1 teaspoon lemon zest
1 tablespoon fresh lemon juice

1.  In a large bowl, whisk together flours, baking powder, baking soda, salt, ground ginger, and minced candied ginger.  Set aside.
Wow that's a lot of ginger
2.  In a medium bowl, whisk together 1 cup sugar, ground flaxseed, applesauce, oil, and lemon zest and juice.  Add the wet ingredients, all at once, to the dry ingredients and carefully mix together with a wooden spoon.  Make sure all the flour bits are moistened and well incorporated.  Form dough into a disk shape and wrap well in plastic wrap.  Refrigerate for an hour, or overnight.

3.  Place a rack in the center and upper third of the oven and preheat 350 degrees F.  Line two baking sheets with parchment paper.
 

4.  Remove the dough from the fridge and use your hands to roll dough into walnut sized balls.  Rolls balls in 1/4 cup granulated sugar and place of baking sheet.  Use the palm of your hand to slightly flatten the dough ball.  Bake for 15 to 18 minutes, until just slightly browned but still slightly soft in the center.  Remove from the oven and allow to cool on the baking sheet for 5 minutes before removing.

These cookies don't spread out as they bake so they will pretty much stay as they look when you "flatten" them.  If you like a crispier cookie, flatten a bit more than I've done.  As for when to make them?  This isn't a recipe that I'd turn to if I just looked at the clock and realized "Oh crap! The boys will be home in 20 minutes and the cookie jar is empty!"  I'd reserve for a special occasion (think bridal or baby shower, a special afternoon tea, or maybe a ladies' brunch).  Because it calls for so much, the crystallized ginger takes a while to get all chopped up. The flavor  is unique enough that I'd certainly make these again though.  The best part?  Because of all that ginger, you can feel free to eat as many as you like without the risk of a stomachache! ;)
Pin It

Thursday, March 24, 2011

Cinnamon Roll Pancakes

I love, love, looooooooooooooooove cinnamon rolls.  Do you?  Have you ever tried making them?  I confess that I have not.  I'm still in the way-too-intimidated-just-by-glancing-at-a-recipe phase for that one.  Maybe someday... I'd really like to make them though because I love, love, loooooooooooooooooove cinnamon rolls.  For now, I settle for the trusty refrigerator canned kind to get my cinnamon roll fix.

But then I found this pancake recipe.  Hello cinnamon!!  These truly have all the warm goodness of a cinnamon roll but without all that rolling and sprinkling and cutting and so forth.  All the skills I need are stirring and scooping.  Yeah, I can handle that on a sleepy Saturday morning.  I bet you can too. ;)

Cinnamon Roll Pancakes
Recipe adapted from AllRecipes.com

1 1/2 cups all-purpose flour
3 tbsp white sugar
1/2 tsp salt
4 tsp baking powder
1 tbsp ground cinnamon (Yes, a whole tablespoon.  Don't be afraid)
2 eggs, beaten
1 cup milk
2 tbsp honey
1/4 cup butter, melted
1 tbsp vanilla extract

1.  In a medium bowl, combine flour, sugar, salt, baking powder and cinnamon.
See? You want lots of cinnamon
2.  In a separate large bowl, beat together eggs, milk, honey, butter and vanilla extract. Stir in the flour mixture.
Prepare to scoop the batter!
3.  Heat a lightly oiled griddle or frying pan over medium low heat. Pour or scoop the batter onto the griddle, using approximately 1/4 cup for each pancake. Brown on both sides and serve hot with maple syrup. 

Cook, my lovelies...
I'm pretty sure I've mentioned before how much we love pancakes right?  Yeah, we love pancakes.  So this is really just the best of both worlds: we get the pancakes we adore, PLUS the bonus taste of lovely, lovely cinnamon rolls.

Eventually I'll get over my issues and finally tackle the homemade cinnamon roll world.  For now, I think Gavin is perfectly fine with my pseudo-replacement.
Typical Saturday morning breakfast response
Pin It

Wednesday, March 23, 2011

French Dip Sandwiches with Onion Spread

I subscribe to some foodie magazines (I know, big surprise there).  In a recent issue there was this glorious French Dip Sandwich recipe with an Onion Spread.  Every taste bud and saliva gland instantly came alive in my mouth when I saw this recipe.  I knew I had to make this sandwich.  For weeks I plotted when I could possibly have the time for such an endeavor.  Finally, the moment came.  I made the spread.  I made the sandwich.

And oh my goodness...  This is truly every carnivore's dream sandwich...

Onion Spread
Recipe adapted from Food Network Magazine

3 tbsp vegetable oil
1 large onion, thinly sliced
Kosher salt
6 medium shallots, thinly sliced
1 bunch scallions, chopped (white and greens parts separated)
1 cup plain Greek yogurt
1/4 cup sour cream
1/4 cup mayonnaise
2 teaspoons white or red wine vinegar
2 teaspoons Worcestershire sauce
My secret weapon for creamy spreads, dips, and sauces.

1.  Heat the vegetable oil in a large skillet over medium-low heat. Add the onion and a pinch of salt; cover and cook, stirring, until golden, about 35 minutes. Add the shallots and scallion whites; cover and cook, stirring, until browned, about 25 more minutes. Stir in the scallion greens, then remove from the heat and let cool.
You can't rush caramelized onions.  Take the time to do it right.

2.  Chop the onion mixture and transfer to a bowl. Add the yogurt, sour cream, mayonnaise, vinegar, Worcestershire sauce and 1 teaspoon salt. Cover and refrigerate at least 2 hours and up to 1 day.
Creamy. Decadent. Delicious.

This. Dip. Is. AMAZING!!!  Spread it on the sandwich.  Use it as a chip dip.  It hasn't come to this quite yet but I have threatened to just get a spoon and eat it as is.  If you like onion dip, give this a try.  Yes, it does take some effort to make.  I promise you though, for a special occasion, or if you're watching your weight (thank you Greek yogurt!!), it is worth that effort.

I'd really encourage you to make the spread the night before and let those flavors get to know each other for a day before serving.

French Dip Sandwich
Recipe adapted from Food Network Magazine

6 cloves garlic
Kosher salt
1 tsp extra-virgin olive oil
1/2 teaspoon celery salt
Pinch of cayenne pepper
Freshly ground black pepper
1 3-to-4-pound beef eye round roast
4 cups low-sodium beef broth, divided 
3/4 cup red wine
2 carrots, roughly chopped
1 small onion, roughly chopped
2 tablespoons unsalted butter
2 tablespoons all-purpose flour
6 6-inch Italian rolls, split and lightly toasted

1.  Using a garlic press, smash the garlic into a bowl and add 1 tsp salt.  OR if you don't have a garlic press, mince the garlic, then sprinkle with 1 teaspoon salt and mash into a paste with the flat side of a large knife. Transfer to a bowl.
I'd be lost without my garlic press.
2.  Add the olive oil, celery salt, cayenne and 1/2 teaspoon black pepper. Cut small slits all over the beef with a knife, then use your fingers to push the garlic paste into the slits. Cover; refrigerate at least 1 hour or overnight.  [Note: highly recommend overnight!  The longer it sits, the more the flavor soaks into the meat]
Kinda hard to show the slits on the meat.
3.  Preheat the oven to 425 degrees F. Bring the beef to room temperature (let it sit out 30-60 minutes). Sprinkle with 2 teaspoons salt and 1/2 teaspoon pepper.  Add 1 cup broth, red wine, the carrot , and onion to the pan. Put roast on top of the carrots and onions (yup, you've made a makeshift, flavorlicious roasting rack).  Roast 10 minutes, then reduce the oven temperature to 350 degrees F and roast until a thermometer inserted into the center of the beef registers 115 degrees F, about 45 more minutes. Transfer to a cutting board; let rest 20 minutes. Strain the pan juices; reserve.
It's ok to drool.  I did.  A lot.
4.  While the meat rests, make the jus. Melt the butter in a medium saucepan over medium heat. Add the flour and cook, stirring, 1 minute. Whisk in the reserved pan juices and the remaining 3 cups broth and bring to a boil, whisking.  Brush the rolls with some of the onion spread. Thinly slice the beef against the grain. Dunk the slices in the jus, then layer on the rolls. Serve the remaining jus in small bowls for dipping.
Don't let the neatness here fool you.  It's messy to eat and worth every napkin!

To make life easier on myself, I did split this up and make the spread and garlic paste the night before.  Much as I love to cook, pregnant women tire quickly and I wasn't sure I'd be up to the whole shebang in one go.  As a result, we were salivating at the smells in the kitchen for pretty much two days before sitting down to this sumptuous feast.  First words out of my husband's mouth?  "You need to make this a lot."

And I think I will do just that. :)


Pin It

Tuesday, March 22, 2011

Pepperoni Pizza with Beer Pizza Dough

Pizza and beer.  Beer and pizza.  This is one of life's perfect pairings right?  Well why not truly bring these two together closer than ever before?
The foundation for an AWESOME pizza crust
If I have the time and energy, I like to make my own pizza.  I started playing around with making pizza when I was probably 10ish?  I can't remember my exact age but I know we were living in MD at the time so that does narrow the time frame a bit.  At first it was just messing around with toppings, finding that perfect cheese-meat-vegetable ratio.  I would always use a premade crust though.  Making pizza dough was just waaaay too hard, right?  Then a couple years ago I realized that making my own dough wasn't really as hard as I'd made it out to be.  Up until that moment, any kind of bread recipe that involved using thermometers and/or kneading was just way too much for me.
Mmmm...beer and butter

But I found a basic pizza dough recipe in a magazine; it was only four ingredients long and didn't look too bad.  So I started making it, and I enjoyed doing it, but I was still required to somewhat babysit the dough.  Gotta bloom the yeast, mix up the dough, knead the dough, let it sit and rise....  Meh, not terrible but my life is getting busier as my son gets older.  And then the epiphany came.... I discovered that my breadmaker, the one I've had for almost 8 years now, has a dough setting.  (!!!!!!!)  To the internet!!
Your house will smell amazing while this rises
I found this pizza dough recipe on one of my favorite go-to sites for recipes, made it, and haven't moved on to trying any other recipes.  I'm having too much fun with it!  I love how it not only uses beer as the main liquid (loooooooooooooooove cooking with beer), but it also encourages you to add herbs and seasonings to truly customize the dough to your tastes.

Beer Pizza Dough for Breadmaker
Recipe adapted from AllRecipes.com

[Note: you will want all of these to be room temperature.  Forget to pull stuff out?  Use the delay option on your breadmaker for at least 1 hour before it will start mixing and kneading the dough]
1 cup of semi-flat beer
2 tbsp butter
2 1/2 cups all-purpose flour
2 tbsp sugar
1 tsp salt
2 tsp garlic powder
1 tsp dried basil
1 tsp dried oregano
2 1/4 tsp yeast (or 1 of those handy packets)

UPDATE: Lately I've been using EVOO instead of butter, and swapping a 1/2 cup whole wheat flour for the same in white flour.  Love it!  I also love the flavor combination of 2 tsp garlic powder and 1 tsp dried rosemary.  

1.  Coat dough container with non-stick spray.  Put all ingredients in breadmaker according to manufacturer's specifications.  Select dough setting and hit Start.  On my machine the dough setting is about 90 minutes long.
Prepare to be mixed!
2.  Remove dough from bread machine, with lightly floured hands, when cycle is complete. Roll or press dough to cover a prepared pizza pan, or roll out on lightly floured parchment paper.  Use the flour; yes, the dough is sticky.
If you like thinner crust, this makes a rather large pizza

3.  Preheat oven to 400.  Spread sauce and toppings on dough and bake for about 23-25 minutes.

So that's my favorite dough recipe.  Now on to the pizza!  We're pretty basic at my house; Rob likes pepperoni.  Gavin likes cheese.  (Mama likes all kinds of strange combinations and vegetables so it's just easier when I'm making a family pizza to say I like pepperoni also.)  I usually end up doing pepperoni over most of the crust and leaving a meat-free section  for munchkin.

Now I could say that I just add sauce, meat, and cheese but that's not really my thing.  If I'm going to make a pizza, I'm going to Make A Pizza.  And that Pizza will have Flavor at every level.  

Pepperoni Pizza
Exact concoction from Jeanna's head

1 recipe beer pizza dough (see above)
1 (8oz) can tomato sauce
1 tbsp pesto 
Turkey pepperoni
Mozzarella cheese
Cheddar cheese
Parmesan, grated


1.  My pizza sauce is a wonderful little trick I think every busy cook needs to know about: 1 can of tomato sauce with approximately 1 tbsp of pesto.  Stir together and voila!  You have pizza/marinara/breadstick dipping sauce in about 30 seconds. 
Every summer I make pesto and freeze it in ice cube trays.

2.  Spread a layer of sauce around the pizza dough.  Don't slather on too thick or the crust will be soggy. 

3.  I cannot tolerate a lot of grease, which is why I get turkey pepperoni instead of regular.  Since I get a lower-fat meat, I feel better about loading up the pizza the way I know Rob likes.  So I put a first layer of pepperoni on the sauce, generously sprinkle on some mozzarella, and then add a second layer of pepperoni. 

See the little section for Gavin?
4.  Sprinkle on a little more mozzarella, a little cheddar for color and flavor, and finally some Parmesan to get that lovely crispy brown topping. 


5.  You can bake the pizza at this point, but why stop the flavor here?  I have this awesome herb pizza  topping that I love.  However I've also used just dried oregano too (or use some dried Italian seasoning).  Just a little sprinkle on top for that final bang of flavor.
There's red pepper flakes in this too; love that spicy kick!
6. Bake pizza and let sit for about 5 minutes before slicing.  Enjoy!

Golden, cheesy, meaty deliciousness
Pin It

Monday, March 21, 2011

Grapefruit Honey Yogurt Scones

I didn't know what scones were until I was about 8 or 9.  We had a Japanese exchange student staying with us that summer and one day she decided she wanted to make us some scones and tea.  I still remember my mom saying she could never get scones to turn out right.  They were very delicious and I slathered on the butter and strawberry jam...probably drank a gallon of traditional green tea too (none of that brown icky stuff thank you very much; but that's a rant for another day).
I still don't really know what makes a scone, a scone exactly.  But you know me, I loooooove to bake!  I like to think Keiko would be proud of me for trying these.  I know, they sound a little weird, and therefore intimidating.  But if you like citrus flavors, give these a shot.

Grapefruit Honey Yogurt Scones
Recipe from Joy the Baker

1 1/2 cups all-purpose flour
1 teaspoon baking powder
1/2 teaspoon baking soda
1/4 teaspoon salt
1 Ruby Red grapefruit, zested and segmented 
1/4 cup granulated sugar, divided
2 tablespoons honey
6 tablespoons unsalted butter, cold
1/2 cup plain Greek yogurt*

1.  Place a rack in the center of the oven and preheat to 425 degrees F.  Line a baking sheet with parchment paper and set aside.

2.  In a medium bowl, whisk together flour, baking powder, baking soda and salt.  Set aside.

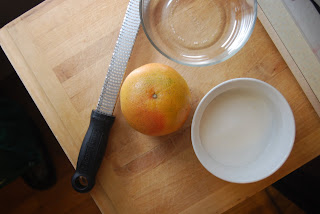
3.  Zest the grapefruit and combine zest and granulated sugar in a bowl or on a clean & dry cutting board.  Rub together the zest and sugar with the back of a spoon.  The sugar will be tinted a pale orange color and smell of grapefruit (YUMMY!!!).  Measure 2 tablespoons of the grapefruit sugar and whisk into the dry ingredients.  Save the remaining grapefruit sugar for topping the scones just before baking.
This smelled like Florida to me.  HEAVEN!!
4.  Segment the grapefruit next.  Slice off the bottom and top of the grapefruit, exposing the wheel of grapefruit flesh inside.  Use a sharp knife to cut away the peel and pith of the grapefruit, exposing the pink grapefruit flesh.  Slice in between the white skin segments to the center of the fruit, at a slight angel, circling the grapefruit.  Little grapefruit segments should fall from the fruit as you slice.  Set segments aside.
Cut the peel off with a knife.  You want the fleshy goodness exposed.
Your fruit should look like this when finished segmenting
5.  Dice cold butter into small chunks and add to the dry ingredients.  Using either your fingers or a dough cutter, and working quickly, break the butter down into the flour mixture until butter chunks are the size of oat flakes or small peas.  The butter and flour combined will resemble coarse meal.  Add the honey, plain yogurt and grapefruit segments.  Toss together with a fork until all of the dry ingredients are moistened by the yogurt and  honey.
You can also blitz the flour mixture & butter through the food processor
6.  Turn the scone dough out onto a lightly floured surface.  Form into an 8 inch circle, about 1 inch thick. [NOTE: My dough was difficult to keep together so this step was pretty messy for me.  Keep working the dough though to form a disk.  The end result is so tasty, it's worth a little messy frustration]  Use a knife or a bench scraper to cut the dough into six scone triangles.  Place on the prepared baking sheet. Lightly brush the tops of the scones with milk or buttermilk, and sprinkle generously with grapefruit sugar.
It pays to be persistent; my dough made it to the baking sheet!
7.  Bake for 15 to 17 minutes, until golden brown on top and firm but soft in the center.  Allow to cool on the pan for 10 minutes before serving.  You can serve these with butter and jam but honestly I love them as they are in all their grapefruit-y glory.  They are best consumed the day you make them but aren't too shabby either a day or two later (if they last that long).
Hello cuteness!!
 *Don't have any Greek yogurt?  You can still make this with the regular plain stuff.  Get a bowl and colander out and line the colander with a coffee filter or paper towel.  Pour in about 2/3-3/4 cup plain yogurt and let sit in the fridge for at least 20 minutes.  The longer you let the yogurt sit, the thicker it will become as the liquid drains out.

These scones really are incredible.  Love. Them. So. Much.  I actually couldn't remember how many grapefruits I needed when I went grocery shopping so I picked up two.  Good thing now because I'm totally making these again!  These would be lovely at a bridal shower brunch or casual spring/summer snack-y get together with some girlfriends.  Or just indulge yourself in one (or two) of these alongside a Sunday morning omelet.  They are flaky, and doughy, and just good.  The sudden bursts of tart sweetness from the grapefruit segments makes my mouth smile. :)

Oh, and if you don't like grapefruit, make this with another citrus fruit you enjoy: oranges, clementines, tangerines...if you go for a more tart fruit like lemon or lime, you'd definitely want to increase the amount of sugar.  Or consider adding in some dried fruits as well. 

Pin It