Thursday, March 28, 2013

Spring Break

Gavin's Spring Break starts today!  So we're taking advantage and running away for a week.  Well, I am with the little guys.  Rob will be taking advantage of my taking advantage by getting some big house projects done that can't be accomplished with little ones underfoot.

I'll be back next week, hopefully refreshed, inspired, and ready for even more fun in the kitchen! :)

Happy Spring!
Pin It

Tuesday, March 26, 2013

Drunken Chicken

Who doesn't love Beer Butt Chicken?

Oh, sorry if that shocked you... some people I think call it Beer Can Chicken.  We've always called it what it is: you shove a mostly full can of beer into the chicken cavity and then put it (upright) on the grill for however long until it's done.  The result is always this super moist, flavorful chicken that is sooooooooooooooo goooooooooooooooooooooood.


And it's been horrible not having a grill big enough to accommodate an upright chicken.  But not anymore!

Drunken Chicken
Recipe adapted from Bobby Deen
Prep time: 10 minutes   Cook time: 1 hour, 40 minutes

1 tsp ground coriander
3/4 tsp mustard powder
1/4 tsp freshly ground black pepper
1/4 tsp ground cumin
1 bay leaf, crushed
1 tsp salt
One 5-pound chicken
2-3 carrots, roughly chopped 
1 onion, quartered
1 orange, zested and halved
One 12-ounce beer

1.  Preheat the oven to 375 degrees F.
2.  In a small bowl, combine the coriander, mustard powder, black pepper, cumin, bay leaf, and salt.  Set aside.
Mmmmm spices


3.  Place the chicken in a roasting pan and pat dry. Arrange the carrots and onions around the chicken. Scatter the orange zest on top of the chicken and place the orange pieces in the cavity.
Don't feel like hauling out your turkey-sized roasting pan for a tiny chicken?
Crumple up tin foil in an 8x10 baking dish instead.


4.  Lift the chicken skin from the chicken without removing it using your fingers. Rub the spice mixture and the salt on top of the chicken and under the skin. Pour the beer into the bottom of the roasting pan, not onto the chicken or any of the vegetables. Cover with foil and carefully transfer to the oven.
Ready to roast!


5.  Roast the chicken for 40 minutes, and then remove the foil and return to the oven and continue cooking until the internal temperature reaches 160 degrees F, 50 to 60 more minutes.
This is just after I took the foil off.


6.  Let rest for at least 10 minutes before cutting into halves or quarters. Remove the orange and skin before serving.
The aromas wafting from this are INCREDIBLE!!!!
So yeah, this is a variation of the classic Beer Butt Chicken; all the same flavors, and the same idea of using the steam from the beer to moisten the meat, but just a different technique.


I have a difficult time repeating recipes.  But this one just might become a regular monthly meal at our house.  This chicken was juicy, flavorful, and just plain DELICIOUS.  It's SUPER easy to make (come on, I put this together while sick).  And,even better, I lost count how many times Gavin declared he loooooooooooved this.  He loved it so much he asked for a second helping that was bigger than his first.  Even Kieran wanted seconds!  And that says a lot for me as Kieran usually plays with his dinner and is showing early signs of picky-ness.  Yup, I will totally be making this one again and again and again!
Pin It

Monday, March 25, 2013

Whole Wheat Sandwich Bread

I want to clarify something... I am NOT trying to turn into one of those "Martha Stewart" types who literally make just about everything from scratch, have a beautifully decorated home, and a perfectly landscaped garden.  For starters, I have children so my home is current on Fisher Price decor if that's a cute trend.  And I have a dog so it's all I can do just to keep him from eating the raspberries and tomatoes.  Because he has.  And it drives me crazy.

But that food part?  Well, I'm slowly getting to that "make everything myself" point not because of any trendy trend, but because I'm CHEAP.  I mean, seriously, have you seen the cost of bread lately?!


I want my family to eat healthy, just like any other Family Cook.  But it nauseates me to spend so much money on something that I have come to realize doesn't cost THAT much to make!  Like bread.

And thanks to recipes like this one, I am NEVER buying bread again. 

Whole Wheat Sandwich Bread
Recipe from Healthy Bread in 5 Minutes a Day
Prep time: 5-10 minutes   Rising time: 3 1/2-4 hours   Cook time: 50 minutes

5 cups whole wheat flour
2 1/2 cups all-purpose flour
1 1/2 tbsp granulated yeast
1 tbsp kosher salt
1/4 cup vital wheat gluten
2 1/2 cups lukewarm water
1/2 cup honey
5 large eggs
2/3 cup canola oil

1.  In a 5 quart, NON airtight, lidded container, whisk together the flours, yeast, salt, and gluten.

Basic dry ingredients in that shoebox container again.

2.  Combine the liquid ingredients in a medium bowl and mix into the dry ingredients, without kneading.
Pour in the wet...

...and stir to combine


3.  Cover (again with the NOT airtight seal), and allow to rest at room temperature for about 2 hours.  You could bake some up right away but it's better if you put it in the fridge and forget about it for 24 hours.
LABEL LABEL LABEL


HURRAY YOU HAVE SANDWICH BREAD DOUGH!!!  Now what?

BAKING DAY
1.  Lightly grease an 8 1/2x4 1/2-inch loaf pan.  Take the dough out of the fridge and dust the surface with flour.  Cut off a 2lb piece (this will be half the dough in the container), dust with more flour and shape into a ball by stretching the surface of the dough around to the bottom on all four sides, rotating as your go.
One loaf is about half the container.


2.  Elongate the ball into an oval and place it in to the loaf pan.  Cover it loosely with plastic wrap and allow to rest for 1 1/2 to 2 hours (40 minutes if you can't wait and using fresh, unrefrigerated dough).
LOOSELY cover.  Just lay the plastic on top and walk away.

Rise, my bread!  RISE!


3.  Thirty minutes before baking time, preheat the oven to 350.  Place the loaf on a rack near the center of the oven and bake for 45-50 minutes, or until golden brown.
Yes, it smells as good as it looks.


4.  Remove the bread from the pan and allow it to cool completely on a rack before slicing and eating.
Good luck waiting until this is cool to eat it.


This. Bread. Is. INSANELY GOOD!!  Don't believe me?  Ask my toddler.  Or better yet since his verbal skills aren't the greatest, show him a loaf and watch his reaction.

I do have a few random things I want to point out about this bread before you go racing off to your kitchen to make your own:
  • Storage.  The recipe says to just keep this on a plate, uncovered, cut side down.  It's a wet dough so technically it doesn't need to be covered to keep for a while.  I tried this and about the last inch or so got pretty stale.  And while I have ways of using up stale bread, I'd rather eat up as much of this in my sandwiches as I can.  For the moment, I'm keeping mine wrapped in foil in the pantry until I can find a better solution.
  • You WILL need to wash this bin when you're done with it because of the eggs.
  • Rising.  I've tried various wheat bread recipes over the years, hoping to find one we could use for sandwiches so I wouldn't have to buy the overpriced stuff anymore.  But while the loaves were good, they'd always come out pretty dense.  This bread is gloriously fluffy, thanks to the eggs, yeast (of course), and vital wheat gluten.  I'm new to that stuff and I absolutely LOVE the results of it!
Pin It

Thursday, March 21, 2013

This Week's Menu

Another week's worth of meals, ready for your perusal, and hopefully will lend a little inspiration. :)
  • Saturday: New Recipe! Drunken Chicken, baked potato, and tossed salad
  • Sunday: New Recipe! Vegetarian Potato Soup, and fresh bread
  • Monday: Meatball sandwiches, and steamed veggies
  • Tuesday: Leftovers
Happy planning!!
Pin It

Wednesday, March 20, 2013

Apple Butter

So let's say you're at the grocery store and you see that 3lb bags of organic apples are on stupid-sale and you can't resist getting a couple bags.


What on EARTH do you do with 6lbs of apples?!

Make apple butter.

Apple Butter
Recipe adapted from AllRecipes.com
Prep time: 5 minutes (this does NOT include apple prep time)   Cook time: 12 hours

5 1/2 lbs apples, peeled and diced [NOTE: do this ahead of time and soak in salt water to prevent browning]
2 to 2 1/2 cups honey [NOTE: exact measurement will vary depending on how tart your apples are]
2 tsp cinnamon
1/4 tsp cloves
1/4 tsp salt

1.  Place the apples in a slow cooker. In a medium bowl, mix the honey, cinnamon, cloves and salt. Pour the mixture over the apples in the slow cooker and mix well.
Can you tell I chopped these the night before?  Hurray for a quick salt bath!!

 
2.  Cover and cook on HIGH for 1 hour.
I could just snack on this.

 
3.  Reduce heat to LOW and cook 9 to 11 hours, stirring occasionally, until the mixture is thickened and dark brown.
Yes, my house smelled AMAZING.

 
4.  Stir the mixture; if the apples haven't broken down enough, blend the butter using a food processor or immersion blender until smooth.  Feel free to freeze or can the apple butter to preserve it longer.
Too tired to blend it right away?  No problem!  Just store it until you're ready.


Just an FYI, this is awesome on pancakes or some simple leftover bread.  Or you could just pretend it's applesauce and eat it with a spoon.  We don't judge here.
Pin It

Monday, March 18, 2013

Basic Artisan Bread

I have been torturing my friends on Facebook for the last week talking about this bread.  Yes, it really is THAT easy.  Yes, it really is THAT good.


Still not sure?  Find out for yourself!

Basic Artisan Bread
Recipe from Artisan Bread in 5 Minutes a Day
Prep Time: 5-10 minutes   Rising Time: 2 hours, 40 minutes   Cook Time: 30 minutes

3 cups lukewarm water
1 1/2 tbsp granulated yeast (1 1/2 packets)
1 1/2 tbsp kosher salt
6 1/2 cups all-purpose flour

1.  Pour the warm water in a large bowl OR 5-quart container with a lid.  The water should be a little bit warmer than body temperature, but not so warm that you get that tingly "wow that's hot!" feeling in your fingers.  You can get this temp right from your tap water.
I have my flour on stand-by


2.  Add the yeast and salt to the water; don't worry about it dissolving.
Yes, my container is "dirty" from the last batch.
I'm taking the lazy route to SOURDOUGH!!


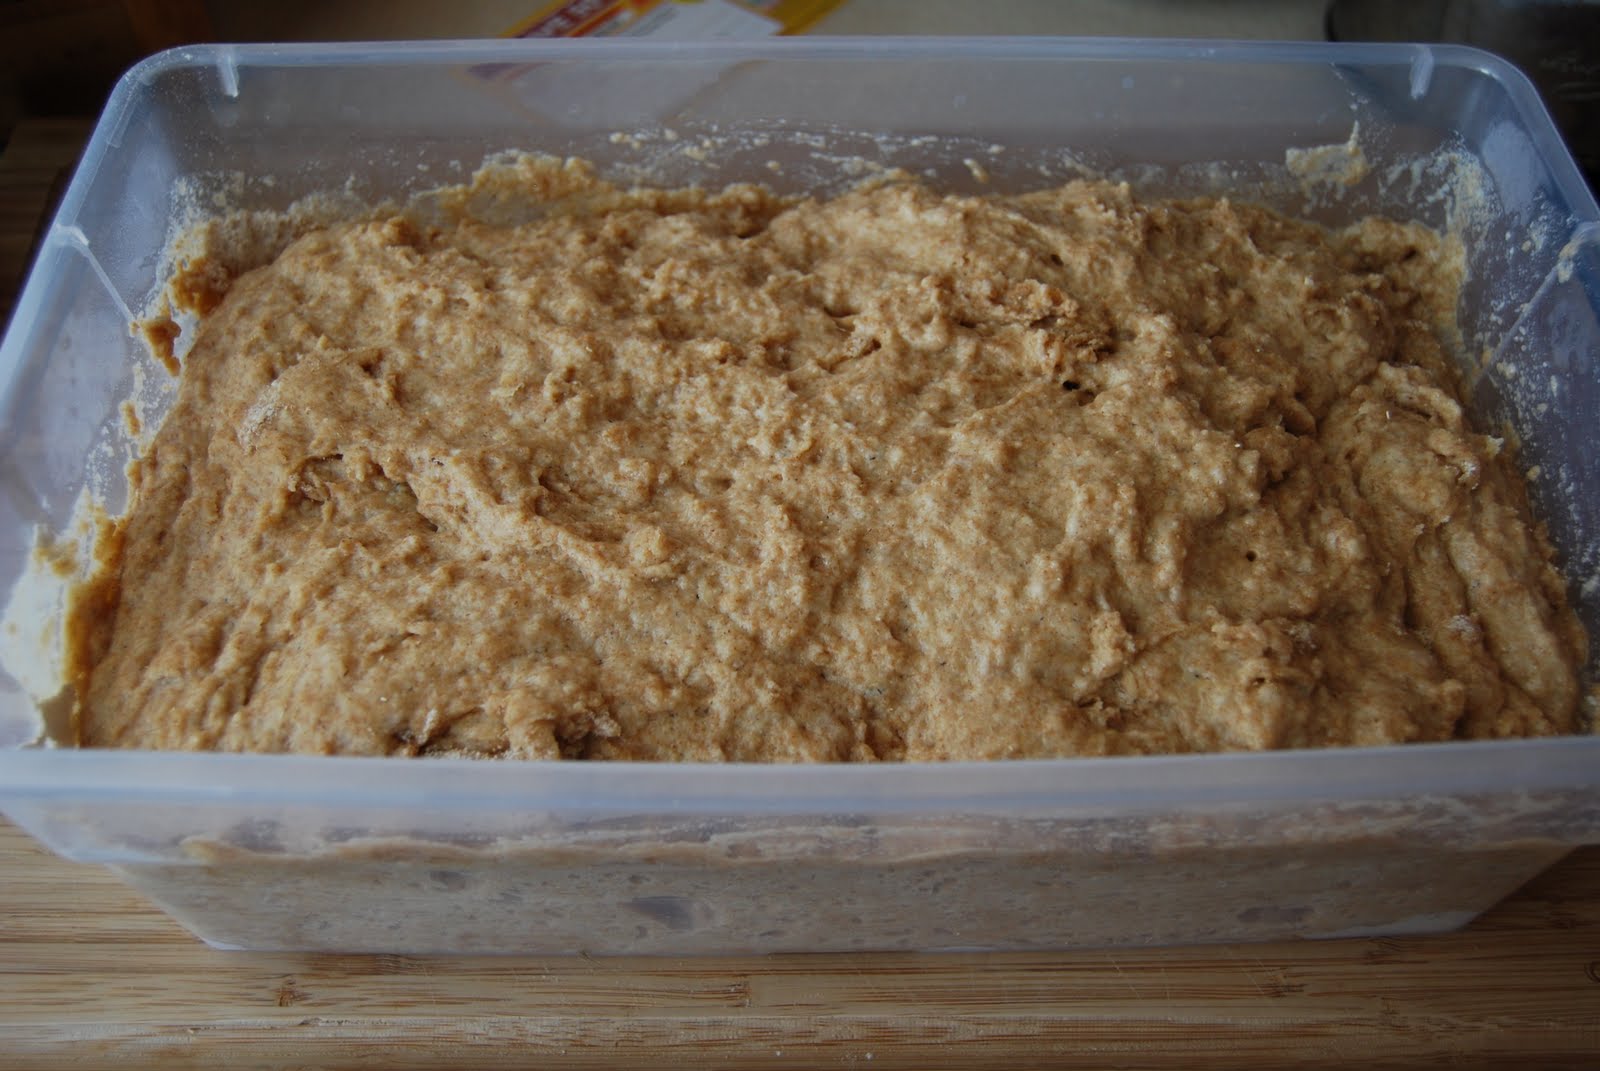
3.  Mix in the flour but kneading is unnecessary.  Just stir it up with a spoon.  If your container has weird crevices or corners, you may need to get in there with your hands. But again, do NOT knead the dough.
Just a mass of sticky dough.


4.  Cover the container with the lid (this should NOT be an airtight container!!) and let the dough rise for 2 hours.
I cannot stress the importance of LABELING enough here.

Nice and puffy.  Now into the fridge with this beauty!


That's it!  You've just mixed up four pounds of bread dough in a few simple minutes.  Great job!!!  Take a moment to bask in how awesome you are.

Now what? 

You could move right into the baking part of this recipe, however it's best to let this dough sit 24-hours before baking.  So I would recommend putting your container in the fridge until the next day.

BAKING DAY
1. Take a pizza peel and sprinkle a little cornmeal in the middle of it (about a tablespoon).  If you don't have a pizza peel and aren't interested in buying one you could also use a rim-less or inverted cookie sheet.
Cornmeal will help the dough to slide off MUCH better than flour.


2.  Sprinkle the surface of the refrigerated dough with flour.  Pull up and cut off a 1-pound (grapefruit sized) piece of dough using a serrated knife. Hold the mass in your hands and add a little more flour as needed so it won't stick to your hands.
I just dusted the section I was pulling out but you can flour over the whole thing.


3.  Gently stretch the surface of the dough around to the bottom on all four sides, rotating the ball a quarter-turn as you go.  Most of the dusting flour will fall off; THAT'S FINE.  This is not an exact science, you just want a smooth, round of dough with a reasonably flat bottom. This step should only take about 30 seconds.
This is also how my pizza dough looks before I flatten it.


4.  Place the dough in the middle of the cornmeal on the pizza peel and let rest/rise, uncovered, for about 40 minutes.  If it doesn't rise all that much THAT'S OK.  More rising will occur as it bakes.

5.  About 20 minutes before baking, put a pizza stone OR inverted cookie sheet on the middle rack of the oven.  Preheat to 450. Place an empty broiler tray for holding water on any other shelf that won't interfere with the rising bread.

6.  Lightly dust the surface of the bread dough with about a teaspoon of flour.  Make a few 1/4" deep slashes in the dough using a serrated knife in whatever pattern you choose (cross, scallop, tic-tac-toe, etc).
Why yes, I used a steak knife.  And your point is...?

The little flour dusting helps the knife cut through without sticking.


7.  With a quick forward jerking motion of the wrist, slide the loaf off the pizza peel and onto the preheated stone. Quickly but carefully pour 1 cup of HOT water from the tap into the broiler tray and close the oven to trap the steam.  Bake for 30 minutes.
Into the hot oven with you!

Steamy

I won't tell, or judge, if you lick your screen.


YOU HAVE FRESH, ARTISAN BREAD!!!!  Isn't that exciting?!?!?!  Wasn't that SO STINKING EASY??  My family has always been really into carbs so this is quickly becoming an exciting, regular addition to our dinner table.  Kieran even gets so excited he does his version of tap dancing when he sees me pull the raw dough out.  It's so cute!

Now, there a couple things I want to point out:
  • Make sure the container you use to keep the dough is NOT an air tight one.  I'd originally intended to use some of my new Tupperware for this but, after some more reading, realized that wasn't going to work.  Rob picked up a 5-pack of regular old shoe storage containers for $5.
  • Get a roll of masking tape and LABEL.  Especially if you think you might have more than one bin of dough sitting in your fridge (I have two currently; I'll tell you more about the second batch later).  I label the end of the bin with what kind of dough it is AND I put the "Use By" date on top.  This dough will last up to 14 days.   
    A little labeling goes a long way.
  •  Don't think you can go through 4 pounds of dough in 14 days?  Then portion it out into 1-lb pieces and FREEZE IT.
  • As long as your dough does not contain any eggs, washing it in between batches isn't necessary.  Over time the bits of dough from previous batches will sour and you will end up with your very own sourdough bread starter!
Pin It

Thursday, March 14, 2013

This Week's Menu

Not a whole lot new this week (at least, that's not readily apparent here). ;)  I've received a number of orders for my craft business in the last couple weeks, which is AWESOME.  So I need tried and true dinners this week that don't require a ton of focus from me.  I'm also playing around with some bread dough recipes that I cannot WAIT to share with you!

So much more to come!!! :)
  • Saturday: Spaghetti, tossed salad, and garlic bread
  • Monday: Leftovers
Happy planning!!
Pin It

Tuesday, March 12, 2013

Fruit Oatmeal Bars

I just love when Gavin's Snack Day rolls around.  It's my chance to play with recipes I otherwise probably wouldn't try!


And then I wouldn't know how awesome and EASY these bars are and that would just be a shame.

Fruit Oatmeal Bars
Recipe from The Pioneer Woman
Prep time: 10 minutes   Cook time: 40 minutes

14 tbsp (1 3/4 sticks) cold butter, cut into pieces
1 1/2 cup flour
1 1/2 cup oats
1 cup brown sugar, firmly packed
1 tsp baking powder
1/4 tsp salt
1 jar (10-12oz) jam or preserves of your choice

1.  Preheat the oven to 350 degrees. Grease a 9x13 baking dish and set aside.
I used old-fashioned oats because I wanted more texture.


2.  Mix together the flour, oats, brown sugar, baking powder, and salt. Cut in the butter with a pastry cutter, two knives, or your fingers until it resembles coarse crumbs.
Hint: don't use fresh-from-the-fridge COLD butter.  Your arm will thank me.

Cool butter will suffice.


3.  Sprinkle half the mixture into the pan and pat lightly to pack it a little tight. Spoon the preserves evenly over the surface, then carefully spread it around. Sprinkle the other half of the oat mixture over the top and pat lightly again.
Use a flat-bottomed vessel to help get an even & flat bottom layer.

Very gently spread the jam around so you don't pull up the crust.

I could just eat this as-is.


4.  Bake until light golden brown on top, about 30 to 40 minutes. Remove from the oven and let cool in pan.  When cool, cut into squares and serve.
Still have a TON of jam from last summer's canning session?  GREAT way to use it up!
You'll probably see a lot more recipes in the next few months that use jam or preserves.  And it's all Gavin's fault.  No really, it is!  I embarked on a giant canning effort last summer because my darling older boy LIVES for PB&J sandwiches.  So I made a number of batches of jam last summer, while congratulating myself that I wouldn't have to buy jam for a year.  And then school started.  And then he began requesting his sandwiches with just peanut butter.  No jam.  No honey.  Just the PB.  Really Gavin?! Really???  *sigh*

At least this recipe used up an entire big jar of my yummy 3 Berry Honey Jam (strawberries, raspberries, and blueberries)!  And these were soooo good that I might just have to make another pan on this later today for us to munch on at home.  Delicious!!!
Pin It

Monday, March 11, 2013

Farmers Market Dinner Challenge

Last week I mentioned that we discovered a local winter, indoors farmer's market and wanted to go on Saturday.  So of course I thought it'd be fun for us to pick out the entire dinner menu from the items at the market.

Interested in what we came up with?  I thought so.


We found:
  • Goat meat, chops and shank
  • Russet potatoes
  • Purple potatoes
  • Asiago sourdough bread
  • Caramel apple preserves
The vendor selling the goat recommended slow cooking it.  So after defrosting it quickly (thank you microwave!), I liberally seasoned the meat and tossed them in.  Oh, I did brown the chops first in a little butter and EVOO, again at the vendor's recommendation.  Since I'd never had goat before, I needed her advice!

I'd never had purple potatoes before so I was SUPER geeked out to try them.  Not sure what I was expecting but they don't taste any different from other potatoes.  I LOOOOOOOOOVED the color they added to the table though!  I quartered the potatoes, added some chunks of carrot, tossed everything in EVOO, S&P, garlic powder and rosemary, and roasted them at 400 for about 45 minutes.  YUM!!

So a fabulous meal of goat, roasted potatoes & carrots, and warm Asiago sourdough bread HAS to be followed up with an equally fantastic dessert right?  Right! So we all fell in love with this caramel apple jam, and I conveniently remembered I had some pie dough sitting in my freezer.  Know what happened with you seal up some jam inside of flaky crust?  Tarts!  So so so soooooooooooo good.
Kieran loved watching me get the tarts assembled.


I'm not sure that we'll do another whole meal at a farmer's market (that could blow my grocery budget!), but we will continue to look for ingredients for various dishes.  Not only was it tasty, but it was fun to do as a family!  Gavin especially seemed to like that, for once, he wasn't the only one trying something new at dinner time.
Pin It

Thursday, March 7, 2013

This Week's Menu

So much going on right now... Kieran & I keep visiting different play groups and activities around town, I'm in the middle of developing our summer activities plan, Gavin's going through yet another frustrating phase, I'm trying to reorganize my house, AND I decided to launch a crafting business in the midst of it all!  I think I need my head examined.

At least I know we'll eat well this week!
  • Saturday: I don't know how I've lived here for so many years and not heard about Milwaukee's Winter Farmers MarketI think it'd be a fun challenge to design dinner around whatever we find at the market; so Farmer's Market Find it is!
  • Sunday: New recipe! Pulled Pork Sandwiches, salad, and some kind of potato
  • Monday: Steak or pork chops (whichever is on sale), and New Recipe! Risotto with Yogurt & Peas
  • Tuesday: I have plans so it's Daddy's Dinner Night.
  • Wednesday: Leftovers
Happy planning!!
Pin It

Wednesday, March 6, 2013

Baked Shrimp with Tomatoes & Feta

This is a favorite dish of my parents.  And now that I've finally made it I can see why!


And if it tastes this good now, in the middle of winter, can you imagine how incredible it would be in the summertime with garden fresh tomatoes and herbs?!  Omg I can't wait!

Baked Shrimp with Tomatoes & Feta
Recipe from Ellie Krieger
Prep time: 10 minutes (longer if you need to shell the shrimp)   Cook time: 20 minutes

1 tbsp olive oil
1 medium onion, diced
2 cloves garlic, minced
2 (14.5-ounce) cans of diced tomatoes, undrained
1/2-3/4 tsp dried herb of choice (I used basil this time)
1 1/4 pounds medium shrimp, peeled and deveined
Salt & freshly ground black pepper
2/3 cup crumbled feta cheese (about 3 ounces)

1.  Preheat the oven to 425 degrees F.
Pantry staples in my house so this one's easy!

I buy frozen shrimp and thaw in cold water; it only takes a few minutes.


2.  Heat the oil in an oven proof skillet over a medium-high heat. Add the onion and cook, stirring, until softened, about 3 minutes, then add the garlic and cook for 1 minute. Add the tomatoes and bring to a boil. Reduce the heat to medium-low and let simmer for about 5 minutes, until the tomato juices thicken.
Let those juices concentrate and thicken up.


3.  Remove from the heat. Stir in the herbs and shrimp and season with salt and pepper. Sprinkle the feta over the top. Bake until the shrimp are cooked through and cheese melts, about 12 minutes.
Just before baking...

...just after baking. Melty, cheesy goodness!

So Rob commented, in between mouthfuls, that this would be awesome over some hot pasta.  And he's right... but I REALLY loved this with some warm, crusty bread to help soak up all those delicious juices!
Pin It