Showing posts with label salsa. Show all posts

Monday, July 9, 2012

Chicken Taco Pizza

I've been tormenting my friends by talking about this pizza A LOT since my mom made it for me a couple weeks ago.


No more teasing... here's the recipe. Enjoy!!

Chicken Taco Pizza
Recipe adapted from Aaron McCargo, Jr.
Prep time: 15 minutes   Cook time: 15 minutes

For the Taco Seasoning:
1 tbsp onion powder
1 tbsp garlic powder
1/2 tbsp chili powder
1/2 tsp dried oregano
1/2 tsp cayenne pepper
1/2 tsp ground cumin
1/2 tbsp Kosher salt
1/2 tbsp freshly ground black pepper

For the Pizza:
1/4 cup canola oil, plus more for brushing
2 skinless, boneless chicken breasts
1/2 of pizza dough recipe  [NOTE: I used water instead of beer this time; 1 tsp garlic powder and 3/4 tsp oregano for the seasoning.  I wanted to keep the crust flavor really mild for this pizza.  I wrapped the other half of the dough and stuck in the freezer for another day.]
All-purpose flour, for dusting
1/4 cup shredded mozzarella
1/4 cup shredded sharp cheddar
Guacamole (see recipe below)
Salsa
Sour cream
Fresh cilantro, optional 

For the guacamole:
1 avocado
Juice of 1 lime
1/2 tsp ground cumin
1/2 tsp chili powder
1 tbsp diced red onion [NOTE: I used white onion this time because I forgot to buy a red one]
Kosher salt and freshly ground black pepper 


1.  Preheat a pizza stone or upside cookie sheet in the oven at 425. 

2.  Make the taco seasoning: combine all ingredients in a small bowl.
Makes a TON!  Store the leftovers in an airtight container.


3.  Prepare the pizza: season both sides of the chicken breasts with some of the taco seasoning (I used about 2 tsp total).  If you have the time, set the seasoned chicken aside about 30 minutes to marinade.  If you don't have the time, I promise it still tastes good.
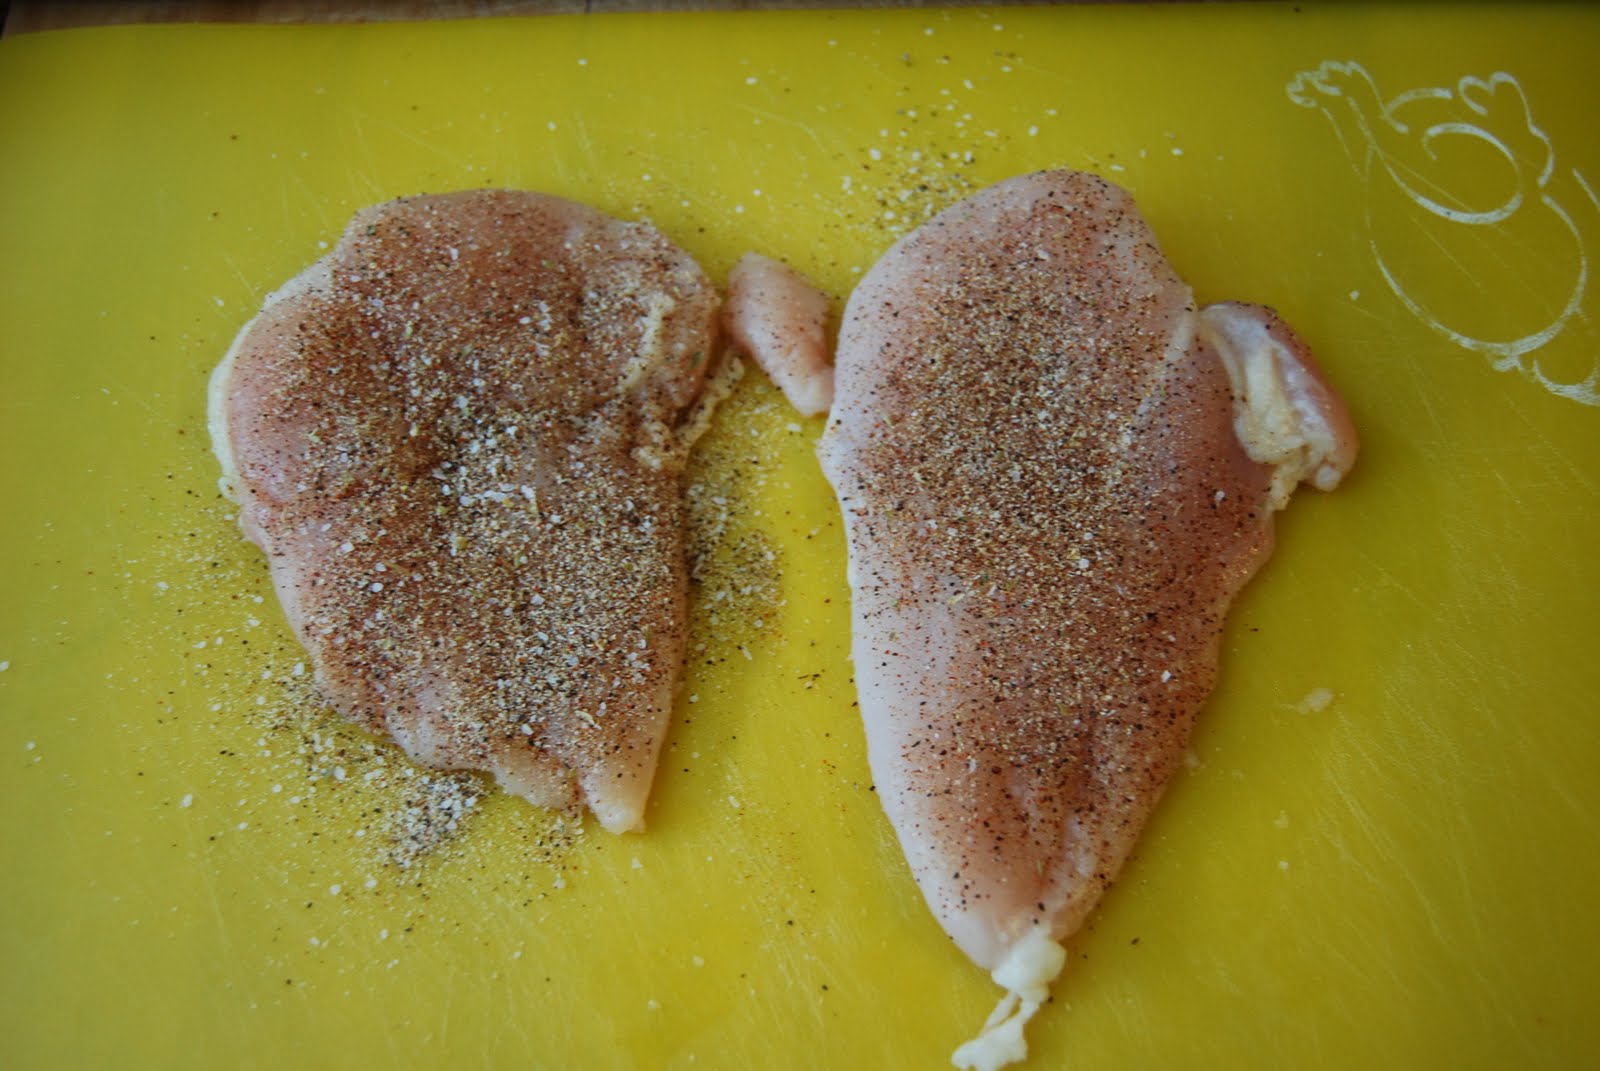
Be generous with the seasonings.


4.  Preheat a grill pan or skillet over medium high heat.  Cook the chicken until cooked through, about 4 minutes per side.  Let cool, then cut into bite-size pieces.
Always, always, ALWAYS let meat rest a bit before cutting.


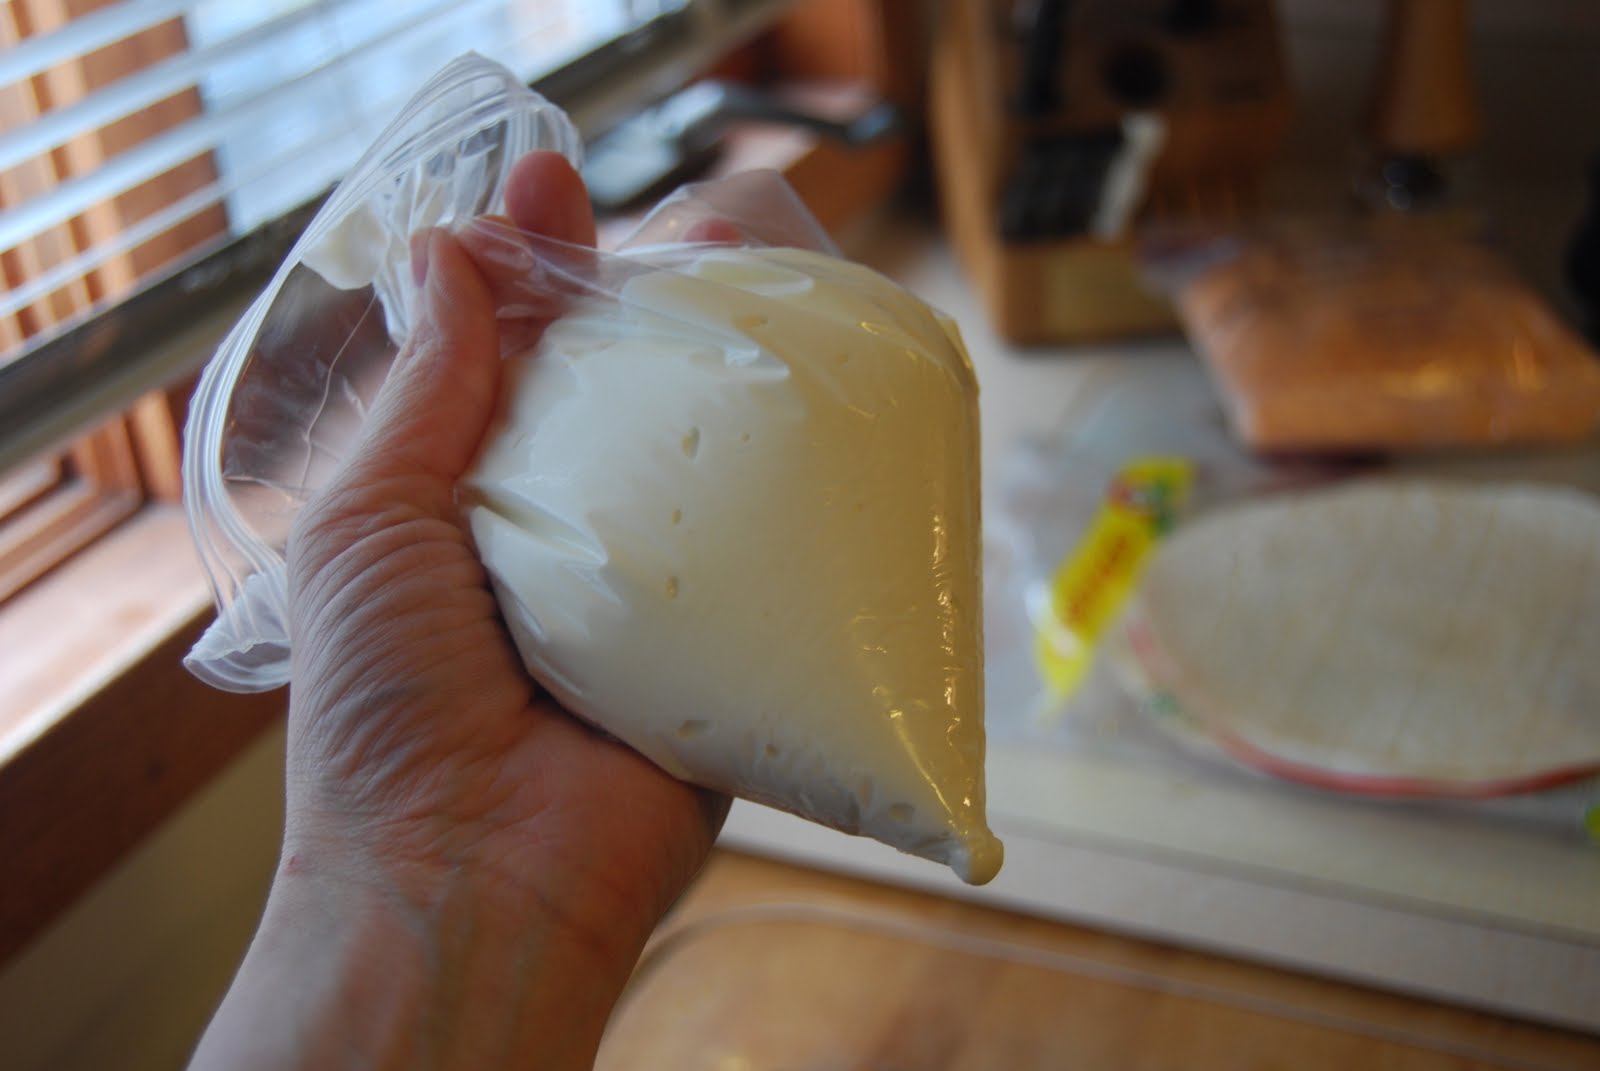
5.  Roll out the dough on a floured surface. Brush with canola oil and sprinkle with taco seasoning. Mix the cheeses in a bowl, then sprinkle on the crusts and top with the chicken. Bake the pizza on the hot pizza stone until the crust is golden brown, about 12-15 minutes.


I used about 1 1/2 of the chopped chicken breasts.


6.  While the pizza bakes, mix the avocado, lime juice, cumin, chili powder, red onion, and salt and pepper to taste. Top the pizzas with the guacamole, salsa, sour cream and cilantro, if using.
Love love LOOOOOOVE the chili powder in this guac!!


If you want a smokier flavor, by all means follow the original recipe and grill this beauty!  But if your Grill Master is unavailable, I don't think that should stop you from enjoying the amazingness of this pizza.

Not gonna lie... when I made this on Friday I ate half the pizza.  I'm not ashamed.  It's just TOO GOOD.
Pin It

Wednesday, October 26, 2011

Meatloaf Muffins with Barbecue Sauce

I had a lot of comforting ideals when it came to food when Rob and I first got married.  Some became family favorites.  Others were shot down.  One that I fully expected to make periodically was the always classic meatloaf.

And then I was informed that my other half does not like meatloaf.

I don't really recall all the details of my reaction, but I know I was willing to accept the loss of tuna casserole.  And though it pained me, I'd manage without my beloved linguine with clam sauce.  But you know what?  A girl's gotta draw the line somewhere, and I decided that line was meatloaf.  Because when you think about it, my husband is a diehard Carnivore.  There is no reason why he should not like meatloaf!

My investigation began to find some means of getting that comforting flavor that I loved from my childhood but using ingredients that Rob couldn't say no to.

Ladies and gentleman, we have a winner!

Meatloaf Muffins with Barbecue Sauce
Recipe adapted from Rachael Ray

1 lb lean ground beef
1 medium onion, cut into chunks
3 small-medium carrots, cut into chunks
1 large egg plus a splash of milk, beaten
1 cup plain breadcrumbs
2 tbsp grill seasoning
1 cup smoky barbecue sauce
1/2 cup salsa
1 tbsp Worcestershire sauce
Extra-virgin olive oil

1.  Preheat oven to 450. 

2.  Put ground beef in a large bowl. In a food processor, add onion and carrots. Pulse until finely chopped and add them to meat bowl. Add egg (beaten with a splash of milk), breadcrumbs and grill seasoning. 
There really is meat under all that goodness!


3.  Next, in a small bowl mix together barbecue sauce, salsa and Worcestershire sauce. Pour half the sauce mixture into the meat bowl. 
Not your typical ketchup topping


4.  Mix meatloaf together with your hands.  Even out the meat in the bowl and score it, with your hand, into four sections.  Lightly roll each section into three balls.
I think these are rather cute


5.  Brush a 12-cup muffin tin with oil. Place a ball into each cup and pat down a little.  Top each meatloaf muffin with remaining sauce.  Bake about 20-25 minutes. 
Salsa and bbq sauce give this a deeper, almost meatier flavor


Not only does Rob really go for this, but I've grown to love it more than the ketchup-topped version I grew up with.  Bonus reason why I like this recipe?  Because it's divvied up into smaller portions, it bakes significantly faster then a standard loaf.  I love to serve this with cream cheese mashed potatoes and either green beans or a tossed salad.

Pin It

Tuesday, July 12, 2011

Hearty Burritos

I wasn't sure I was going to tell you guys about this one.  I made these a while back and they turned out fine, but not really spectacular.  One the major factors that caught my eye about this recipe though was that I could make, assemble, and FREEZE these burritos to bake up later on.  So since I'd made up a bunch of the filling, I went ahead and froze a few.

Wow, I think these taste better for having sat in my freezer for a couple months!  And sooooo handy too.  Let me tell you that when you're starving, the baby's screaming and refusing to be put down, it's super nice to be able to grab one of these to toss into the oven for a while.

Hearty Burritos
Recipe adapted from my mother-in-law's recipe collection

1 lb ground beef
1 medium onion, chopped
1 pkg (16oz) frozen cubed hash brown potatoes, thawed
1 can (15oz) black beans, rinsed and drained
1 can (14.5oz) Mexican diced tomatoes, undrained
1 cup frozen corn, thawed
1/2 cup salsa
1/2 cup cooked rice [Great use of leftover rice!!]
2 tsp chili powder
1/2 tsp salt
2 cups shredded Cheddar
8 flour tortillas, BIG ones

1.  In large skillet, cook beef, green pepper, and onion over medium heat until meat is no longer pink; drain. Add potatoes, beans, tomatoes, corn, salsa, rice, chili powder and salt. Stir to combine. 
Suggestion: stir in some chopped fresh cilantro just before wrapping

2.  Sprinkle 1/4 cup cheese off-center on each tortilla; top with about 1 cup beef mixture. Fold sides and ends over filling. 
Prepare to be wrapped!

3.  Wrap burritos individually in foil and freeze up to 3 months.* Or place burritos seam side down on a baking dish. 
I had 4 to bake, plus 4 to freeze.  Not bad!

4.  Bake at 350 for 25 minutes or until heated through. Serve with preferred condiments. 
Gooey, yummy deliciousness


*Now you really should thaw these overnight in the fridge and then bake as directed.  I'm terrible at the whole "thawing" thing though so if you're like me and grab one of these still frozen solid, let it sit out a while to take the frozen edge off.  Plan on baking it at least 40 minutes to fully heat through.  When you can smell it, it's probably ready to go.
Pin It

Friday, May 20, 2011

Get Ahead: Machaca Beef

I'm all about getting ahead these days.  I am due to have this baby on Monday so the more I can pack into my freezer, the better.  God bless my mom and mother-in-law for helping me with this!!!  I've also been trying to contribute to this effort by Cooking Big.  By that I mean in the last few weeks I'm trying to make a recipe or two that make enough to feed probably eight people.  Then I'm guaranteed a few leftovers for lunches plus a healthy freezer offering for a later dinner.

This is a great recipe that makes a ton and is easily frozen for a later date.  Or you can always give in to the glorious smells emitting from your slow cooker and eat all of this in one sitting.  We don't judge here.

Machaca Beef

Recipe from Fix It & Forget It cookbook

1 1/2 lb beef roast
1 large onion, sliced
2 beef boullion cubes
1 (4oz) can diced green chiles
1 1/2 tsp dry mustard
1 tsp season salt
1/2 tsp garlic powder
1/2 tsp freshly ground black pepper
1 cup salsa

1. In a slow cooker, combine the onion, boullion cubes, and chiles.  Lay the roast on top of this and sprinkle with seasonings.  Add just enough water to cover the roast.

 2.  Cover and cook on LOW for 10-12 hours.


3.  Transfer the roast from the cooking liquid to a large bowl and shred.  Stir in salsa.  Add some of the cooking liquid (and the onions too!) if it is still a little dry.  You want this to be a deliciously juicy shredded meat concoction.

4.  Use shredded beef for:
  • Nacho topping
  • Tacos
  • Burritos
  • Quesadillas
  • Enchiladas
  • Chili
  • All around feel-good happiness food
Pin It

Wednesday, May 4, 2011

Black Bean & Corn Quesadillas

I can trust y'all, right?  I mean, we are talking about food here... peoples' likes and dislikes and that can get pretty intense sometimes.  See, I need to confess something....I am always on the hunt for vegetarian recipes that I think my family will like.  There, I said it.  I'm in a house of carnivores, and God knows I like to eat meat too, but I also sometimes just need to change things up a little with a vegetarian option.
Baby's really into avocado, hence my heavier hand with the guac


And can I just say that it is HARD to quietly get a vegetarian dish to my table??  Knowing how much I love cooking, Rob will usually ask about what meals I'm planning because he's awesome and wants to be supportive of my obses- *ahem*, I mean hobby.  If it comes to light ahead of time that I'm working on a dish with no meat in it, I get The Look.

But this time, I won. :)  And even though I agree this would also be good with chicken in it (occasionally), we BOTH liked it despite it's lack of meat!

Black Bean & Corn Quesadillas
Recipe adapted from AllRecipes

2 tsp olive oil
3 tbsp chopped green onion
1 (15.5 ounce) can black beans, drained and rinsed
1 1/4 cups frozen corn, thawed
1 tbsp brown sugar
1/4 cup salsa
1/4 tsp red pepper flakes
8 (8 inch) whole wheat tortillas
1 1/2 cups shredded cheese of your choice

1.  Heat oil in a large saucepan over medium heat. Stir in onion, and cook about a minute, just to soften it up a little.  Stir in beans and corn (if you're in a rush and using corn that's still frozen, add the corn first and let that heat up a minute or two before adding the beans).
Look at that COLOR!!


2.  Add sugar, salsa, and pepper flakes to the skillet; mix well. Cook until heated through, about 3 minutes. 

3.  Sprinkle the shredded cheese on half of a tortilla.  Top with a little of the bean-corn mixture and sprinkle with some more cheese [Note: a little goes a long way].  Cook on a hot griddle or dry skillet until golden, then flip and cook on the other side.  Repeat with remaining tortillas and filling. 


The combination of the brown sugar along with the salsa and red pepper flakes really gives this an amazing flavor.  It's so not spicy at all (but then I used medium salsa and was careful with the red pepper), rather I get this lovely warming sensation in my mouth, but it's tempered by the sweetness of the sugar.  I almost think it has a barbecue flavor but that's not entirely true.....Give it a try and let me know what you think!

As for cheese, I used two different kinds of cheeses: cheddar and pepperjack.  Cheddar is my standard go-to for all quesadillas.  And since I had some leftover pepperjack cheese from those club sandwiches (and Rob and I love the kick of pepperjack), I tore those slices up too.  Wouldn't you know but I happened to love both!  I got a better sense of the filling from the cheddar quesadillas, while the pepperjack ones satisfied my desire for spice (and, again, I can't get over how great that sweetness is in this!).


So, if you're a vegetarian or into vegetarian dishes, try this out and let me know what you think of the flavor.  If you're a Tried-and-True-sure-this-looks-great-but-I-can't-do-it Carnivore, my feelings aren't hurt. ;)  Try this with some shredded chicken or, better yet, pork. 


p.s. Just want to let you know that the leftover filling, topped with some cheese and guacamole, make awesome nachos the next day!


Pin It

Monday, April 11, 2011

Layered Enchilada Bake

Ok, so most of the time when I post about a recipe, it's something that I'd made several days, or even a week prior but usually have leftovers lingering in the fridge.  This is not one of them.  Oh don't get me wrong, I made this less than a week ago, and I even made the full recipe instead of halving it as I normally do.  There is not one container of this left in my fridge.

Yes, it's that good.
Look at those layers.  What's not to love??

My mother-in-law introduced me to this recipe, and I have to say that I was initially skeptical.  Not because it was enchiladas or anything.  Are you kidding me?  I love Mexican food!!  But I noticed right away that there's Italian dressing in it.  Wha--?  Yeah, you read that right, Zesty Italian salad dressing.  In an enchilada recipe.  I'm not kidding.

Ok so this is the point where you just need to trust me on this one.  I am a huge fan of everyone tweaking and altering recipes to suit their own tastes.  However I will say that you neeeeeeeeeeeeeeed to keep the salad dressing in this one.  Believe me, you'll notice the lack of spark in this dish if you do.

Layered Enchilada Bake
Recipe from Jan Swafford, who got it from Kraft Foods

1 lb lean ground beef
1 large onion, chopped
2 cups salsa
1 can  (15 oz.) black beans, rinsed
1/4 cup Zesty Italian dressing
2 tbsp taco seasoning mix
6 flour tortillas (8 inch)
1 cup sour cream*
1 pkg. (8 oz.) shredded cheddar OR a Mexican blend

*Did you know that plain yogurt has a very similar tang to that of sour cream?  Also, plain Greek yogurt has that same tangy-ness as well as the consistency of sour cream. Mm hm.  All I'm saying is that if you wanted to make this a tad healthier, or if you didn't quite have enough sour cream and needed to supplement it with something else, that you have options.  And this is merely a suggestion; I am not admitting to anything as to how I may have previously prepared this dish so Rob you can quit looking at me like that. ;)

1.  Preheat oven to 400.

2.  Brown meat with onion in a large skillet over medium-high heat; drain.
Start with the basics: ground beef, onion.
 3.  Stir in salsa, black beans, dressing, and taco seasoning.
Save your packets! Instead buy the mix in bulk for recipes like this
4.  Using a 9x13 pan, arrange 3 tortillas so that most of the bottom of the pan is covered.  The cover tortillas with layers of half each meat mixture, sour cream, and cheese.  Repeat layers; cover with tin foil.
My secret to even sour cream distribution

5.  Bake, covered, for 30 minutes.  Then uncover and bake for an additional 10 minutes (total 40 minutes baking time).  Let stand 5 minutes before serving.
Melty, cheesy goodness
I like this recipe, not only for it's zippy taste, but also for the freezing options!  Oh you knew this topic was coming up right?  You actually a couple of freezing choices if you wanted to make this ahead of time:

OPTION 1:  My mother-in-law will put together the meat mixture and freeze that in small containers.  Then when she plans on having this for dinner she thaws the amount of meat she needs, assembles the casserole, and life is good.  This is a great way to prevent potentially soggy tortillas.

OPTION 2: Assembly is usually my time-consuming issue though so I will follow the recipe up through step 4.  Then wrap it extra well and freeze the entire thing.  Then I will just thaw the casserole and bake as directed.  I haven't noticed a soggy tortilla issue but then I haven't been looking for it.

Enjoy!!
Pin It

Wednesday, March 30, 2011

Chicken Azteca

I haven't been doing this whole blog thing very long but I already like you guys.  Does that make me weird?  Well, if it does I'm ok with that.  But what's not to like about a group of people who find food fascinating?!  And because I like you, I'll go ahead and share a slow cooker recipe that I think EVERY busy cook should have, especially the busy cook who likes to entertain a crowd of people on occasion.

This is one of those recipes in my life that had I known one little piece of information, I never would have made it.  My parents were visiting for the weekend and helping with some things around the house.  I really wanted a dinner recipe that would make a lot, preferably in a slow cooker since we were all busy with various chores and projects.  This one had caught my eye from one of my mom's cookbooks so I wanted to try it.  Little did I know that not only does my dad not care much for Mexican flavors, but he also doesn't like cream cheese very much.

Thank goodness for ignorance!  Not only did my dad eat and LIKE this recipe (wahoo!!) but it's become a huge favorite of mine and Rob's.
Dark beans meets sunny yellow corn.  Contrast is just so much fun!

Chicken Azteca
Recipe adapted from Fix It and Forget It for Entertaining

1 can black beans, drained & rinsed
2 cups frozen corn kernals
1-2 cloves garlic, minced
3/4 tsp cumin
1 (16 oz) jar of salsa, divided
5 boneless, skinless chicken breasts
1 (8oz) brick of cream cheese


1.  In a slow cooker, combine beans, corn, garlic, cumin and half of the salsa.
Doesn't this just scream FESTIVE?


2.  Lay the chicken breasts on top of the bean/corn mixture.  Pour on remaining salsa.
I love combining chicken and salsa together

3.  Cover and cook on HIGH for 2-3 hours or on LOW for 4-6 hours.

4.  Remove the cooked chicken and shred.  Add shredded chicken back to the slow cooker and stir to combine with the bean/corn/salsa mixture.

5.  Cube the cream cheese and add to slow cooker; stir.  Cover and let sit at WARM or LOW setting just until the cream cheese has melted (about 30 minutes).  Stir to make sure everything is well combined.

I like to eat this comforting concoction on top of hot rice and smothered with cheddar cheese.  Rob likes to use it as a burrito filling.  We both enjoy it as a fun twist on nachos also.  The best part is normally we would fight over the leftovers, however it makes soooooooooooooo much that there is plenty to go around.
*Drooooooooooooooooooooooooooooooooooooooooool*
Oh, and bonus preparation option?  Rob's taken this recipe camping too.  It comes together quite well in a Dutch oven and takes about 30 minutes to an hour to cook, depending on how hot the campfire is.  So for you crazy campers out there (God knows I am SO not one of you; sorry), give this a shot.
Pin It

Monday, March 7, 2011

Mexican Chicken

It was sophomore year in college that I made the big decision: I was going to move out of the dorms and into an apartment with some girlfriends.  Eeeek!!  How exciting!  How awesome!  How freaking scary!  Living in the dorms kind of makes it seem like you're living on your own but really, you totally still have someone taking care of you.  Someone else makes sure the doors are locked.  Someone else cleans the bathrooms.  Someone else does the cooking, I just have to make up my mind of what I want to eat.

So moving out officially on my own meant I'd really be in charge of things.  If I want to feel secure, there's the deadbolt.  If I wanted a clean bathroom, there's the Lysol wipes.  If I want to eat something, there's the kitchen.  Yikes!  In preparation for this major moving event, my mom (bless her!) gave me what I think of as my first real adult cookbook: The 4-Ingredient Cookbook.  Sound intriguing?  Oh yeah, it is a great cookbook to have for when you're A) on a tiiiiiiiight budget and B) just learning about how this whole real cooking-for-myself thing works.
This book also got me through those first couple years of marriage.  You know, those days of living on one person's income while the other finishes school.  You're living in an apartment, thinking about how you can make Ramen into a fancy "I'm not in college anymore" dish.  Yeah, those days.

One of our favorites from this book, then and now, is Mexican Chicken.

Mexican Chicken
Recipe adapted from The 4-Ingredient Cookbook
Salsa is a fantastic shortcut ingredient


1 tbsp extra-virgin olive oil
1-2 cloves garlic, minced
4 boneless, skinless chicken breasts
1 (16oz) jar chunky salsa [highly recommend Pace Medium]

1.  Make sure your chicken is THAWED OUT.  I am constantly forgetting to do this myself and I don't recommend wasting precious post-work minutes waiting for your microwave to take care of this for you.

2.  Heat oil in a large skillet over medium heat.  Add garlic and saute about a minute.

3. Add chicken and brown on both sides.  Pour salsa over chicken and bring to a boil.

4.  Reduce heat and simmer, covered, for 35-40 minutes.

I pretty much always serve this with rice and corn.  Since this dish is so easy, feel free to play up the side dishes.  Make a lime-cilantro rice or add a little compound butter to the hot corn.  Enjoy!
Pin It