Showing posts with label honey. Show all posts

Tuesday, July 29, 2014

Honey-Lime Glazed Salmon

Truly, I cannot blog this recipe fast enough. Because you have to know about this. You have to make this. Why?

Because my Picky Eater likes it.


My Picky Eater, who has always hated salmon, who barely eats any seafood at all unless it's a supremely mild whitefish and even then it's often questionable, likes this dish!!!

I think I'm still in shock over that fact actually.

Honey-Lime Glazed Salmon
Recipe slightly adapted from Paleo in PDX
Prep time: 5 minutes   Cook time: 15-20+ minutes (depending on the thickness of your filets)

1/4 cup butter, melted
1/4 cup honey
Zest and juice of two limes
4 salmon filets
Salt and freshly ground black pepper

1. Preheat oven to 400.

2. In a small bowl, whisk together the butter, honey, lime zest, and lime juice. Set aside.
Glaze takes all of 1 minute and 32 seconds to make.


3. Line a 9x13 baking dish with parchment paper. Place the fish skin side down on the paper and season with salt and pepper.
Fat may be flavor, but don't skip seasoning your salmon either!

Mmmmmmmmmm....glaze.


4. Spoon the glaze over each filet. Bake 15-20 minutes, or until fish is cooked through (internal temp should read 145F).
I had THICK filets so mine baked more than 20 minutes.


Ok so let's say that no one in your house is much of a seafood eater. Or you make this and decide the buttery sweet-tart flavor of this salmon isn't to your liking. That's ok! I want to make one point very clear when it comes to cooking for "selective tastes."

Always keep trying. 

I am constantly trying new ingredients, and new cooking methods. Because our tastebuds are constantly changing. And even if we continue to despise one thing over and over again, you never know when you might stumble across that One Special Recipe that doesn't just make that thing palatable, but makes it spectacular.

That's why I keep pushing my sons. And my husband. And myself. That's why we participate in a CSA. That's why I will grudgingly cook up vegetables I have hated for 30 years in delicious oils and fresh herbs. And sometimes bacon if I'm really convinced I won't like it otherwise. Because I am always on the hunt for that One Special Recipe so that I can finally appreciate the goodness in what I once loathed.

And while I will accept when my Picky Eater gives me two thumbs down, complete with a gagging frowny face and the "NEVER make this again" comment, that doesn't mean I give up on an ingredient. I keep trying. I keep pushing. I keep going.

Because there's a massive world out there of delicious food, and I want all of us to enjoy it!

Oh and p.s. Go ahead and bake extra filets. The leftovers are fabulous flaked onto a salad for lunch!
Pin It

Tuesday, June 10, 2014

Three Berry Honey Jam

If you live in Wisconsin, you know about New Glarus Brewery.

Come to think about it, if you like really good beer and you've spent five minutes in this state then you know about New Glarus Brewery.

New Glarus Brewery is this incredibly fantastic micro-brewery that makes incredibly fantastic beer (Spotted Cow anyone?). They only use locally sourced ingredients, and they only sell their beer in Wisconsin (sorry non-Wisconsinites. Guess you need to come visit!). And while of course they do more classically flavored beers, they also do several fruit beers. They are especially known for their cherry beer.

Well, a couple years ago there was this drought. Remember that drought? Anyway, the cherry crop was practically annihilated, but they had to produce this beloved beer! No seriously, there would be rioting in the streets without their cherry beer. It had to be made, but what could they do without the cherries they needed? Well, they included a few other fruits with the cherries and called in Serendipity: a happy accident. Hot damn it's one of my favorite beers.


So why am I telling you all this? Because it's my way of telling you that this jam is my own Serendipity. My own happy accident.

Three Berry Honey Jam
Recipe adapted from Gastronome Tart
Prep time: Depending on your fruit-prep equipment, allow for an hour  Cook time: 30ish minutes

NOTE: You can use fresh OR frozen (but thawed) berries.

6 cups of washed, hulled, and crushed strawberries (psst! This is done way faster with a food processor)
1 cup washed and crushed blueberries
1 cup washed and crushed raspberries
1 cup honey
1 tsp lemon zest
2 tbsp lemon juice
6 tbsp pectin

1. In a medium-to-large saucepan over medium heat, combine all ingredients.
I made a double-batch this year using up the remaining frozen strawberries from LAST year.
And yes, I regularly buy honey in 5lb bottles. 


2. Bring to a boil, stirring frequently, and boil for 1-2 minutes. Wear comfy shoes because this will take some time. Your patience will be rewarded.
Stirring, stirring, stirring. Patience, patience, patience.


3. Turn off the heat and scrape off any foam. Store in sterilized containers of your choice, whether you intend to freeze it, or can it (I've got a little tutorial on canning in this post).
Foam isn't bad. It's just annoying and not pretty.

It's also bitter. Don't eat the foam.

I like to save my freezer space for Get Ahead meals and the like.
It's more of a time commitment, but canning is the way I prefer to preserve jams.


About two years ago I went to make a third batch of strawberry honey jam. I had some berries left from our strawberry-picking trip and wanted to use them up. And I especially liked this recipe because it used honey instead of sugar, and far less than a classic strawberry jam recipe. When you've got a crazy, energetic child who easily gets high on simple things like breathing air, you tend to think about things like sugar content.

But I didn't have enough strawberries. Craaaaaaaap.

A quick dig through my freezer yielded part of a bag of frozen raspberries, and I'd just picked up a pint of blueberries at the store. I crushed it all up, rejoiced that I'd reached the necessary 8 cups of fruit, and prayed that my berry ratios would be somewhat tasty.

Oh. My. Graciousness.

This jam is hands-down my favorite one. Probably ever. It is the perfect balance of sweet and tart, which I adore! And while the texture of this jam is closer to sauce-like than a gelatinous jam-like consistency, I don't really care because it's just sooooo good.

I eat spoonfuls of it on thick slices of fresh bread. I scoop it into yogurt. I happily use it in oatmeal bars. And it is the crucial ingredient for Berry Whiskey Barbecue Chicken, which if you haven't tried yet then you REALLY REALLY REALLY need to.

God bless happy accidents. :)
Pin It

Monday, March 25, 2013

Whole Wheat Sandwich Bread

I want to clarify something... I am NOT trying to turn into one of those "Martha Stewart" types who literally make just about everything from scratch, have a beautifully decorated home, and a perfectly landscaped garden.  For starters, I have children so my home is current on Fisher Price decor if that's a cute trend.  And I have a dog so it's all I can do just to keep him from eating the raspberries and tomatoes.  Because he has.  And it drives me crazy.

But that food part?  Well, I'm slowly getting to that "make everything myself" point not because of any trendy trend, but because I'm CHEAP.  I mean, seriously, have you seen the cost of bread lately?!


I want my family to eat healthy, just like any other Family Cook.  But it nauseates me to spend so much money on something that I have come to realize doesn't cost THAT much to make!  Like bread.

And thanks to recipes like this one, I am NEVER buying bread again. 

Whole Wheat Sandwich Bread
Recipe from Healthy Bread in 5 Minutes a Day
Prep time: 5-10 minutes   Rising time: 3 1/2-4 hours   Cook time: 50 minutes

5 cups whole wheat flour
2 1/2 cups all-purpose flour
1 1/2 tbsp granulated yeast
1 tbsp kosher salt
1/4 cup vital wheat gluten
2 1/2 cups lukewarm water
1/2 cup honey
5 large eggs
2/3 cup canola oil

1.  In a 5 quart, NON airtight, lidded container, whisk together the flours, yeast, salt, and gluten.

Basic dry ingredients in that shoebox container again.

2.  Combine the liquid ingredients in a medium bowl and mix into the dry ingredients, without kneading.
Pour in the wet...

...and stir to combine


3.  Cover (again with the NOT airtight seal), and allow to rest at room temperature for about 2 hours.  You could bake some up right away but it's better if you put it in the fridge and forget about it for 24 hours.
LABEL LABEL LABEL


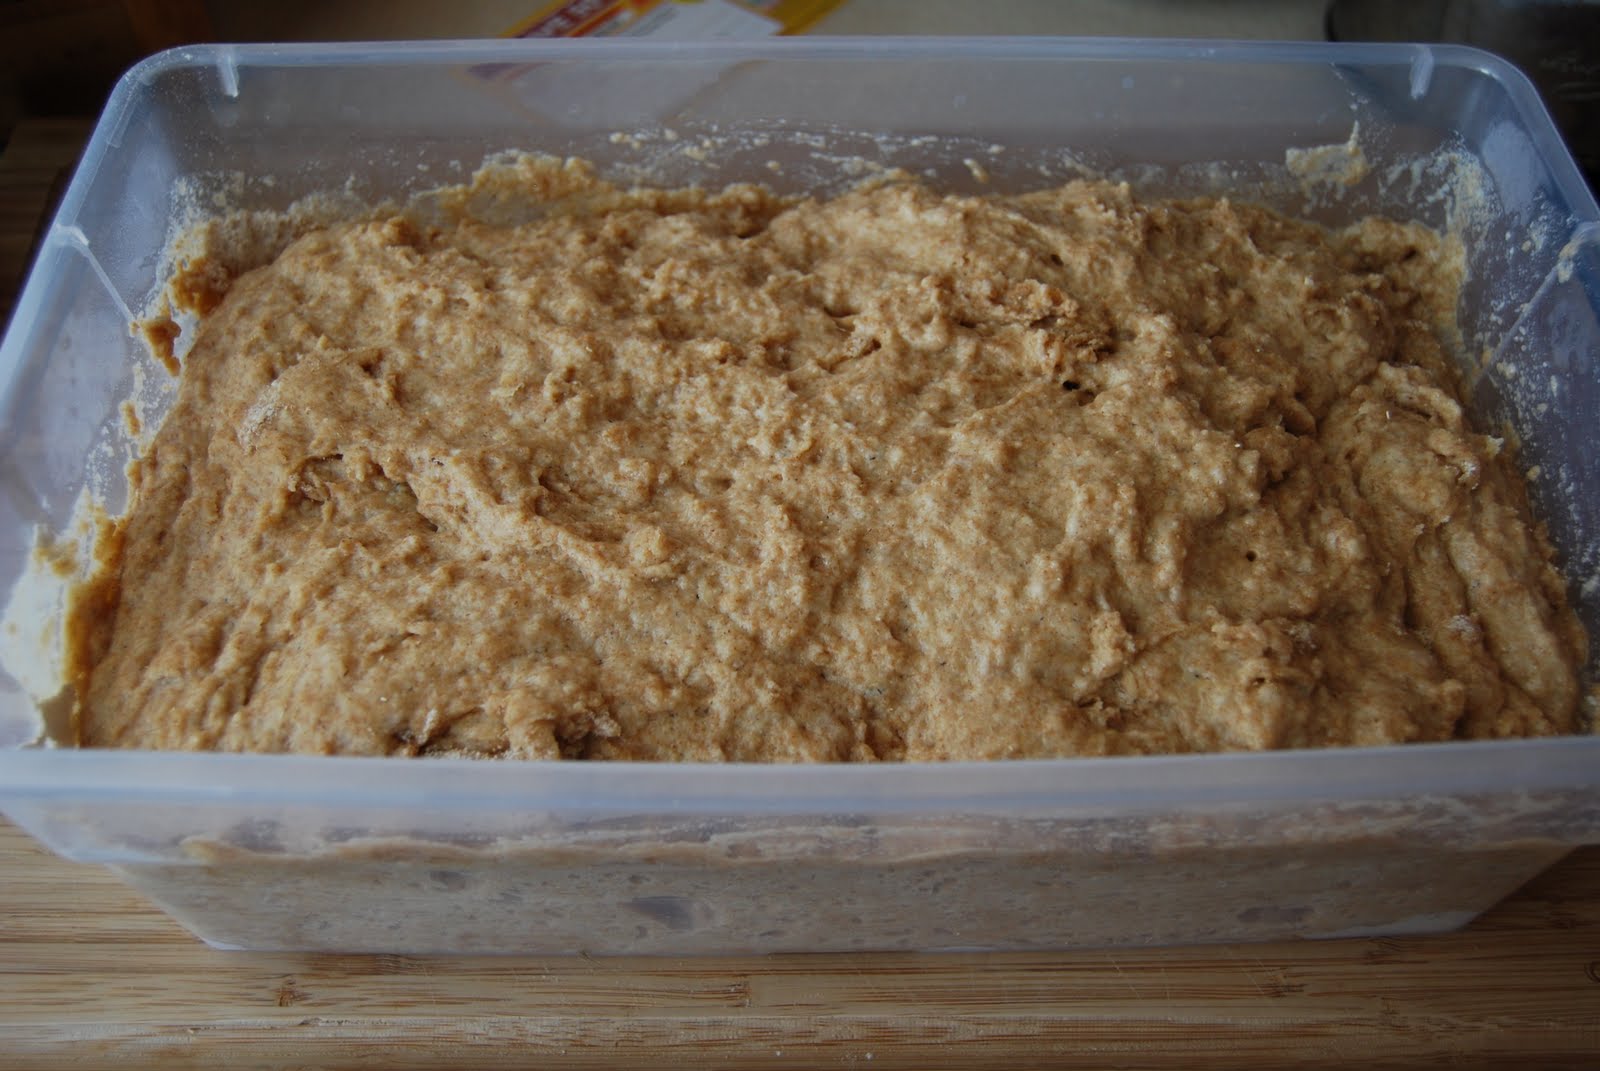
HURRAY YOU HAVE SANDWICH BREAD DOUGH!!!  Now what?

BAKING DAY
1.  Lightly grease an 8 1/2x4 1/2-inch loaf pan.  Take the dough out of the fridge and dust the surface with flour.  Cut off a 2lb piece (this will be half the dough in the container), dust with more flour and shape into a ball by stretching the surface of the dough around to the bottom on all four sides, rotating as your go.
One loaf is about half the container.


2.  Elongate the ball into an oval and place it in to the loaf pan.  Cover it loosely with plastic wrap and allow to rest for 1 1/2 to 2 hours (40 minutes if you can't wait and using fresh, unrefrigerated dough).
LOOSELY cover.  Just lay the plastic on top and walk away.

Rise, my bread!  RISE!


3.  Thirty minutes before baking time, preheat the oven to 350.  Place the loaf on a rack near the center of the oven and bake for 45-50 minutes, or until golden brown.
Yes, it smells as good as it looks.


4.  Remove the bread from the pan and allow it to cool completely on a rack before slicing and eating.
Good luck waiting until this is cool to eat it.


This. Bread. Is. INSANELY GOOD!!  Don't believe me?  Ask my toddler.  Or better yet since his verbal skills aren't the greatest, show him a loaf and watch his reaction.

I do have a few random things I want to point out about this bread before you go racing off to your kitchen to make your own:
  • Storage.  The recipe says to just keep this on a plate, uncovered, cut side down.  It's a wet dough so technically it doesn't need to be covered to keep for a while.  I tried this and about the last inch or so got pretty stale.  And while I have ways of using up stale bread, I'd rather eat up as much of this in my sandwiches as I can.  For the moment, I'm keeping mine wrapped in foil in the pantry until I can find a better solution.
  • You WILL need to wash this bin when you're done with it because of the eggs.
  • Rising.  I've tried various wheat bread recipes over the years, hoping to find one we could use for sandwiches so I wouldn't have to buy the overpriced stuff anymore.  But while the loaves were good, they'd always come out pretty dense.  This bread is gloriously fluffy, thanks to the eggs, yeast (of course), and vital wheat gluten.  I'm new to that stuff and I absolutely LOVE the results of it!
Pin It

Wednesday, March 20, 2013

Apple Butter

So let's say you're at the grocery store and you see that 3lb bags of organic apples are on stupid-sale and you can't resist getting a couple bags.


What on EARTH do you do with 6lbs of apples?!

Make apple butter.

Apple Butter
Recipe adapted from AllRecipes.com
Prep time: 5 minutes (this does NOT include apple prep time)   Cook time: 12 hours

5 1/2 lbs apples, peeled and diced [NOTE: do this ahead of time and soak in salt water to prevent browning]
2 to 2 1/2 cups honey [NOTE: exact measurement will vary depending on how tart your apples are]
2 tsp cinnamon
1/4 tsp cloves
1/4 tsp salt

1.  Place the apples in a slow cooker. In a medium bowl, mix the honey, cinnamon, cloves and salt. Pour the mixture over the apples in the slow cooker and mix well.
Can you tell I chopped these the night before?  Hurray for a quick salt bath!!

 
2.  Cover and cook on HIGH for 1 hour.
I could just snack on this.

 
3.  Reduce heat to LOW and cook 9 to 11 hours, stirring occasionally, until the mixture is thickened and dark brown.
Yes, my house smelled AMAZING.

 
4.  Stir the mixture; if the apples haven't broken down enough, blend the butter using a food processor or immersion blender until smooth.  Feel free to freeze or can the apple butter to preserve it longer.
Too tired to blend it right away?  No problem!  Just store it until you're ready.


Just an FYI, this is awesome on pancakes or some simple leftover bread.  Or you could just pretend it's applesauce and eat it with a spoon.  We don't judge here.
Pin It

Wednesday, February 13, 2013

Honey Ale Bread

I have a feeling that when Rob showed me this recipe that he wasn't exactly expecting me to make it. 


I like surprising him, especially with something as tasty as this!

Honey Ale Bread
Recipe adapted from Sugar & Brews
Prep time: 15 minutes   Cook time: 1 hour

2 1/2 cups all-purpose flour
1/2 cup whole wheat flour
2 tbsp sugar
1 tbsp baking powder
1 tsp salt
2 tbsp honey
1 bottle (12 oz) ale [strongly recommend New Glarus Spotted Cow]
4 tbsp butter, melted

1.  Preheat the oven to 350 degrees F. Grease a 9 x 5 x 3-inch loaf pan.
Is it weird that I think dry ingredients can make such a pretty picture?


2.  In a medium bowl, mix together the flour, sugar, baking powder and salt. Next, stir in the beer and honey into the dry ingredients. Yes, the dough will be sticky and thick.  Keep mixing though, and consider the workout you're getting by making bread!
I love that I live in Wisconsin, the land of AWESOME BEER.

Arm, meet your workout.


3.  Pour half the melted butter into the greased pan. Then place the batter into the pan.  Spread out the batter and brush the top with the remaining butter.
Mmmmmmm, butter......


4.  Bake for 50 to 60 minutes, until top is golden brown and a toothpick inserted in the middle comes out clean.
I'd make this again just because this is so pretty!


This bread is so pretty and rustic and wonderful.  Whether you eat it warm from the oven with really good butter, or 3 nights later smeared with dark chocolate honey that you picked up at a farmer's market, it's AWESOME!
Pin It

Tuesday, February 5, 2013

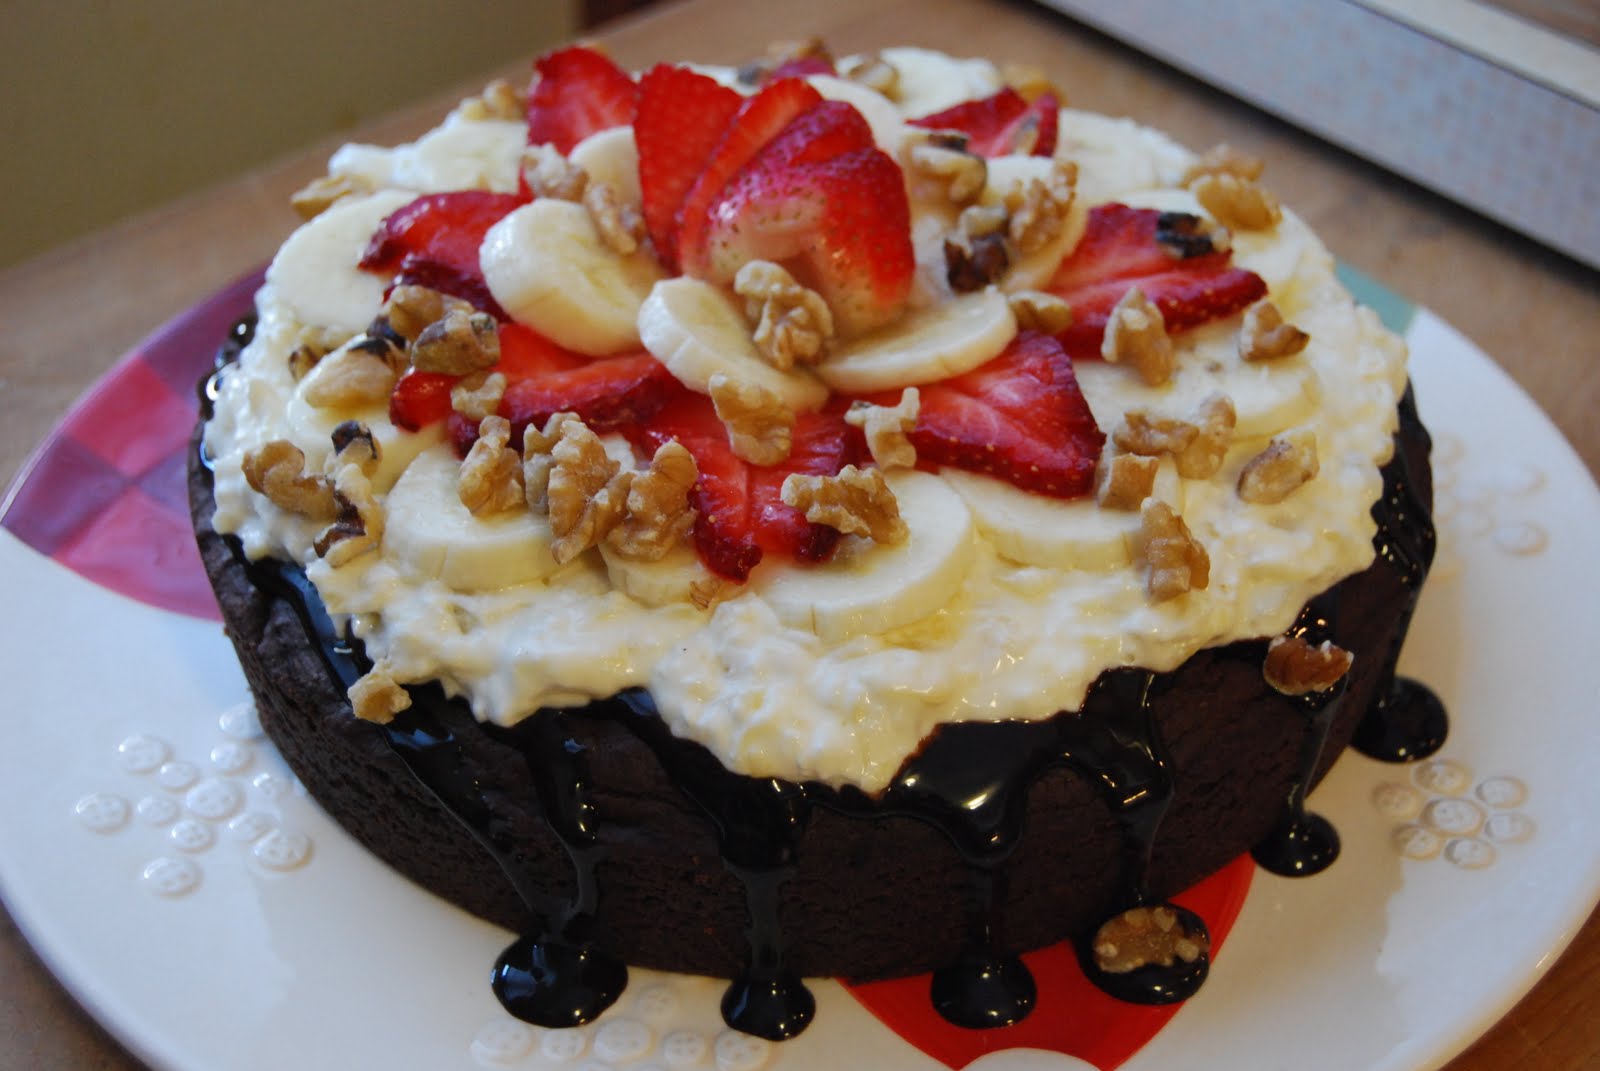
Brownie Banana Split Pizza

I'm trying to force myself to work on some other blog posts to put up here for you, and I keep coming back to this one.  I keep daydreaming about this one.  I want to keep eating this one.


So, why fight it?  I think you should share in my current dessert obsession. ;)

Brownie Banana Split Pizza
Recipe adapted from Bobby Deen
Prep time: 20 minutes   Cook time: 20-25 minutes

1/2 cup melted canola oil
1 1/4 cups flour
1/2 cup cocoa powder
2 tsp baking powder
1/4 tsp baking soda
1 tsp salt
2/3 cup honey
1/2 cup applesauce
3 tbsp chocolate syrup
4 oz whipped cream cheese
1 tbsp sugar
One 8-ounce can crushed pineapple, drained
2-3 fresh strawberries, thinly sliced
1 banana, thinly sliced and tossed in lemon juice to prevent browning
1/4 cup chopped walnuts

1.  For the brownies: Preheat the oven to 325 degrees F. Grease a 9-inch cake pan with cooking spray; set aside.
I love where this is going.


2.  Whisk together the flour, cocoa powder, baking powder, baking soda and salt in a medium bowl. Add the oil, honey, and applesauce directly into the dry ingredients. Stir until the batter is smooth.
Who wants to lick the bowl??


3.  Pour the batter into the prepared pan. Bake on the center rack until a toothpick inserted in the center comes out clean, 20-25 minutes.  Cool completely before assembling the pizza.
Keep checking the middle for done-ness! You don't want it collapsing on you.


4.  For the pizza: Remove the brownie from the cake pan and place in the middle of a cake plate.  Drizzle with chocolate sauce.
*drooooooooooooooooooooooooooool*


5.  Beat the cream cheese, sugar and pineapple together in a bowl with a spatula. Spread the mixture over the cooled brownie crust.
I could eat just this for breakfast.

Creamy. Fluffy. Lovely.


6.  Arrange the strawberry and banana slices over the cream cheese mixture. Sprinkle with the chopped walnuts. Freeze for at least 30 minutes. Slice into wedges for serving.
WARNING! Do not attempt to eat your computer screen!
This is only a picture.


Now, I was a little nervous about this recipe because of the brownie.  Obviously it's a cake-like brownie and there's not a whole lot of sweetness to it.  And it was a little dry.  But as I pulled the whole thing together, it began to make sense.  This not-so-sweet brownie is meant to complement it's sweet and fruiting toppings, not out-do them.  Between the refreshing bananas and strawberries, crunchy walnuts (my fav!!), bright and creamy cream cheese layer, and the chocolate-y base....omg can you see why my brain is still dwelling on this beauty?!
Pin It

Monday, December 10, 2012

Peanut Butter Popcorn Balls

I made these for Gavin's snack day today at school.  SUPER cute. SUPER fun to make.  SUPER easy!!


Peanut Butter Popcorn Balls
Recipe from Dig This Chick
Prep time:  20 minutes   Cook time: 10 minutes

15 cups popped popcorn [This is about 3/4 cup unpopped kernals if you're doing your own popping]
1 cup sugar
1 cup honey
1 1/2 cups peanut butter
2 tsp vanilla extract
1-2 tbsp canola oil

1.  Mix honey and sugar in a pot and cook over medium heat until melty and boiling. Turn off heat, add peanut butter and vanilla and mix well.
Keep stirring until smooth


2.  Pour the canola oil on a plate so it's easier to get the oil on your entire palm. Pour the hot peanut butter mixture over popcorn and mix as gently as you can.  You will crunch some of the popcorn and that's ok.  Just try to get everything fairly evenly coated.
I had to use my largest soup pot for all this popcorn.


3.  When you are able to stand touching the popcorn (it’ll be hot!), palm the oil with both hands. Grab a clump of popcorn and firmly shape into a ball. Keep it up, dipping in oil as necessary (to prevent popcorn from sticking to hands). Makes about 20 three-inch balls.
A plate makes oiling your hands SO MUCH EASIER


One of my favorite things about kindergarten is Snack Day.  I actually don't often get a chance to play with snack recipes as my boys are satisfied with fresh fruit, goldfish crackers, cheese sticks, and the occasional granola bar.  So when Gavin has to supply his class of 18 students with a snack once a month, I get pretty giddy about it and hit up my cache of snack recipes.  This one I mentioned to Gavin when I found it, and after he finished drooling he immediately requested I make them for his next Snack Day.  Happy to oblige!
Pin It

Wednesday, September 12, 2012

Cinnamon Honey Iced Coffee

Welcome to my latest vice.  Lately, this is truly how I make it through the latter half of my day.


Cinnamon Honey Iced Coffee
Recipe adapted from How to Make Iced Coffee cookbook
Prep time: 5 minutes   Chill time: 8 hours

3 1/2 cups cold water, divided
1/2 cup coffee grounds
Milk, optional
Honey
Cinnamon

1.  Pour 2 cups of cold water into a jar and add 1/2 cup ground coffee.  Close the jar and shake it a little to mix it up.  Refrigerate at least 8 hours, or overnight.
I used my canning funnel to make sure I don't get grounds everywhere.


2.  Add 1 1/2 cups of cold water and shake to combine.  Line a sieve with a coffee filter and slowly pour the coffee over this to strain out the grounds.

Pour slowly so you don't overflow the filter.


3.  Pour the strained coffee into a covered pitcher or jar and add enough milk, if using, to reach your preferred lightness.
Yes, I like my coffee LIGHT and SWEET.


4.  The amount of honey you add will vary depending on how sweet you like your coffee.  I add about 1/4-1/3 cup, but admittedly, I don't measure this.
A little cinnamon goes a long way.


5.  Sprinkle in 1/8-1/4 tsp cinnamon and shake well to mix.  Pour over ice and enjoy!
Pin It