Showing posts with label wheat flour. Show all posts

Monday, March 25, 2013

Whole Wheat Sandwich Bread

I want to clarify something... I am NOT trying to turn into one of those "Martha Stewart" types who literally make just about everything from scratch, have a beautifully decorated home, and a perfectly landscaped garden.  For starters, I have children so my home is current on Fisher Price decor if that's a cute trend.  And I have a dog so it's all I can do just to keep him from eating the raspberries and tomatoes.  Because he has.  And it drives me crazy.

But that food part?  Well, I'm slowly getting to that "make everything myself" point not because of any trendy trend, but because I'm CHEAP.  I mean, seriously, have you seen the cost of bread lately?!


I want my family to eat healthy, just like any other Family Cook.  But it nauseates me to spend so much money on something that I have come to realize doesn't cost THAT much to make!  Like bread.

And thanks to recipes like this one, I am NEVER buying bread again. 

Whole Wheat Sandwich Bread
Recipe from Healthy Bread in 5 Minutes a Day
Prep time: 5-10 minutes   Rising time: 3 1/2-4 hours   Cook time: 50 minutes

5 cups whole wheat flour
2 1/2 cups all-purpose flour
1 1/2 tbsp granulated yeast
1 tbsp kosher salt
1/4 cup vital wheat gluten
2 1/2 cups lukewarm water
1/2 cup honey
5 large eggs
2/3 cup canola oil

1.  In a 5 quart, NON airtight, lidded container, whisk together the flours, yeast, salt, and gluten.

Basic dry ingredients in that shoebox container again.

2.  Combine the liquid ingredients in a medium bowl and mix into the dry ingredients, without kneading.
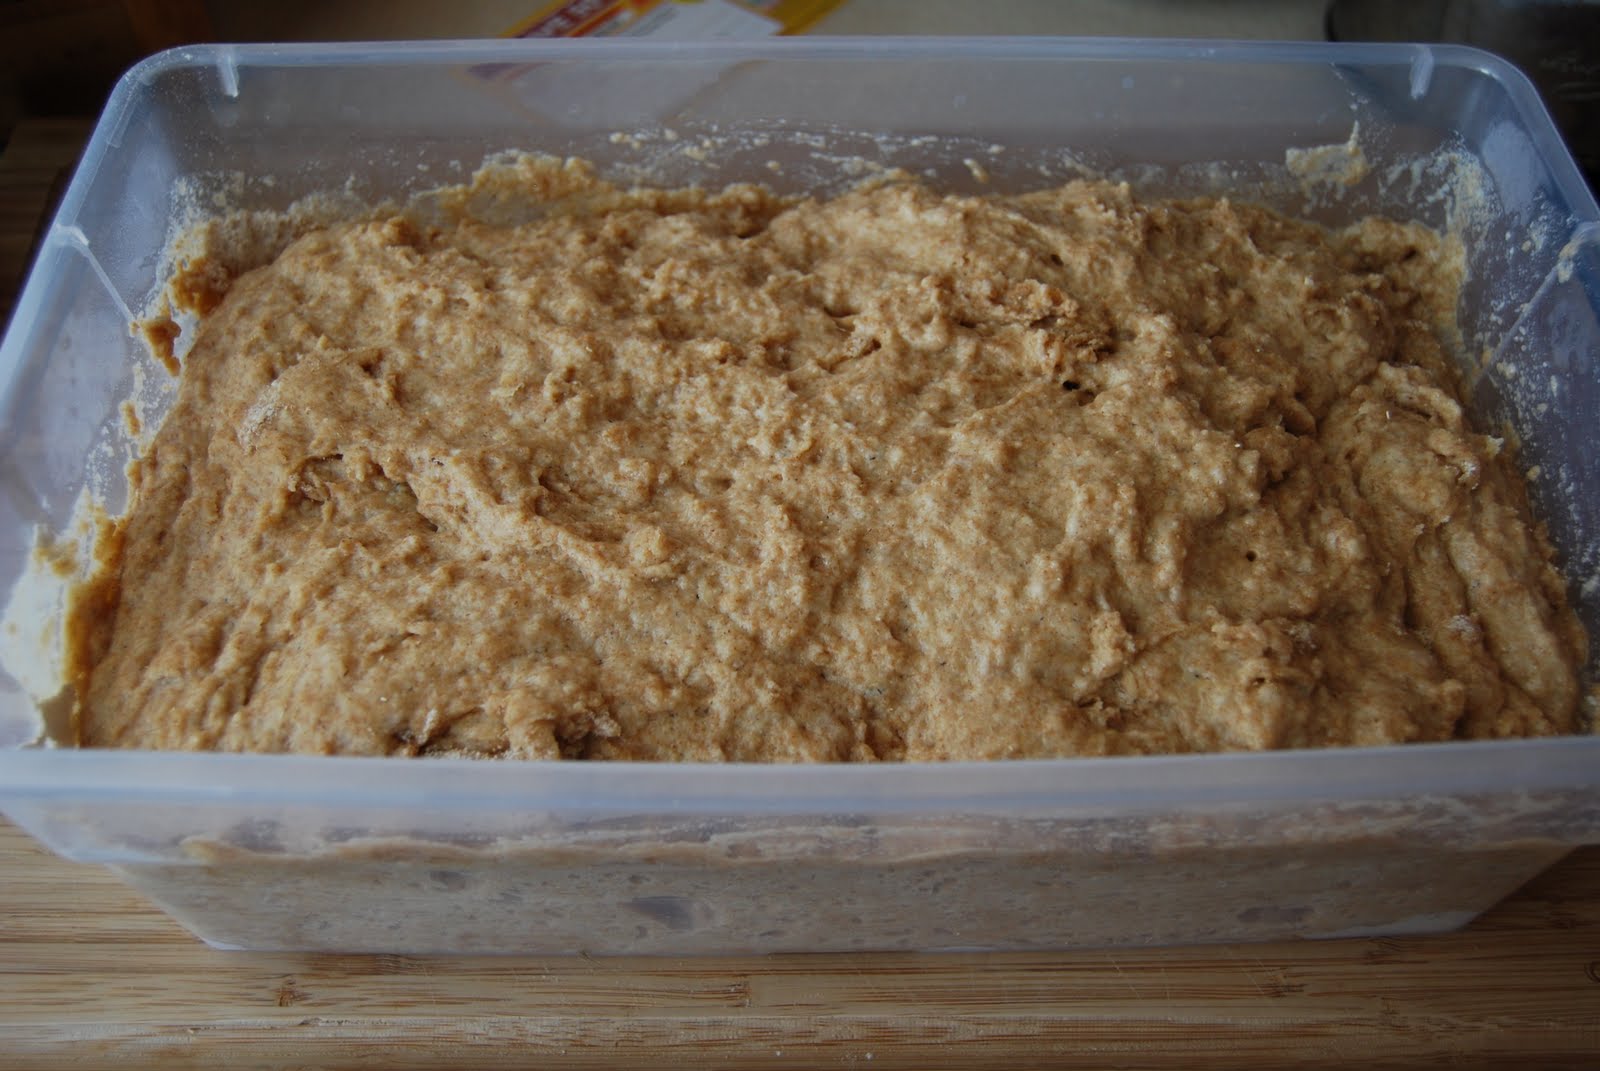
Pour in the wet...

...and stir to combine


3.  Cover (again with the NOT airtight seal), and allow to rest at room temperature for about 2 hours.  You could bake some up right away but it's better if you put it in the fridge and forget about it for 24 hours.
LABEL LABEL LABEL


HURRAY YOU HAVE SANDWICH BREAD DOUGH!!!  Now what?

BAKING DAY
1.  Lightly grease an 8 1/2x4 1/2-inch loaf pan.  Take the dough out of the fridge and dust the surface with flour.  Cut off a 2lb piece (this will be half the dough in the container), dust with more flour and shape into a ball by stretching the surface of the dough around to the bottom on all four sides, rotating as your go.
One loaf is about half the container.


2.  Elongate the ball into an oval and place it in to the loaf pan.  Cover it loosely with plastic wrap and allow to rest for 1 1/2 to 2 hours (40 minutes if you can't wait and using fresh, unrefrigerated dough).
LOOSELY cover.  Just lay the plastic on top and walk away.

Rise, my bread!  RISE!


3.  Thirty minutes before baking time, preheat the oven to 350.  Place the loaf on a rack near the center of the oven and bake for 45-50 minutes, or until golden brown.
Yes, it smells as good as it looks.


4.  Remove the bread from the pan and allow it to cool completely on a rack before slicing and eating.
Good luck waiting until this is cool to eat it.


This. Bread. Is. INSANELY GOOD!!  Don't believe me?  Ask my toddler.  Or better yet since his verbal skills aren't the greatest, show him a loaf and watch his reaction.

I do have a few random things I want to point out about this bread before you go racing off to your kitchen to make your own:
  • Storage.  The recipe says to just keep this on a plate, uncovered, cut side down.  It's a wet dough so technically it doesn't need to be covered to keep for a while.  I tried this and about the last inch or so got pretty stale.  And while I have ways of using up stale bread, I'd rather eat up as much of this in my sandwiches as I can.  For the moment, I'm keeping mine wrapped in foil in the pantry until I can find a better solution.
  • You WILL need to wash this bin when you're done with it because of the eggs.
  • Rising.  I've tried various wheat bread recipes over the years, hoping to find one we could use for sandwiches so I wouldn't have to buy the overpriced stuff anymore.  But while the loaves were good, they'd always come out pretty dense.  This bread is gloriously fluffy, thanks to the eggs, yeast (of course), and vital wheat gluten.  I'm new to that stuff and I absolutely LOVE the results of it!
Pin It

Tuesday, January 22, 2013

Whole Grain Pancakes

Remember my meal plan for this week?  Yeah, you could probably disregard that.  It's just going to be one of Those Weeks.  Because right now I have a feverish 5-year-old quietly playing with Legos in the dining room.  And I have a feverish 19-month-old spread across my lap.  And apparently the only cure for whatever my 19-month-old has is constant Mommy Contact.  Constant.  As in all the time.  Poor baby. :(


But no matter what I make, or don't make, this week, I did make some pretty outrageous pancakes last week.  Like, awesomely outrageous.  So good that I'll just leave you with my Picky Eater's words about them:

"Mama, you made these 100% YUM."

Whole-Grain Pancakes
Recipe from Food Network Magazine
Prep time: 15 minutes   Cook time: 20 minutes

3/4 cup old-fashioned oats
1/4 cup flaxseed
1 cup whole-wheat flour
1 tsp baking powder
1/2 tsp salt
2 large eggs, separated
1 1/2 cups milk
3 tbsp butter, melted, plus more for the skillet
3 tbsp sugar
1.  Pulse the oats and flaxseed in a blender or food processor until finely ground; transfer to a large bowl. Add the flour, baking powder and salt and whisk until combined.
I love how healthy this looks already


2.  Whisk the 2 egg yolks and milk in a separate bowl; add to the dry ingredients along with the melted butter and whisk until just smooth.
Yep, typical dense-looking batter.  But we can make it better!


3.  Beat the 2 egg whites and sugar in another bowl with a mixer until soft peaks form; gently fold into the batter until just combined.
Soft peaks still flop over.  Be patient; it will take a bit to get here.

Fluffy batter thanks to the air whipped into the egg whites!

4.  Lightly butter a nonstick skillet and place over medium heat. Working in batches, add about 1/4 cup batter for each pancake; cook until bubbly on top, then flip and cook until golden brown on the other side, about 3 minutes per side.
Mmmmmmmmmmmmmmm.........


I made these for dinner but I totally can't wait to make these for Saturday morning breakfast.  What a fabulously tasty (& healthy!!!) way to start out the day!  Whether you choose to drown them in maple syrup or make up a quick strawberry sauce, your family will never know these are good for them.  All they'll taste is nutty, fluffy pancake-deliciousness.

Seriously 100% yum!
Pin It

Monday, January 30, 2012

Triple Chocolate Cookies

I first heard about this concept of Pajama Day a long, long time ago.  Sounded cool, but as a busy working-outside-the-home Mom, when would I have the time to indulge in spending the day in our pj's??  So the idea of it just sat there in the back of my mind, simmering...

And now I'm at home with my kids.  And it's winter time.  And it looks like Wisconsin FINALLY decided to act like it was winter time and give us a good snow.  Sounds like a Pajama Day to me!!

And I've decided that it really can't be Pajama Day without a seriously good cookie to go with it.

Triple Chocolate Cookies
Recipe from Ellie Krieger

1/2 stick (1/4 cup) unsalted butter, softened
1/2 cup firmly packed dark brown sugar
1/4 cup granulated sugar
1/4 cup canola oil
1 large egg
1 tsp vanilla extract
1/2 cup all-purpose flour
1/2 cup whole wheat flour
1/4 cup cocoa powder
1/4 tsp salt
2 oz dark chocolate (60-70% cocoa solids), coarsely chopped*
2 oz milk chocolate, coarsely chopped*
2/3 cup pecans

*Substituting white chocolate chips for one of these is also quite yummy.

1.  Preheat oven to 350.

2.  In a large bowl, mash together the butter and sugars with a fork until well combined.  Add the oil and egg and beat until creamy.  Mix in the vanilla.
Mashing with a fork makes for easier blending later.


3.  In a medium bowl, whisk together the flours, cocoa, and salt.  Add the flour mixture to the butter mixture and mix well.  Stir in both chocolates and nuts and mix well.
Great way to sneak in healthy whole wheat flour!


4.  Using a tablespoon or cookie scoop, scoop the batter onto an ungreased cookie sheet.  Bake until the cookies are just set, about 12 minutes.  Transfer the cookies to a rach to cool  Store at room temperature in an air tight container for up to 4 days.
Didn't even last long enough to get a picture of them baked.


These are DANG TASTY.  They are cookies, but they also have this chewy consistency that tastes almost like a brownie.  So a cookie, that occasionally masquerades as a brownie, and it's HEALTHY???  Dude.  Make these.  You're welcome.
Pin It

Tuesday, September 6, 2011

Whole Wheat Flat Bread

I am surrounded by Carbivores.  Don't get me wrong, I like bread as much as any living, breathing person.  But it's not something I hope for, look for, at practically every meal.  I didn't grow up seeing bread on the table all the time so it truly doesn't occur to me to have something for my own table.

Rob, bless him, does not make an issue AT ALL about the lack of carbs.  But I know he'd really love to see bread at the table more; it's comforting for him.  Also, what four-year-old doesn't want Mama to serve more bread with dinner?

When I do actually think to make something, one of the problems I run into is one I'm all too familiar with: BOREDOM!  I mean, how many times can I have our breadmaker spit out white bread, wheat bread, or oatmeal bread to complement the meal?  Cornbread only goes so far.  Tortillas pair with only certain things (in my mind).  And, much as I love them, brown & serve rolls can get old.

*sigh*

Thank God for bloggers like Joy.

Whole Wheat Flat Bread
Recipe from Joy the Baker


3/4 cup warm water, about 95 degrees [Don't freak out on me; more on the temp below]
1 package (about 2 1/2 tsp) active dry yeast
1/2 tsp granulated sugar
1 3/4 cup whole wheat flour
2 tbsp uncooked old fashioned oats
1 tsp salt
1/2 tsp coarse ground black pepper
1 tsp olive oil

1.  In a small bowl, whisk together 1/4 cup warm water, yeast and sugar.  How do you know it's around 95 degrees without a thermometer?  Stick your finger in it.  No, seriously.  If it's warm but you're not getting that "this is waaay too hot" tingly sensation, you're fine.  Set aside for 5 minutes.  The mixture will grow and foam and that’s how you know the yeast is active and alive.
Kinda looks like beer


2.  In a medium bowl, whisk together flour, oats, salt and pepper.  Create a well in the center of the dry ingredients and add the yeast mixture.  Add the remaining 1/2 cup of water.  Bring mixture together with a fork, until all of the flour bits are moistened, and the dough is shaggy.  Dump out onto a lightly floured work surface and knead a few times to bring together.
Nope, it's not too dry.  I promise.


3.  Coat the medium bowl with a teaspoon of olive oil and place dough ball in bowl.  Cover with plastic wrap and a kitchen towel and allow to rise in a warm place for 1 hour.  Dough will double in size.
Shiny, lovely dough


4.  When dough has rested and risen, dump out onto a lightly floured work surface and knead for a few turns.  Use a knife to divide the dough in half, then divide each half into six equal pieces.  Heat a non stick pan over medium heat.
"Roar!"


5.  On a lightly floured work surface, roll out each dough piece into a roughly 4 to 5-inch circle.  Place dough round in the ungreased, hot pan.  Cook on one side for 1 to 2 minutes, until browned on the bottom and slightly puffed.  Flip and cook for another 1 or 2 minutes.  Remove from pan and serve warm with whatever floats your boat.
FYI: You can totally cook these while holding a fussy baby


The bread can also be cooled and refrigerated for up to three days.  If you wait to eat them, reheat the flat breads in a warm skillet before serving.

These make a lovely, fresh complement to dinners, but don't stop there!  Smear on a little cream cheese and jam and you have breakfast-on-the-go.  I like to tear mine up to scoop out garlicky bean dip too.  Mmmmmm....

And oh yeah, in case you're thinking that yeast bread is too intimidating, you're too busy, there's no way you could make these.  YES YOU CAN.  I've made this recipe twice now, both times while managing a fussy 3 month-old.  The dough comes together in 10 minutes and then you get to leave it alone for an hour!  Sure, rolling them out requires both hands but after that, you can totally get away with this one-handed.  If I can make these while telling my baby he really should have listened to me and taken a nap earlier, you can absolutely pull this off.
Pin It

Friday, April 15, 2011

Fig Bars

"A cookie is just a cookie, but Newton's are fruit and cake."

Does anyone else remember those commercials?  I thoroughly enjoy just about any kind of cookie but when it comes to Fig Newton's... mmmmmmmmmmmmmmmmmm...  YUM!  First of all, I absolutely adore dried figs.  I love that sweet taste and even the crunchy texture from the seeds.  Surround that in soft, cake-like breading and I'm totally in my happy place.  It would not be completely outside the realm of possibility for me to consume at least half a package in one sitting.  Not proud of that fact, but hey.

So imagine my reaction when one of my favorite bloggers posted a recipe that just screamed glorified, HEALTHY Fig Newton to me?  WAHOO BABY!!!  This I've got to try.

Fig-Apricot Bars
Recipe from Dig This Chick

For the crust:
3 cups whole wheat flour
1/2 tsp. salt
3/4 tsp. baking powder
3/8 tsp. baking soda
1/4 cup ground flax seed
dash ground nutmeg and ground cloves [I was extra generous with my "dashes"]
1 stick butter, cold
1/2 cup milk
1/2 cup honey
2 eggs

For the filling:
2 cups dried figs
1/2 cup dried apricots
2 cups juice (I used apple juice by any 100% juice would work great)
1 cup water
  
1.  Combine dry ingredients. Cut in butter until tiny pebbles. 

Of course I used my food processor for this step!

2.  Mix eggs, milk and honey with a fork in a separate bowl. Add wet to dry and mix into a dough. Get your hands in there and make into a ball. Cover and refrigerate for an hour. 

Sticky dough.  You've been warned.

3.  While dough is chilling, cook figs, apricots, juice and water over low heat until soft and thick, and most of the juice is absorbed. Purée in a food processor. 

Hello cooked down fruity goodness

4.  Preheat oven to 375 degrees. After an hour, pull dough out, divide in two and knead about 10 times to make pliable. Sprinkle flour on work surface and roll out half. 
First two layers down.  Just need the top crust

5.  Place on prepared baking sheet. Spread figgy mixture. Knead and roll out other half and place on top. Bake for 15-20 minutes, until golden brown. Let cool and cut up! 


I learned a few things from this experience of making fig bars.  
  • I need to practice my rolling pin skills.  They're pretty rusty because I think the dough could be a tad thinner.  I rolled it to about the thickness I would a pie crust.  Rob thinks this thickness was perfect though.
  • Though Fig Newtons first came to mind when I made them, the crust has this nutty flavor that's a bit closer to a Nutrigrain Bar.  So a Fig Newton/Nutrigrain bar?  I like that nutty flavor though, plus now I don't feel bad feeding these to Gavin for breakfast. 
  • Next time I'm trying a juice with a sharper flavor (pomegranate? orange?), just to see what happens to the filling flavor.
  • It doesn't look or feel like this made that much, however once you cut these into bars it makes quite a bit!  My bars are probably 2"x3"...something like that.
  • If you ask your husband to take baked goods out of the oven for you, expect that there will be a corner of it missing.
It's really become important to have some kind of grab-and-go snack around.  Rob and I are usually in a hurry most mornings to get out the door, plus it's nice to have handy snack available.  I really like the granola bar recipes I've been making, however it's nice to add a new snack bar to the mix too. And of course it REALLY makes me feel good knowing I'm giving my little family something that's not just tasty, but super healthy for them too!
Pin It