Showing posts with label strawberries. Show all posts

Tuesday, June 10, 2014

Three Berry Honey Jam

If you live in Wisconsin, you know about New Glarus Brewery.

Come to think about it, if you like really good beer and you've spent five minutes in this state then you know about New Glarus Brewery.

New Glarus Brewery is this incredibly fantastic micro-brewery that makes incredibly fantastic beer (Spotted Cow anyone?). They only use locally sourced ingredients, and they only sell their beer in Wisconsin (sorry non-Wisconsinites. Guess you need to come visit!). And while of course they do more classically flavored beers, they also do several fruit beers. They are especially known for their cherry beer.

Well, a couple years ago there was this drought. Remember that drought? Anyway, the cherry crop was practically annihilated, but they had to produce this beloved beer! No seriously, there would be rioting in the streets without their cherry beer. It had to be made, but what could they do without the cherries they needed? Well, they included a few other fruits with the cherries and called in Serendipity: a happy accident. Hot damn it's one of my favorite beers.


So why am I telling you all this? Because it's my way of telling you that this jam is my own Serendipity. My own happy accident.

Three Berry Honey Jam
Recipe adapted from Gastronome Tart
Prep time: Depending on your fruit-prep equipment, allow for an hour  Cook time: 30ish minutes

NOTE: You can use fresh OR frozen (but thawed) berries.

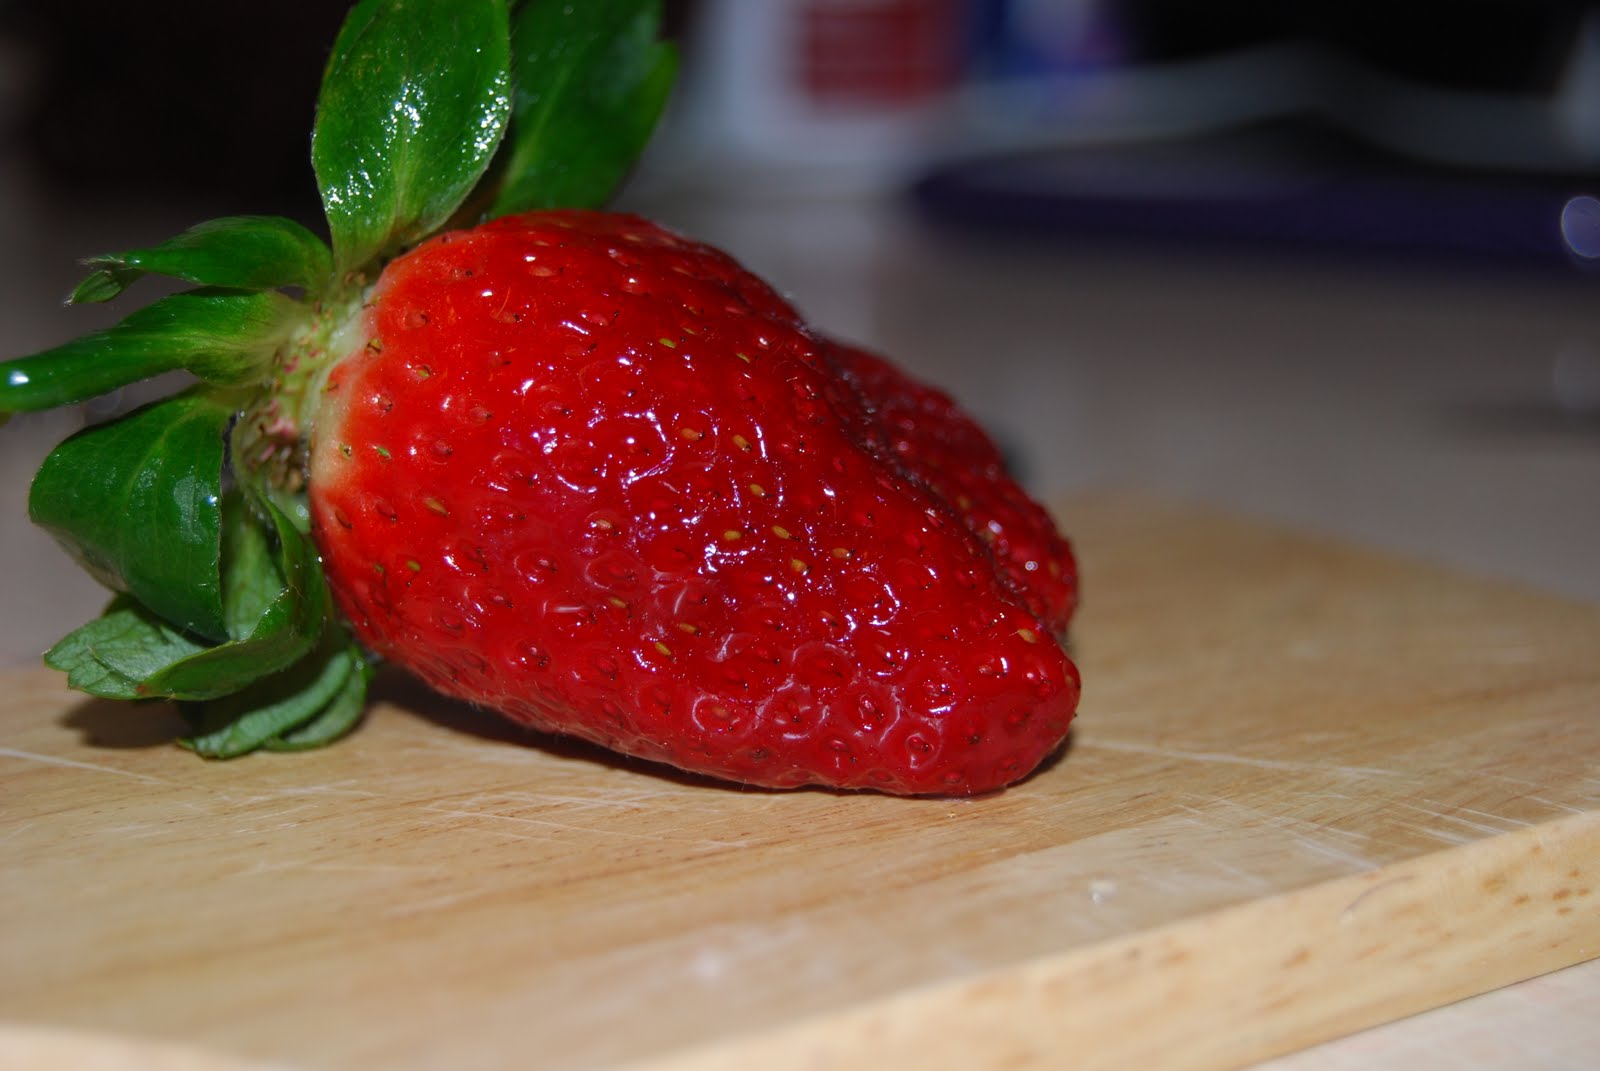
6 cups of washed, hulled, and crushed strawberries (psst! This is done way faster with a food processor)
1 cup washed and crushed blueberries
1 cup washed and crushed raspberries
1 cup honey
1 tsp lemon zest
2 tbsp lemon juice
6 tbsp pectin

1. In a medium-to-large saucepan over medium heat, combine all ingredients.
I made a double-batch this year using up the remaining frozen strawberries from LAST year.
And yes, I regularly buy honey in 5lb bottles. 


2. Bring to a boil, stirring frequently, and boil for 1-2 minutes. Wear comfy shoes because this will take some time. Your patience will be rewarded.
Stirring, stirring, stirring. Patience, patience, patience.


3. Turn off the heat and scrape off any foam. Store in sterilized containers of your choice, whether you intend to freeze it, or can it (I've got a little tutorial on canning in this post).
Foam isn't bad. It's just annoying and not pretty.

It's also bitter. Don't eat the foam.

I like to save my freezer space for Get Ahead meals and the like.
It's more of a time commitment, but canning is the way I prefer to preserve jams.


About two years ago I went to make a third batch of strawberry honey jam. I had some berries left from our strawberry-picking trip and wanted to use them up. And I especially liked this recipe because it used honey instead of sugar, and far less than a classic strawberry jam recipe. When you've got a crazy, energetic child who easily gets high on simple things like breathing air, you tend to think about things like sugar content.

But I didn't have enough strawberries. Craaaaaaaap.

A quick dig through my freezer yielded part of a bag of frozen raspberries, and I'd just picked up a pint of blueberries at the store. I crushed it all up, rejoiced that I'd reached the necessary 8 cups of fruit, and prayed that my berry ratios would be somewhat tasty.

Oh. My. Graciousness.

This jam is hands-down my favorite one. Probably ever. It is the perfect balance of sweet and tart, which I adore! And while the texture of this jam is closer to sauce-like than a gelatinous jam-like consistency, I don't really care because it's just sooooo good.

I eat spoonfuls of it on thick slices of fresh bread. I scoop it into yogurt. I happily use it in oatmeal bars. And it is the crucial ingredient for Berry Whiskey Barbecue Chicken, which if you haven't tried yet then you REALLY REALLY REALLY need to.

God bless happy accidents. :)
Pin It

Wednesday, February 20, 2013

Strawberry Yogurt Muffins

I am always on a quest for easy, tasty, HEALTHY breakfast items that could be enjoyed at home OR quickly grabbed as we race out the door.


Bingo!!

Strawberry Yogurt Muffins
Recipe from The Dashing Dish
Prep time: 10 minutes   Cook time: 25 minutes

2 1/2 cups oats
1 cup plain Greek yogurt
2 eggs
1 cup sugar
1 1/2 tsp baking powder
1/2 tsp baking soda
1 1/2 cup strawberries

1.  Preheat oven to 400 degrees. Line 12 muffin tins with silicone or foil liners, (or just use a silicone muffin pan).
2.  Place all of the ingredients (except the strawberries) in a blender or food processor, and blend until oats are smooth. Pour mixture into a medium sized bowl, and stir in strawberries.


3Divide batter among cupcake liners, and bake for 20-25 minutes, or until toothpick comes out clean.


Not only are these easy to make (dump in the FP and push a button),they are CHOCK FULL of healthy ingredients that I always keep around anyway!  And you could really use any fruit you happen to have on-hand.  I still have some strawberries from our jam adventures last summer, but blueberries, peaches, raspberries, or cooked apples would all be good.  If you're using a frozen fruit, just be sure to that them out first before stirring them into the batter.


Pin It

Wednesday, June 13, 2012

Strawberry Jam

I was going to show this off as a Make It Monday recipe, but honestly, Gavin didn't really do anything with this one. Except watch.  Not much I could have him do since making jam requires sharp knives and stirring frighteningly hot, bubbling liquids over a blazing stove.  He did count the scoops of sugar for me so that's something!


Anyway, last week we went out and picked strawberries.  A lot of strawberries.  Dare I say a CRAP-TON of strawberries.  I'm looking at my refrigerator now and really questioning my sanity.  But this is what I wanted, I remind myself.  I have one son who inhales PB&J sandwiches like they're candy, and another who will probably be the same or pretty close.  I need to start stockpiling.

Strawberry Jam
Recipe from the box of Sure-Jell

About 8 cups whole strawberries, washed and hulled
4 cups sugar
1 box Sure-Jell OR 6 tbsp fruit pectin

NOTE: This is the canning version.  If you don't have canning equipment please do NOT let that stop you from making your own jam!!  Sure-Jell also has recipes and instructions to make freezer jam, which I've done before and it's AMAZING.
To just make a batch or two, buy a box.  To make more jam, get a jar of pectin.


1.   First thing to do is crush the strawberries.  You can either do this with a potato masher, 1 cup at a time, or with a food processor.  If you use the food processor, pulse the berries a few times, making sure to not overdo it.  You want a few chunks in your jam.  Your goal is to end up with 6 cups of crushed berries.
I like lots of berry chunks in my jam.


2.  Carefully measure out the sugar into a bowl.  Scoop 1/4 cup of that sugar into a separate, smaller bowl and mix in the pectin.  [NOTE: Yes, you do want to measure out the sugar into a bowl, ready to go, and not have to waste time scoop it in later when you need it fast.]
Left, pectin mixture. Right, just sugar.


3.  In a large stockpot, combine the berries, and sugar/pectin mixture.  Bring to a boil over high heat, stirring constantly.


4.  Once the jam reaches a rapid boil (yes, while still stirring), quickly pour in the remaining 3 3/4 cups sugar.  Stir to combine and boil for exactly one minute more.  Remove the jam from the heat and skim the foam off the surface.
Foamy

Not quite so foamy.


See?  That's not so bad is it?  Making jam is totally doable.  And you can store it in a variety of ways: freezer containers or by canning.  Freezer jam is easier to make, but canned jam is easier to store.  So, if you feel up to learning to can, keep reading:

1.  Fill your canning pot with enough water that once your jars are submerged, they will be covered by 1-2 inches.  Cover and bring to a boil.  FYI, this could take 30-60 minutes depending on the size of your pot.

2.  Make sure your jars are sterilized.  You can do this by dipping them in the boiling canning water OR by running them through the dishwasher, especially if you have a Sanitize setting.  SIDE NOTE: If you are going to put the jam in the glass jars immediately after making it, make sure to sterilize the jars right before filling them.  Putting a hot substance into cold glass containers is a recipe for disaster.

3.  Fill each jar to within 1/4" to 1/8" of the top.  Wipe the rims with a damp cloth before topping with a two-piece lid (that's the flat circle thingy and the separate metal rim).  Screw the rim down to just gently tighten.  No, you don't want jam to escape or water to get in, but you also want air to escape from the jar.  Trust me, bad things happen if you tighten the lids too much before processing.  More about that tomorrow.


4.  Stack the jars around the rack and submerge.  Boil the jars for 10 minutes, adding more time as necessary based on your elevation.


5.  Carefully remove the jars from the pot with tongs and put on either a wooden cutting board or towel-covered cabinet.  Again, we're trying to avoid a scenario of an extreme temperature change with these glass jars.  Let the jars sit out for 24 hours.  Then tap the button in the middle of each lid.  If it stays down, CONGRATULATIONS!  You did it!!  If the button pops back up, YAY you get to eat jam right now!!  Or you can toss those jars in the freezer.  Either way is fine.

The canned jam will keep for up to one year on the shelf.  Frozen jam will keep for about the same amount of time.


Now, let's talk about what reasons you may have for NOT making jam:
  • I have no need to make so much jam.  No problem!  They make little packets of pectin that result in only a couple jars worth of jam.


  • I am NOT spending my precious time standing over a hot stove and stirring!  Two words for you: instant pectin.  Also, you may want to consider using smaller fruit that requires less prepping to make your jam.  OR you could take some time to prep your fruit one day, and make the jam the next.


  • Ok so I have a little bit of time, but no way do I have an entire day's worth to can.  Nobody said you have to can the same day you make the jam.  I promise you will not spend an eternity in Jam Hell for making the jam one day, pouring it in a bowl, and canning it a day or two later.  It really is ok!

  • I'm too intimidated to can, but I still want to make enough jam for the coming months.  Two years ago I was terrified of canning.  Then my mother-in-law told me about freezer jam.  So I got my little box of Sure-Jell, crushed my berries, sterilized my Ziploc containers in the dishwasher, and was popping my jam into the freezer a mere two hours after I started.  
And if you're still not convinced enough to make jam, well, show this post to some of your foodie friends.  A person can only benefit from being friends with someone who loves to make, and share, jam. ;)
Pin It

Tuesday, May 29, 2012

Mini Fruit Pizzas

I'm torn about this one.  A big part of me doesn't want to tell you about this recipe.  Because I like you.  I care about you.  I want to save you from these.

But they are so delicious and so dang addictive that I just can't do it.


You HAVE to make these.  Just don't hold it against me, ok?  Ok.

Mini Fruit Pizzas
Recipe from Cooking Ala Mel

Cookie Base:
1 cup butter
1/2 cup powdered sugar
1 tbsp vanilla
1 cup chopped pecans
2 1/2 cups flour

Sweetened Cream Cheese:
1 (8oz.) pkg cream cheese
1/2 cup powdered sugar
1 tbsp vanilla

2 peeled, sliced kiwis (halved)
6-8 sliced strawberries
blueberries (about 2 or 3 per cookie base)

1.  For the cookie base: Preheat the oven to 350ºF.  

2.  Beat the butter and sugar together until light and fluffy.  Add the pecans and vanilla until fully incorporated.  Add in the flour and mix until just combined - don't overmix!  
You want this a little crumbly.

3.  Line two 12-cup muffin tins with cupcake liners.  This will make pulling the cookies out later SO MUCH EASIER.  Using a small cookie scoop, drop one scoop into each well of the pan.  Press the dough down firmly so it covers the bottom of each well evenly.  Bake for 10-12 minutes, until lightly golden.
Just use your fingers to smush it down.  Be firm.
 GET AHEAD MOMENT: Keep these in the freezer until you're ready to assemble the pizzas!

4.  For the cream cheese mixture: Blend all ingredients together until light and fluffy.  Store in a resealable plastic bag in the fridge until ready to use.  Pull out of the fridge about an hour before assembly.
Smooth. Creamy. Fluffy.  Where's my spoon?

5.  Assemble the pizzas: Snip the corner off the bag containing the cream cheese.  Squirt a dollup of cream cheese onto the cooled cookies; use the back of a spoon or a knife to spread it around.  Top each with a slice of strawberry, kiwi slice and a few blueberries. 


Whether you start making the cookies and cream cheese mixture a few days ahead of time, or the day of, you don't want to put the pizzas together until the last minute.  You want the cookie to stay nice and crisp.  Because I really packed down the cookie dough into the muffin tin, my cookies actually held up for a couple days, although toward the end the cookies were really getting soft.  

These make the most adorable addition to any party table.  I made them for Kieran's first birthday party, just to have a non-chocolate dessert alternative, and I think Gavin didn't even try the cupcakes.  He just kept going back for more fruit pizza!  And he wasn't the only one either... These were such a big hit!

Ok so I am totally going to reiterate the original poster's disclaimer about this recipe... Just because this dessert involves fruit, it should IN NO WAY be considered a healthy alternative.  Go back up to the list of ingredients for the cookie base.  That first item there is BUTTER.  An entire cup of BUTTER.  There's also CREAM CHEESE (I wouldn't recommend using lowfat or Neufchatel here; you want that fat for creaminess).  And SUGAR.  A couple blueberries and a quarter slice of kiwi will not combat the effects of the more fattening ingredients here.  
Pin It

Tuesday, June 14, 2011

Strawberry Upside-Down Cake

I have an abundance of sour cream in my fridge.  Yeah, I know.  It's what happens when you're not quite able to go grocery shopping on your own with two small boys yet so your husband goes with you.  But that's ok.  There are ways, other than the obvious nacho/baked potato topping, to use up this creamy ingredient.

*drool!!!*

Enter this delectable blog, and Kieran's impromptu nap, and you have this lovely confection baking away in the oven.
Mommy's newest sous chef


Strawberry Upside-Down Cake
Recipe adapted from Joy the Baker


For the Topping:
2 tablespoons unsalted butter
1/4 cup brown sugar
1 cup sliced strawberries

For the Cake:
1/4 cup unsalted butter, softened
1/4 cup unsweetened applesauce
2/3 cup brown sugar
1 large egg
1 tsp pure vanilla extract
1 1/3 cups all-purpose flour
1 tsp baking powder
1/4 tsp baking soda
1/4 tsp salt
1/8 tsp cinnamon
1/8 tsp nutmeg
2/3 cup sour cream

1.  Preheat oven to 350.

2.  Place butter in a cake pan (I used a spring form pan but an 8 or 9-inch round will work) and place in the oven.  When butter is melted, remove pan from the oven.  Using two pot holders, tilt the pan around and around, coating the sides of the pan with butter.  Once sides are coated, set aside.  If you're using a spring form pan, set pan on top of a cookie sheet, just in case of leaks.
Prepare to be melted


3.  In a medium bowl, whisk together flour, baking powder, baking soda, salt, cinnamon, and nutmeg.  Set aside.
Two of my favorite spices in baked goods


4.  In a large bowl, cream butter, applesauce, and brown sugar on medium speed with an electric mixer.  You can use a stand mixer too, fitted with a paddle attachment.  Cream until slightly pale and fluffy, about 3 minutes.  Stop mixer, scrape down the bowl with a spatula, and add egg and vanilla extract.  Beat for 1 minute.


5.  Turn the mixer off, scrape the bowl, and add the dry ingredients.  Beat on low speed while adding the sour cream.  Beat until the batter just comes together; it will be thick.  Remove the bowl from the mixer and finish incorporating ingredients with a spatula.
I have so much, I didn't think leveling the cup was necessary


6.  Sprinkle 1/4 cup brown sugar into the melted butter in the cake pan.  Sprinkle strawberry slices over the butter and sugar in a single layer.  Spoon batter over the strawberries and spread evenly with a spatula.  Bake for about 35 minutes, or until a skewer inserted in the center comes out clean.


7.  Let cake rest for 10 minutes before running a knife around the edge of the cake and inverting the cake onto a cake plate.  Serve warm with whipped cream or a drizzle of chocolate syrup.
Thick batter makes for a dense, moist cake
Pin It

Monday, May 9, 2011

Strawberry Sauce

This is quickly becoming my favorite time of year.  Temps are warming up.  Kids are starting to play outside more.  Grills are getting dusted off and that smoky aroma permeates neighborhoods everywhere.  Garden stores are shouting at us all to stop in, get some plants, grow your own food.  Strawberries are in season.

Oooohhhh strawberries.....

Yes, I am that person who will sit by the fruit tray at parties and eat up all the luscious red berries first (sans dip of course, unless we're talking whipped cream).  I love, love, LOVE strawberries!  There's a winery not too far from me that not only makes strawberry wine special every year, but has this enormous festival celebrating the delightful berry gem!

I love it.

Do you ever struggle though with what to do with all the berries you've purchased?  Perhaps when they're on crazy sale you go a wee bit too crazy and have more than you can feasibly eat before they go bad.  Never fear... I have your solution!

Strawberry Sauce
Recipe from Rachael Ray

2 lbs fresh strawberries, coarsely chopped
3 tbsp dark brown sugar
Juice of two lemons (approx. 4 tbsp)

1.  Combine the strawberries, brown sugar and lemon juice in a large saucepan and bring to a simmer over medium-low heat, stirring, until the sugar dissolves. Partially cover with a lid and simmer, stirring occasionally, until the strawberries are softened and release their juices, about 10 minutes. Let cool.
I've stopped measuring the sugar and juice.  Just add to taste!

2.  Pour the strawberries into a blender or food processor and blend until smooth.  If you have an immersion blender, use that (less dirty dishes = WOO HOO!).
Berries before.

Berries after. I love my immersion blender!

3.  Press the sauce through a fine-mesh strainer into a storage container.  Straining it will get out any pulp that didn't puree well, and also the bulk of the seeds, leaving you with this luscious, velvety-sweet sauce that's just AMAZING.  If the seeds don't bother you though and you're in a hurry, feel free to skip the strainer and pack up the pureed sauce as is.  The sauce will keep for up to 10 days in the refrigerator or up to 6 months in the freezer.
This seriously tastes like liquid velvet.

I've been making this sauce for years but I think this is the year for it to become MAJORLY popular in my house.  Gavin's suddenly aware of it and requests "strawberry syrup" with his pancakes every weekend now.
Scraping the sauce of his plate with his fork.

I've also discovered a new use for this sauce, as well as a new favorite summertime drink: Strawberry Soda.  Pour a tablespoon or two of the sauce into a glass with ice.  Fill glass with lime seltzer and stir to combine.  DELICIOUS!!!  I need to stock up on lime seltzer.

Pancakes.  Soda.  Those are some more obvious uses for this sauce but you can literally do anything with it.  Stir it into some plain yogurt with some chopped kiwi or pineapple.  Use it as a base for a pork tenderloin marinade.  Or just eat it over ice cream!  Explore, get creative. :)
Pin It

Tuesday, April 26, 2011

Bourbon-Glazed Ham with Strawberry Spinach Salad

I am not a whiskey person.  Rob has given me samples of several different whiskies in the past (BEFORE I was pregnant...don't look at me like that) and it always tastes like what I imagine lighter fluid would taste like.  Ew.

But to cook with it....oh man, magical things happen.  We are particular fans of what happens when bourbon meets pork.  And because we like the flavor combination so much, when I found this recipe as I was searching for what to make for Easter dinner, I was pretty sure this would work well.

I think it actually blows "well" out of the water.  "Fantastic" is probably a more apt description.

Bourbon-Glazed Ham
Recipe from AllRecipes

One 5lb ham
1/3 cup bourbon whiskey
1/2 cup packed brown sugar
1 (8 ounce) can crushed pineapple in juice
1/2 cup honey
3 cloves garlic, minced
1 1/2 cups water
1 (8 ounce) can pineapple rings

1.  Score the surface of the ham, making diamond shapes about 1/2-inch deep. Place the ham in a large, resealable bag (if you don't have a bag large enough, put in a casserole dish and baste the ham periodically).  Add the bourbon, brown sugar, crushed pineapple, honey, and garlic to the bag; refrigerate at least 8 hours, turning the bag over several times while marinating.  
Yummy marinade! And then I realized my ham was too big for the bag...

2.  Preheat oven to 350. 

3.  Transfer the ham and marinade to a large baking dish; pour the water into the dish. Attach the pineapple rings around the surface of the ham with toothpicks. 


4.  Bake in preheated oven until the internal temperature reaches 165 degrees F, basting about every 30 minutes with the sauce in the pan, 90 to 105 minutes. 


Now, let's say you're a little distracted and you don't fully read this recipe until that whole 8-hour marinade time has been severely shortened.  Letting it sit in the bourbon goodness for 3 hours or so is perfectly fine too.  There's still enough flavor infused into the meat that your taste buds will be shouting for joy.


I also made sure to get a bone-in ham.  Not only does having the bone mean more flavor, but it also helps keep the meat moist.  I also like to make sure I have the ham bone to make a particularly beloved soup (oh don't worry...you'll hear more about that one later on).  If you're really not a fan of having bones in your meat though, getting a boneless ham is perfectly fine.  You may want to baste it a little more frequently to keep it moist.


A great, Spring-y compliment to this dish?  Strawberry Spinach Salad.  This one is so easy I'm not even going to give you a recipe because there really isn't one; everything is to taste.  

Take a bag of pre-washed baby spinach (don't feel like spending the extra $ on baby spinach? Get regular and give it a rough chop) and put it in a salad bowl.  Wash and quarter as many strawberries as you feel like using and toss in with the spinach.  Roughly chop and TOAST about a 1/2-3/4 cup of almonds; add these just before serving (yes, you want to toast them first.  Trust me).  Voila!  Basic Strawberry Spinach Salad. :)
Toasting brings out the oils and gives that crunch a special oomph

Doesn't this just SCREAM Spring time???


I like the salad with a pre-made, creamy poppyseed dressing.  However if you have another tangy-sweet dressing that you like, use that instead.  If I wasn't feeding a 3-year-old this salad, I'd also add a LITTLE BIT of THINLY SLICED red onion.  Not only for that onion zip but also for that gorgeous purple color.


Feel free to round out this meal with, oh say, Scalloped Potatoes. ;) And there you have my Easter Feast!
FYI, don't slice your potatoes too early; they'll oxidize. Lesson learned.
Pin It