Wednesday, December 28, 2011

Monkey Bread

"Hey Gavin, guess what Mama's making for breakfast Christmas morning?"

"What?"

"Monkey bread!"

..............."Oh.  How many monkeys is she putting in it?"

My boy is too funny.  Anyway, this is our Christmas morning tradition.

Monkey Bread
Recipe from my mother-in-law; method slightly adapted

1/2 cup chopped pecans
1/2 cup granulated sugar
1 tsp cinnamon
3 (10oz) containers refrigerated biscuits [NOT Grands!!! Trust me on this one.]
1 stick butter, melted
1 cup brown sugar

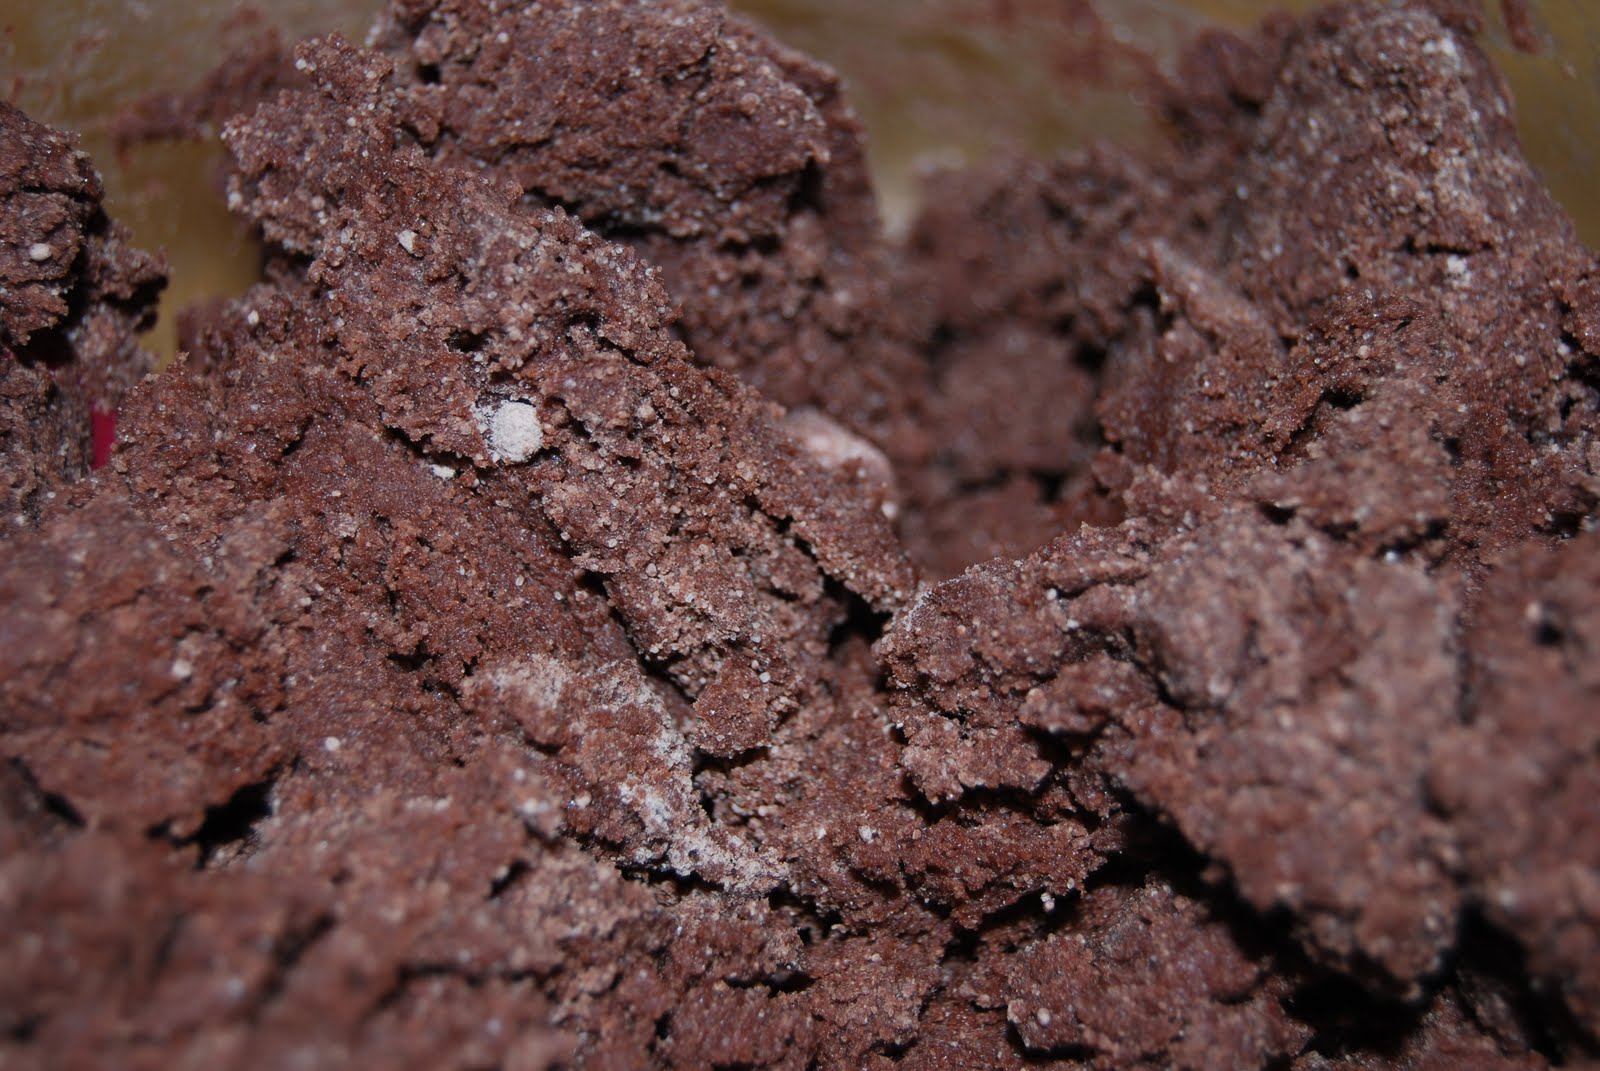
1.  Liberally grease a large bundt pan with cooking spray.  Sprinkle pecans around the bottom and set pan aside.  Combine granulated sugar and cinnamon in a resealable plastic bag.
A cinnamon bomb went off on the sugar


2.  Working in batches, use kitchen shears to cut each biscuit into quarters and toss into the sugar mixture.  Seal the bag and toss to coat the biscuit pieces.  Layer the pieces evenly in the bundt pan. 
No need to be precise, but try to keep it somewhat even.


3.  Whisk together the melted butter and brown sugar.  Drizzle the butter mixture over the "top" of the bread (this will actually become the bottom once it's baked).  At this point, you can either bake it right away or cover it and put it back in the fridge.  Because it takes me about 40 minutes to put it together, I always make it the day before.
I feel positively decadent just looking at this.


4.  If you've refrigerated the assembled bread, pull it out at least 30 minutes before baking.  Preheat oven to 350.  Bake for 40-45 minutes; let cool in the pan for 10 minutes.  Cover the bundt pan with a platter and carefully flip it over (you may need to give it some encouragement with a knife around the edges).  Voila!
Don't touch yet!!  It HAS to rest 10 minutes before inverting.  Set a timer. Walk away.


Your patience is rewarded.


This is an easy yet impressive breakfast item because it just looks so pretty!  And since it's REALLY SWEET, I like to serve this with some kind of eggs and a fresh fruit salad just to round things out a little more.
Gavin was panting at the table in anticipation.
Pin It

Friday, December 23, 2011

Yogurt Pancakes

We are a Pancake House.  I think I've mentioned here before how much my son LOVES pancakes.  He's not alone!  Rob and I also love to drown golden disks of goodness in butter and syrup.  Is there any happier way to start a weekend?
Simple.  Homey.

Rob tends to be more traditional in his pancake love.  He'll happily eat whatever I make but, given the choice, it's Buttermilk Pancakes all the way.  And if you haven't figured me out yet, let me spell out my preference for you: I like to experiment.  I REALLY love pancakes that are light, fluffy, and have a flavor that's awesome enough to complement whatever I want to put on it.  I'm a big fan of alternative pancake toppings like fruit, chocolate, and whipped cream with a little cinnamon or nutmeg.

There was one Saturday morning where I think I went to make Rob's preference and realized, as this happens to me frequently, that my buttermilk was way beyond it's sell by date.  Man I HATE that.  Why does buttermilk have to spoil so quickly???

What?  Oh yeah, pancakes.  Anyway, I looked around and found a recipe for pancakes using an ingredient that I ALWAYS have around: yogurt.

Yogurt Pancakes
Recipe from Food Network Magazine

1 1/2 cups flour
3 tbsp sugar
1 tsp baking powder
1/2 tsp baking soda
1/2 tsp salt
1 1/4 cups plain yogurt
1/2 stick butter, melted
2 eggs
1/2 tsp vanilla

1.  Preheat a skillet over medium LOW heat.  Yes, low.  I'll explain why later.

2.  Whisk together the flour, sugar, baking powder, baking soda, and salt in a large bowl.  In a medium bowl, combine the yogurt, butter, eggs, and vanilla.
Yeah, I over-measured. But I caught myself before I dumped all of this into the bowl.


3.  Whisk the yogurt mixture into the flour mixture until just combined.  Yes, the batter will be thick and feel dense.  Stay with me, these are awesome.
It's a dark picture but I want you to see just how thick this batter is.


4.  Ladle 1/4 cupfuls of the batter onto the hot, greased griddle and spread it out a little bit.  You may not see bubbles as easily with this batter so watch the edges for slight browning to know when to flip.  Keep the heat on the low side of things so as to not burn the outside before the inside cooks.  Serve hot with whatever toppings you like.
Cook these low and slow.


The first time I made these, I had knots in my stomach over the batter.  I was convinced they were going to be these heavy, hockey-puck-esque cakes that would sit in our stomachs like lead.  Boy was I so happily wrong!!  These are light, fluffy, and moist.  Rob of course like his traditional butter and syrup on his, and sometimes I like to join him in that.

But if you're in the mood for something else, and say you happen to notice you have apples that are starting to go on you.  Perhaps make some chunky applesauce with them with some brown sugar, a little lemon juice, cinnamon, nutmeg, and cloves... that's also quite AMAZING on these cakes. ;)
Pin It

Wednesday, December 21, 2011

Festive Fudge Blossoms

Christmas is merely minutes away.  Or, at least that's what it feels like to me.  I am STILL baking and decorating cookies.  I have dozens and dozens of the sugary confections already decorating my dining room table so why on earth am I compelled to keep going?

Because it's Christmas dammit!  And this is the only time of year I can bake cookies with maniacal abandon and be totally normal.  So COME TO MY HOUSE AND EAT COOKIES PLEASE!!!
Who wouldn't love cookies for Christmas??


Anyway, where was I?  Oh yes, the origins of this particular recipe... It was my first Christmas in an apartment.  I was in college and had a BURNING desire to make some Christmas cookies.  But I was dirt poor and hadn't developed a fully-stocked pantry yet.  I needed a cookie recipe that didn't require me to go out and buy pounds and pounds of flour, sugar, and butter.  I needed quick, cheap, and easy.

I don't think it gets any faster, cheaper, or easier than cake mix.

Festive Fudge Blossoms
Recipe from Santa's Favorite Cookies cookbook

1 box chocolate fudge cake mix
1/4 cup butter or margarine, softened [FYI, I've tried both and find margarine easier to work with here]
1 egg, slightly beaten
2 tbsp water
3/4 to 1 cup FINELY chopped walnuts
Chocolate stars

1.  Preheat oven to 350.
Hard to tell from here but the margarine has been cut in.


2.  Using a dough cutter, fork, or whisk, cut the margarine into the cake mix in a large bowl until coarse crumbs form.  Stir in egg and water until well blended.
Dough doesn't look like this? Keep stirring.  It takes a little bit.


3.  Shape dough into 1/2-inch balls; roll in walnuts, pressing nuts gently into the dough.  Place about 2 inches apart onto an UNGREASED baking sheet.
I love walnuts.

4.  Bake cookies 12 minutes, or until puffed and nearly set.  Place a chocolate star in the center of each cookie and bake another minute.  Cool 2 minutes on baking sheet.  Remove cookies from baking sheets to wire rack to cool completely.
The chocolate cousins of Hershey Kiss Peanut Butter Blossoms


Depending on how big you like your cookies, this recipe can yield between 2 and 4 dozen cookies.  I like A Cookie so I usually get a couple dozen.
Pin It

Saturday, December 17, 2011

Honey Baked Chicken

So I've been arguing with myself this week over whether or not to share this recipe with you.  Not because it tastes "meh" or anything... the flavor in this dish is fantastic!  Moist, tender chicken baked in an easy, rich, flavorful sauce.  Why should I hesitate over sharing that??

I hesitate because, well, the story behind this dish is embarrassing.  But, it's just too good to keep to myself!

I first made this dish a rather long time ago.  Knowing my luck it's probably been at least a year, if not closer to two years ago.  You see, I'm not entirely sure when I made this because..........................

I forgot about it.

No wait!  I promise it's REALLY GOOD!!  It was so good I raved about it to my mother-in-law and even e-mailed her the recipe.  It was so good that I set it aside with every intention of making it again "soon."  And then the weeks went by.  And weeks turned into months.  And as I explored other recipes (because that's what I like to do), I just, well, forgot about it.

But the really embarrassing part is when my mother-in-law mentioned she was making "my" honey chicken and I just totally blanked.  "What honey chicken?"  Thankfully she is wonderful and gracious and forgiving of my faulty memory.  AND sent the recipe back to me so I could refresh that memory personally.

I swear I won't forget this dish again!  And I bet you won't either once you make it.

Honey Baked Chicken
Recipe from Idon'trememberwhere but returned to me by my mother-in-law

3 lbs chicken pieces
1/4 cup butter, melted
1/2 cup honey
1/4 cup prepared mustard (yellow or Dijon, either is great)
1 tsp salt
1 tsp curry powder

1.  Preheat oven to 350.
GORGEOUS golden color


2.  Put the chicken pieces in a 9x13 baking dish.  Combine remaining ingredients and pour over chicken.  Cover with foil and bake 30 minutes.
Even using less than 3lbs of chicken, I like to make the full amount of sauce


3.  Remove foil and baste chicken with the sauce.  Continue to bake, uncovered, for another 45-60 minutes, basting the chicken every 15 minutes.  TOTAL BAKING TIME: 1 hour, 15 minutes to 1 hour, 30 minutes.
Basting keeps it moist while helping build this fantastic crust on top


The butter in this sauce makes it rich.  The honey makes it sweet, but the mustard cuts that so it's not SWEET.  The curry deepens the flavor, and could make it a little spicy depending on what kind of curry powder you have (I use sweet curry powder).  And the salt enhances everything.  There really isn't anything about this dish I don't like.  But the best part for me is the cost.  Everything on this list I ALWAYS have on hand so there's nothing extra I have to buy to make it.  Bonus!!

Oh, and a recommendation if you have young children: spend the afternoon watching Winnie the Pooh movies or cartoons, anything that really plays up Pooh's honey obsession, then have this for dinner.  You could serve this with rice and some steamed veggies, or hot crusty bread (to soak up that yummy sauce!!) and a green salad.
Pin It

Wednesday, December 14, 2011

Hot Spinach-Artichoke Dip

Spinach-artichoke dip is one of those things where it sounds like it really should be good for you, but ohmygraciousareyouKIDDINGme it's not.  It's a gloriously rich, decadent appetizer that I typically stare at longingly on a restaurant menu before dramatically sighing and selecting something that won't have my stomach, or my thighs, launching a mutiny.

And then I discovered this fabulous recipe.  Bring on the pita chips because this girl is eating as much as she wants!!

Hot Spinach-Artichoke Dip
Recipe adapted from Food Network Magazine

1 box frozen, chopped spinach, thawed and squeezed dry
1 tsp dried basil
3/4 cup canned white beans, drained and rinsed
6 ounces Neufchatel cream cheese
1 clove garlic, smashed
1/2 cup low-sodium chicken broth
1 14-ounce can artichoke hearts, drained, squeezed dry and finely chopped
1/4 cup grated parmesan cheese
3/4 cup shredded low-fat mozzarella cheese, divided
Pinch of cayenne pepper
2 or 3 dashes Worcestershire sauce
Kosher salt and freshly ground black pepper

1.  Preheat the oven to 450.
The secret ingredient that helps lighten this dish.


2.  Puree the beans, cream cheese, garlic and chicken broth in a food processor until smooth, scraping the sides as needed. Transfer to a medium bowl and fold in the spinach, basil, artichokes, parmesan and 1/2 cup mozzarella. Add the cayenne, Worcestershire sauce, 1/2 teaspoon salt, and black pepper to taste.
I like a good amount of seasoning


3.  Mist a deep 1-quart casserole dish with cooking spray. Spread the dip mixture in the dish and top with the remaining 1/4 cup mozzarella. Bake until golden and bubbly, 20 to 25 minutes. Serve warm with baked chips.
Can you resist melty, cheesy goodness?  Because I can't.


Pin It

Friday, December 9, 2011

Pumpkin Pie

The holidays are such fun, but MAN are they crazy busy!!  This weekend especially is pretty hectic but I continue to try and squeeze in as much cooking and baking as possible.  All because I love you guys so much!

So, I know pumpkin pie is usually a Thanksgiving thing, but I didn't have my camera on me with I baked it.  I absolutely LOVE this recipe though and am convinced you will too.  So, I made another one.  Oh, the sacrifices... ;)

I primarily hold my mom responsible for my love of cooking and baking.  However, it was her sister who gave me my first cookbook.  It was Christmas.  I was 6.
Not all great recipes come from celebrity chefs.


There are a few delightful recipes that came out of that book that I still use today.  Yes, I'm about to share my pumpkin pie recipe with you, one that I've been making since I was about 7 years old.


Pumpkin Pie
Recipe adapted from Kids in the Kitchen


Pie Crust:
1 1/2 cups flour
1/2 tsp salt
1 tbsp sugar
1/2 cup canola oil
2 tbsp milk


Filling:
2 eggs, slightly beaten
1 can pumpkin
3/4 cup firmly-packed brown sugar
1/2 tsp salt
1 tsp cinnamon
1/2 tsp ground ginger
1/2 tsp cloves
1 can evaporated milk

1.  For the crust: sift flour, salt, and sugar together into a 9-inch pie pan.  Add milk and oil; mix using a fork or your fingers.  Pat the dough out to cover the pan.
I've never gotten a fork to work as well as just using my hands


2.  For the filling: combine all ingredients in a large bowl.  Pour into the prepared pie shell.
Mmmmmmmmmmmm....


3.  Bake at 425 for 15 minutes, then at 350 for 45 minutes.
*drool*


Since I've been making this pie for so long, I'll go ahead and let you in on a few things I've learned about this pie.  First, and MOST important, do NOT confuse the salt and sugar in the crust.  It's very easy to do, but the result is a nasty, yucky pie.  Yes, been there. Also, when you are paying such close attention to getting the measurements right for the crust, make sure you don't do something really silly, like forgetting to add the sugar in the filling.  Uh-huh, done that.

I will say that when it comes to the spices, be generous.  If you want to sprinkle a little extra cinnamon on the crust and/or on top of the filling, do it!  This pie is best consumed with LOTS of whipped cream on top.
Pin It

Tuesday, December 6, 2011

Garden Vegetable Soup

This is a Mad Soup.

And now you're probably wondering what on EARTH makes this a Mad Soup.  And is there really such a thing as a "Mad Soup"??  Oh yes, yes there is.

I could go with the obvious and say that eating this soothing soup will make all intense emotions mellow out and float away.  I could also say that the aromas of all the vegetables simmering away in the rich broth will smooth out that furrow of frustration on your forehead.

But let's be honest here...  this is a Mad Soup because you get to chop stuff.  A lot of stuff.  And since beating up on meat isn't really my thing, I prefer to work out my frustrations by cutting up vegetables.

Garden Vegetable Soup
Recipe adapted from Alton Brown

4 tbsp olive oil
2 cups chopped onion
2 tablespoons finely minced garlic
Kosher salt
2 medium carrots, peeled and chopped into rounds 
2 peeled and diced potatoes
2 cups fresh or frozen green beans, broken or cut into 3/4-inch pieces
1 cup chopped celery, with leafy tops
1 quart chicken or vegetable broth
1 cup-ish white wine [get one of those mini bottles and pour into a 4-cup measuring cup.  Fill the rest of the way with water]
3 cups-ish water
1 quart bag of roasted tomatoes, chopped
2 cups fresh or frozen corn
1 cup broccoli florets
1/2 tsp freshly ground black pepper
1/4 cup packed, chopped fresh parsley leaves
1 to 2 tsp lemon juice

1.  Heat the olive oil in large, heavy-bottomed stockpot over medium-low heat. Once hot, add the onion, garlic, and a pinch of salt and sweat until they begin to soften, approximately 7 to 8 minutes. Add the carrots, potatoes, green beans, and celery and continue to cook for 4 to 5 more minutes, stirring occasionally.  Season again with salt.
Some of the veggies that felt the wrath of my knife.

2.  Add the wine, water, and stock, increase the heat to high, and bring to a simmer. Once simmering, add the tomatoes, corn kernels, broccoli, and pepper. Reduce the heat to low, cover, and cook until the vegetables are fork tender, approximately 25 to 30 minutes. Remove from heat and add the parsley and lemon juice (do NOT leave these out!!). Season, to taste, with kosher salt. Serve immediately with some hot, crusty bread.
All those gorgeous COLORS!!

Couple things to point out here, aside from the obvious satisfaction I derived from chopping up all these great veggies.  Usually when recipes call for a lot of oil or butter, I cut it back or out altogether.  However there is no meat in this to generate any additional fat so you really do need 4 tbsp of oil to get everything working.  Also, don't be afraid to season each layer of ingredients that you add to the pot.  Again, there's no meat or cheese in this, and vegetables can be pretty bland unless seasoned properly.  Be sure to taste this before serving to make any seasoning adjustments.

One of the cool things about this soup is that it's a great base to do whatever you like to it.  Have a diehard Carnivore in your house who's giving you the stink eye for making something vegetarian?  Toss in some shredded chicken or turkey.  Make this more of a tomato-y soup by replacing the wine/water with tomato juice.  Add some whole wheat pasta to this, or barley, or rice, or beans.  Do whatever you like!!  That's the beauty of soups like this one.
Pin It

Thursday, December 1, 2011

Contingency Plan

Some habits are tough to break.  Like stocking up the freezer with Make Later meals.  I mean, I'm at home now so the theory is that I have "more time" (HAHAHAHAHAHAHAHAHAHA!!!!!!!!) to cook.  So why the heck am I still doubling soup recipes, dividing casseroles in half, and sticking pre-cooked meats in the freezer to use later on?

Contingency plan, my friends.  Plan for the unexpected.

If anyone flat-out told me that staying home full-time with my kids would be harder, and WAY more exhausting than working outside the home, I did not listen.  Please accept this humble mommy's apologies!!  Exhausted Days call for soup.  I like soup a lot.  Thai Chicken soup and Creamy Roasted Tomato soup are oh-so-nice to eat on Exhausted Days.

There are Frantic Days too.  Do you have Frantic Days in your life?  I haven't really hit those quite yet, but I plan to next year.  That's when Gavin will start school, plus I want to enroll him in a few energy-sucking extracurriculors like soccer or gymnastics.  What does a busy family eat on a Frantic Day?  How about Chicken Parm Casserole, Hearty Burritos, quesadillas, or spaghetti.

Or how about days like today?  Today is a Sick Day.  My littlest guy is fighting off a barrage of yuck, which medicines are thankfully starting to work.  And this morning I went to get my oldest up and stepped in a puddle of...well, this is a food blog so we won't really go there but you get the picture.  There's sickness in my house.  So Gavin's on a bland diet today, and Kieran only eats baby food right now but Mama and Daddy still have to eat.  All I have to say is THANK GOD for the pan of Chicken Enchiladas I found in my freezer.

Today I have officially learned this valuable lesson.  Keeping cooking ahead, keep freezing, keep planning for the unavoidable.  The inevitable.  Because that day will come when finding something as simple as a meal ready-to-go in your freezer will cause you to cry tears of joy. 
Pin It