Friday, April 29, 2011

Microwave Tuna Casserole

Ok, so before you shoot me down on this one, I'm hoping you'll take a look at the recipe and maybe even give it a shot.  Tuna casserole has a reputation; you either like it or you don't.  When I was little, if you asked me about this dish I probably said I didn't care for it.  I didn't outright hate it though; you could say I had a "meh" relationship with this casserole.  I think I was in high school when my mom came across a new tuna casserole recipe and that one TOTALLY changed how I feel about this classic dish.


Not only did I like the taste of this one better, but you also cook it in the microwave.  No oven necessary...wahoo!!

Microwave Tuna Casserole
Recipe from my mom

1 cup short-cut pasta, uncooked
1 cup shredded cheddar cheese
1 cup frozen peas [if you're out of or don't like peas, just use another frozen vegetable]
2 cans of tuna, drained
1/4 cup diced onion
1 can cream of mushroom soup
1 soup can milk

Note: THIS HAS TO BE ASSEMBLED AHEAD OF TIME.

1.  Combine all ingredients in a casserole dish.  Cover and refrigerate at least 8 hours.
Bowls are overrated; stir it up in the baking dish!


2.  Let come to room temp (if you've got the time).  Microwave on HIGH for 20 minutes.
Ready for a soak!

Yeah, that's really all there is to it.  Super easy to assemble.  Super easy to cook.  And I happen to think it tastes fantastic!
Pin It

Thursday, April 28, 2011

Broccoli Salad

I figure there are two groups of people on this one...you either know what I'm talking about, or you don't.  If you don't, please allow me to enlighten you.  This salad, though sounds like the epitome of healthy eating, is really just about anything but.  Yes, there's broccoli in it..........and cheese, and bacon, and a "dressing" that's really just lightly flavored mayonnaise. 

The first time I had this salad was at a family gathering.  The flavor was Ah-MAY-zing!! However that night, I was reminded that my stomach isn't like other peoples' stomachs.  It doesn't like excessive amounts of grease and fat.  So for years I have admired this salad from afar, too chicken to even have a bite or two, lest I offend my fat-sensitive Stomach.

But I've been learning a thing or two about cooking in the last 10 years or so.  One of my favorite tricks is substituting yogurt for sour cream or mayonnaise in recipes.  Ok Broccoli Salad....I'm ready for you.  Let's do this and see what happens.

Broccoli Salad
Recipe adapted from Paula Deen

6-8 slices thick-cut bacon
1 head of broccoli
1 small red onion, thinly sliced (I don't often have red onion; so I just use a little finely chopped whatever-onion-I-have-around)
2 tomatoes, chopped
8 oz sharp cheddar cheese, cubed
1/2 cup (ish) dried cranberries
1 cup (ish, a little less probably) plain yogurt
2 tbsp mayonnaise
1/4 cup sugar
2 tbsp apple cider vinegar

1.  Preheat oven to 400.  Lay bacon on a broiler pan in a single layer and bake until crisp, about 20 minutes.  Blot any excess grease with paper towels.  Let cool and crumble into bite-sized pieces.

Or you can use a cookie sheet for a little extra crispy bacon.

2.  In a large bowl, combine broccoli, onion, tomatoes, cheese, dried cranberries, and bacon.  Toss to combine.
Love those colors!!


3.  In a small bowl, whisk together yogurt (use Greek-style if you want a thicker dressing), mayo, sugar, and vinegar.
I am rarely without a giant container of plain yogurt in my fridge.

4.  Drizzle as much or as little dressing as you like over the salad.  Toss to make sure everything is lightly coated.  Refrigerate until ready to serve.


I dare you to try this and see if you can tell the difference in taste.  Bet you can't. ;)
Pin It

Wednesday, April 27, 2011

California Club Sandwich

Have you ever watched one of those cooking shows and the person is explaining how they were inspired to make this particular (complicated) dish based on something they ate recently and some restaurant in a far-off city that normal people like you and me will never visit?  Yeah, me too.  I hate it when they do that.  I feel like I have no creativity when they do that because I'm soooo dependent on recipes.

And now I'm about to do it to you.  Crud.  Forgive me?

I have to say though that I wasn't "inspired" by a dish I actually ate; I flat-out wanted to duplicate a sandwich I saw listed on the menu.... and based on the description, which was essentially the ingredient list, I thought I could do it.  And if not, hey, there's bacon involved so it can't be that bad, right?


Honestly, because I didn't order the sandwich I have no idea if I succeeded in my duplication efforts or not.  Quite frankly I don't really care.  What I came up with is SO GOOD, I'm just going to keep making it as is.  So there.

California Chicken Club Sandwich
Recipe inspired by Bar Louie menu item


4 boneless, skinless chicken breast cutlets
1 yellow onion, cut into 1/4" thick slices
Extra virgin olive oil
Salt and freshly ground black pepper
2 ripe avocados
Lemon juice
2 tomatoes, sliced
1/2 lb thick-cut bacon, cut in half and baked in the oven (baked bacon doesn't crinkle as much and is easier to eat in a sandwich)
4 slices pepperjack cheese
1/4 cup (ish) Ranch dressing
Multi-grain sandwich bread

1.  Preheat broiler.  Lay the chicken cutlets and onion slices on a broiler pan.  Drizzle both sides of everything with extra-virgin olive oil and season with salt and pepper.  Broil about 6 minutes per side until onions are soft and chicken is cooked through.  NOTE: this step would be AWESOME on the grill!
I used a little Rosemary oil, just for an added flavor boost

2.  Because sliced avocado can be slippery (as are several other components to this sandwich), I decided to smash mine up with a little bit of lemon juice and salt.  I purposely left it pretty chunky though so it wouldn't feel like an "avocado spread."
I could've just had this for dinner and been deliriously happy

3.  Toast 8 slices of multi-grain bread.

4.  Rob and I each assembled our sandwiches a little differently.  I liked:
  • Bottom toast, spread a little Ranch dressing
  • A few pieces of onion
  • Chicken cutlet
  • 3-4 pieces of bacon
  • Pepperjack cheese; toss under broiler for a few seconds to melt the cheese slightly
  • 2 slices tomato
  • Healthy dollops of avocado
  • Top toast
Yes, I had to unhinge my jaw a little to eat this.  WORTH IT!!
The leftovers did not even last 24 hours.  Are we surprised by this?  Nope!
    Pin It

    Tuesday, April 26, 2011

    Bourbon-Glazed Ham with Strawberry Spinach Salad

    I am not a whiskey person.  Rob has given me samples of several different whiskies in the past (BEFORE I was pregnant...don't look at me like that) and it always tastes like what I imagine lighter fluid would taste like.  Ew.

    But to cook with it....oh man, magical things happen.  We are particular fans of what happens when bourbon meets pork.  And because we like the flavor combination so much, when I found this recipe as I was searching for what to make for Easter dinner, I was pretty sure this would work well.

    I think it actually blows "well" out of the water.  "Fantastic" is probably a more apt description.

    Bourbon-Glazed Ham
    Recipe from AllRecipes

    One 5lb ham
    1/3 cup bourbon whiskey
    1/2 cup packed brown sugar
    1 (8 ounce) can crushed pineapple in juice
    1/2 cup honey
    3 cloves garlic, minced
    1 1/2 cups water
    1 (8 ounce) can pineapple rings

    1.  Score the surface of the ham, making diamond shapes about 1/2-inch deep. Place the ham in a large, resealable bag (if you don't have a bag large enough, put in a casserole dish and baste the ham periodically).  Add the bourbon, brown sugar, crushed pineapple, honey, and garlic to the bag; refrigerate at least 8 hours, turning the bag over several times while marinating.  
    Yummy marinade! And then I realized my ham was too big for the bag...

    2.  Preheat oven to 350. 

    3.  Transfer the ham and marinade to a large baking dish; pour the water into the dish. Attach the pineapple rings around the surface of the ham with toothpicks. 


    4.  Bake in preheated oven until the internal temperature reaches 165 degrees F, basting about every 30 minutes with the sauce in the pan, 90 to 105 minutes. 


    Now, let's say you're a little distracted and you don't fully read this recipe until that whole 8-hour marinade time has been severely shortened.  Letting it sit in the bourbon goodness for 3 hours or so is perfectly fine too.  There's still enough flavor infused into the meat that your taste buds will be shouting for joy.


    I also made sure to get a bone-in ham.  Not only does having the bone mean more flavor, but it also helps keep the meat moist.  I also like to make sure I have the ham bone to make a particularly beloved soup (oh don't worry...you'll hear more about that one later on).  If you're really not a fan of having bones in your meat though, getting a boneless ham is perfectly fine.  You may want to baste it a little more frequently to keep it moist.


    A great, Spring-y compliment to this dish?  Strawberry Spinach Salad.  This one is so easy I'm not even going to give you a recipe because there really isn't one; everything is to taste.  

    Take a bag of pre-washed baby spinach (don't feel like spending the extra $ on baby spinach? Get regular and give it a rough chop) and put it in a salad bowl.  Wash and quarter as many strawberries as you feel like using and toss in with the spinach.  Roughly chop and TOAST about a 1/2-3/4 cup of almonds; add these just before serving (yes, you want to toast them first.  Trust me).  Voila!  Basic Strawberry Spinach Salad. :)
    Toasting brings out the oils and gives that crunch a special oomph

    Doesn't this just SCREAM Spring time???


    I like the salad with a pre-made, creamy poppyseed dressing.  However if you have another tangy-sweet dressing that you like, use that instead.  If I wasn't feeding a 3-year-old this salad, I'd also add a LITTLE BIT of THINLY SLICED red onion.  Not only for that onion zip but also for that gorgeous purple color.


    Feel free to round out this meal with, oh say, Scalloped Potatoes. ;) And there you have my Easter Feast!
    FYI, don't slice your potatoes too early; they'll oxidize. Lesson learned.
    Pin It

    Monday, April 25, 2011

    Scalloped Potatoes

    Taking you back for another childhood recipe!!  I just love this one... and really, what's not to love?  Thinly sliced potato, baked in a creamy sauce, topped with cheese.  My mom always called this Scalloped Potatoes, which is how I think of this cheesy dish.  Others may want to call this Au Gratin Potatoes.

    Call this what you will, it's just plain comforting goodness. :)

    I could eat this right out of the casserole dish.  Yup, not kidding.

    Scalloped Potatoes
    Recipe from my mom


    5 russet potatoes
    1/4 cup butter
    1/4 cup onion, chopped
    1/4 cup flour
    2 1/2 cups milk
    1 1/4 cups shredded cheddar, divided

    1.  Preheat oven to 350.  Melt butter medium-sized pot over medium-high heat.  Add the onions and saute for a few minutes, until softened. Whisk in the flour and let that cook for a few minutes.
    I store extra chopped onion in little containers to save time.

    2.  Whisk in the milk and let that slowly heat and thicken (yup, you're making a bechamel sauce).  Season with salt and pepper to taste.  Once thickened, remove sauce from heat and stir in the cheese.


    3.  As the sauce thickens, thinly slice the potatoes.  If you're feeling particularly domestic, feel free to do this by hand, it doesn't really take that long actually .  If you're in a hurry though, I strongly recommend doing this in the food processor.  Layer half the sliced potatoes in the bottom of a greased 2-quart casserole dish.
    THIN (well, thanks to my food processor)

    4.  Pour half the sauce over the potatoes.  Repeat layers.*  Bake, COVERED, at 350 for 45 minutes, stirring once.  Remove cover, sprinkle with remaining cheese and bake an additional 30 minutes.


    *If you were making this ahead of time you can at this point cool, cover, and freeze the dish to bake later on.  Since there are only not-quite-4 in my family, I split this in half as I made it and baked one right away, putting the other away in the freezer for another time.  I will thaw before baking and then follow the normal baking instructions.
    Pin It

    Saturday, April 23, 2011

    Chicken Cordon Bleu

    So now you know my secret that sometimes I get bored with recipes, and sometimes I get stuck.  When this happens I like to ask Rob if there's anything he'd like for me to make that he hasn't had in a while.  Most of the time though he's so open and flexible to whatever I make that this doesn't work too well.  Occasionally I get a helpful response though, like the other day when he said he wanted Chicken Cordon Bleu.

    *sigh*  I despise making Chicken Cordon Bleu.

    Don't get me wrong I like eating it!  But I have remembering-to-defrost-the-chicken-ahead-of-time issues.  And then there's the whole pounding it out super thin, which I hate doing because raw chicken juice splatters everywhere and it's just a big mess for me.  Oh and the assembly of this....  Ack!!  Slippery raw chicken, recently beaten to death, topped with a just as slippery piece of deli ham and a usually less than flexible slice of Swiss cheese.  I end up using about 53 toothpicks just to get the thing to stay put, but then how am I supposed to get the breading on around all those picks poking out??

    Yeah, do NOT love making this one.  But I love my husband and he really doesn't request dishes that often so, dang it, I'm going to make this.  I wonder if I can adapt this though to something that isn't going to drive me insane just in putting it together....hmmmmm.....  I've got it!! 

    Chicken Cordon Bleu
    Recipe from Jeanna's head

    3 boneless, skinless chicken breasts
    4-5 thin slices of deli ham
    1/2 cup (ish) shredded Swiss cheese
    Salt and freshly ground black pepper
    1/2 cup (ish) flour
    2 eggs
    1 cup (ish) Panko breadcrumbs
    1 tbsp EACH butter and olive oil

    1. Preheat oven to 350.  Start a skillet heating over medium-high heat.  Stack the ham slices together and roll into a log.  Slice up the "ham log" so you end up with little ribbons of deli meat (yes, like a chiffonade); set aside.  Create a pile of shredded cheese next to the ham and have 3 toothpicks handy.
    A meat chiffonade!


    2. Using a sharp paring knife, cut into the side of each chicken breast, but NOT all the way through, making a nice stuffing space (use your fingers a little to gently stretch the space bigger if you like).  Put a little of the ham and cheese inside the chicken and close it with a toothpick.  Repeat with remaining chicken breasts.
    Endless possibilities for that pocket...


    Stuffed full of meat and cheese


    See that one little unobtrusive toothpick?


    3.  Setup breading station: pour flour into a shallow dish or plate.  Beat eggs in a separate dish.  Pour Panko into a third.  Season the chicken, flour, and Panko with salt and pepper.  Coat each chicken breast in the flour (shaking off the excess), egg, and then Panko.  If you like an extra crispy coating, repeat the egg and Panko steps.
    Breaded chicken anxiously awaiting the skillet


    4.  In the hot skillet, melt butter and oil together.  Add the breaded chicken breasts and brown on each side.  Transfer pan to oven and bake at 350 for 20-25 minutes, or until chicken is cooked through.
    Look at that crispy, golden perfection....


    This variation on the usually rolled chicken dish is sooooooooooooo much easier for me to handle.  And with only using one little toothpick, I'm not creating a lumpy breading nightmare for myself either!  Yeah, I can do this. :)

    [I have to interject at this point that I've really fallen in love with using Panko breadcrumbs.  For YEARS I have subconsciously resisted using Panko because it's a bit more expensive.  Plus all these chefs on TV keep making these "crispy" coatings using regular crumbs so the fact that I haven't been able to do it yet just means I'm doing it wrong, right?  Yeah.  If you like a great crispy crust, spend the extra pennies and get the Panko.]

    Oh, and in case you're wondering, Gavin asked for thirds. ;)
    Pin It

    Thursday, April 21, 2011

    Reruns

    I have a hard time repeating recipes.  I'm not even really sure why that is exactly.... but once I get a recipe down, no matter how much I love it, it can be months, even a year or more before I'll make it again.  It's like I get bored with it or something.  And I'm not even consciously aware that I'm doing it!  A few months ago, when Gavin was getting pretty bad about eating dinners with us, Rob really made me aware that I was doing this.  At first I didn't quite believe I was that bad.  But then I went back through the calendar, where I write down our weekly meal plan.  Ho. Lee. COW.  He was right.  And let me just say that it's pretty hard to have a true Family Favorite if Mommy doesn't make it again for 8 months.

    So in the last few months I've really tried to make an effort to repeat recipes more frequently, especially ones I know Gavin likes.  Mac & cheese now makes a monthly appearance on our table, if not twice a month.
    You can never have too much goat cheese

    I'm also trying to give in to my cravings more, like for flank steak that's spent the day soaking in a balsamic marinade.  Oooohhhhh yummy!
    I could eat this picture.  Yeah, it's THAT good.

    No matter what the day throws at you, when Chicken Azteca is waiting for you at the end of it, it's a good day.
    Creamy chicken + hot rice + CHEESE = Happy Comfort

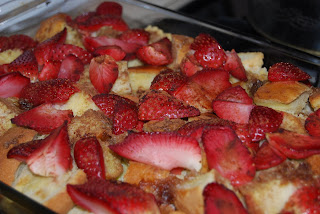
    And I've noticed how much y'all like the Strawberry French Toast Bake.  I felt the need a couple weekends ago to refresh my memory on just how good it is. ;)
    Aren't strawberries just about in season again?


    I'm learning that it's ok to make things frequently.  Even if it bores me a little sometimes.  I'm taking more joy in seeing my son light up that I'm making pancakes for dinner.  Or Rob's obvious delight when I make some good, old-fashioned red meat dinner.  There's more to cooking than the flavor, texture, smells, and feel of the food itself.  It's also about making people happy.  And that's truly satisfying. :)
    Pin It

    Wednesday, April 20, 2011

    Uglies

    Yeah, you heard me.  I made a dish that is called "Uglies."  Don't look at me like that...I didn't come up with the name!  In fact, I have to say I disagree with this name because I actually thought they were kinda cute, in a rustic, homey sort of way.


    Whether you choose to try the actual recipe for this is up to you.  What I find most intriguing though is the concept behind this.  Cooking a protein with seasonings, adding sauce, spooning this mixture into a dough cup, topping with cheese and bake.  That's really what this recipe boils down to.  Hmmm, interesting....  Could this then be something used to tackle the ever-present Leftovers?  Could these be main dish or an appetizer?  Could these be vegetarian?  Could these be carnivore?  Could these be a weekend party food or a fast weeknight I'm-so-tired-I-could-scream-but-my-family-needs-to-eat meal?

    Abso-fricking-lutely!!


    Uglies 
    Recipe from AllRecipes

    1 lb ground beef
    1 medium onion, chopped
    1/2 tsp-ish garlic powder
    1 1/2 cups barbecue sauce
    8-10 refrigerator biscuits
    1/2 cup-ish shredded cheddar

    1.  Preheat oven to 400.  Heat a skillet over medium-high heat.  Add beef, onion and garlic powder and cook until meat is no longer pink and onions are translucent.  Drain any excess fat.  Add barbecue sauce and let simmer for 3-5 minutes.

    2.  While the beef mixture is cooking, grease a muffin tin and open the biscuit dough tube.  On a floured surface, roll the raw biscuits to about 6" diameter.  Place dough in prepared muffin tin (my dough did not want to stay up the sides so I stretched each piece over the top and the dough sank in to it's little spot as I spooned the filling in).
    Biscuit before. Biscuit after.
    3.  Spoon filling into each dough-lined muffin cup.  Top with shredded cheddar.


    4.  Bake at 400 for 15 minutes or until cheese is melted and biscuit dough is cooked and golden.
    I suppose at this point these aren't that attractive.
    Whenever I find recipes like these, where the concept just jumps out at me, I think I must get this crazy gleam in my eye.  I start thinking of all the cool possibilities!!  Is your kid like mine and won't touch barbecue sauce (I know, weird...we're working on him)?  Use a spaghetti sauce instead.  Or Alfredo sauce. Or some completely crazy but TOTALLY delicious sauce your family loves that perhaps your grandmother makes only twice a year.

    Or hey, why not go REALLY easy on yourself and use the leftover barbecue (beef, pork, chicken, whatever) from the Memorial Day party.  Then this 30-minute meal pretty much becomes a 20-minute meal.  Bonus!!

    Don't do meat?  No problem...saute your favorite selection of tofu and small veggies together with a tangy ginger sauce.

    Are you getting yet how you can totally take this recipe and run with it?  The dish as-is is quite good.  But I think I'm going to have even more fun with playing around with the different possibilities.

    Man I love cooking.  One recipe, infinite possibilities. :)
    Pin It

    Monday, April 18, 2011

    Chicken Divan

    I'd heard once that every new bride needs to have a good recipe for Chicken Divan.  Is that still true anymore?  No idea but I know that I grew up with a version of this.  My mom called it chicken & broccoli casserole though.  What on earth is "chicken divan" anyway?  Sometimes I just want to call it like it is, like the way I grew up.  Seems simple right?  However if you have any Anti-Casserole people in your life (you know who I mean), sometimes you need to get a little creative in slipping in a few "casseroles" undetected.  I have a couple of semi-anti-casserole types so I this is one where I keep to the original name, even though I still think the name is weird. ;)

    Chicken Divan
    Recipe adapted from a Campbell Soup cookbook


    4 cups FRESH broccoli florets (frozen works too but fresh is really amazing)
    2 cups cooked, cubed chicken
    1 can condensed cream of chicken soup OR condensed cream of broccoli soup OR condensed broccoli cheese soup
    1/3 cup milk OR white wine
    1/2 cup (ish) shredded cheddar
    2 tbsp Panko bread crumbs
    Extra virgin olive oil

    1.  Preheat oven to 450.  Steam the broccoli florets in the microwave for a few minutes, enough to take out that raw crunch but don't turn it into mush  (sorry I don't have an exact time...my microwave has a short-cut button I use for steaming fresh veggies).  If using frozen broccoli, make sure it's thawed.

    2.  Layer the chicken and broccoli in a 2-quart casserole dish.
    You do not get this gorgeous green from frozen broccoli...just sayin'

    3.  In a small bowl, whisk together the soup and milk OR wine until the sauce is smooth.  If you'd like a nice creamy sauce, use milk.  If you like having a little tang to the dish, go with the wine.  Pour over the chicken and broccoli.
    Note that you can still see the broccoli and chicken.  No sauce-drowning here!

    4.  Sprinkle shredded cheese over the sauce (in situations like these, I don't measure the cheese.  My family likes CHEESE so I just use the measurement as a suggestion or guideline rather than the rule).


    5.  Sprinkle Panko bread crumbs on top of cheese and drizzle with a little extra virgin olive oil.  I have for years used a regular bread crumb and butter combination but the Panko just blows that out of the water.  If you like a nice crispy topping, use the Panko.
    This is like a hug for your mouth and your tummy.

    6.  Bake at 450 for 20  minutes until casserole is hot and bubbly, cheese is melted and the Panko is a lovely golden color.

    I'm pretty darn positive that this is cliche of me but I really like to eat this over rice.  There's something about the cheesy, creamy goodness of this over a bed of steaming rice that just screams COMFORT to me.  For a long time I made this dish as written, but the last few times I've been doing different things.  I'm either getting more adventurous in my cooking, or I'm getting tired and just want to use up stuff I already have in the pantry without having to go buy more.  Probably more like the latter but I love how for the most part I hit home with "new" recipes that we like to keep around! :)
    Pin It

    Friday, April 15, 2011

    Fig Bars

    "A cookie is just a cookie, but Newton's are fruit and cake."

    Does anyone else remember those commercials?  I thoroughly enjoy just about any kind of cookie but when it comes to Fig Newton's... mmmmmmmmmmmmmmmmmm...  YUM!  First of all, I absolutely adore dried figs.  I love that sweet taste and even the crunchy texture from the seeds.  Surround that in soft, cake-like breading and I'm totally in my happy place.  It would not be completely outside the realm of possibility for me to consume at least half a package in one sitting.  Not proud of that fact, but hey.

    So imagine my reaction when one of my favorite bloggers posted a recipe that just screamed glorified, HEALTHY Fig Newton to me?  WAHOO BABY!!!  This I've got to try.

    Fig-Apricot Bars
    Recipe from Dig This Chick

    For the crust:
    3 cups whole wheat flour
    1/2 tsp. salt
    3/4 tsp. baking powder
    3/8 tsp. baking soda
    1/4 cup ground flax seed
    dash ground nutmeg and ground cloves [I was extra generous with my "dashes"]
    1 stick butter, cold
    1/2 cup milk
    1/2 cup honey
    2 eggs

    For the filling:
    2 cups dried figs
    1/2 cup dried apricots
    2 cups juice (I used apple juice by any 100% juice would work great)
    1 cup water
      
    1.  Combine dry ingredients. Cut in butter until tiny pebbles. 

    Of course I used my food processor for this step!

    2.  Mix eggs, milk and honey with a fork in a separate bowl. Add wet to dry and mix into a dough. Get your hands in there and make into a ball. Cover and refrigerate for an hour. 

    Sticky dough.  You've been warned.

    3.  While dough is chilling, cook figs, apricots, juice and water over low heat until soft and thick, and most of the juice is absorbed. Purée in a food processor. 

    Hello cooked down fruity goodness

    4.  Preheat oven to 375 degrees. After an hour, pull dough out, divide in two and knead about 10 times to make pliable. Sprinkle flour on work surface and roll out half. 
    First two layers down.  Just need the top crust

    5.  Place on prepared baking sheet. Spread figgy mixture. Knead and roll out other half and place on top. Bake for 15-20 minutes, until golden brown. Let cool and cut up! 


    I learned a few things from this experience of making fig bars.  
    • I need to practice my rolling pin skills.  They're pretty rusty because I think the dough could be a tad thinner.  I rolled it to about the thickness I would a pie crust.  Rob thinks this thickness was perfect though.
    • Though Fig Newtons first came to mind when I made them, the crust has this nutty flavor that's a bit closer to a Nutrigrain Bar.  So a Fig Newton/Nutrigrain bar?  I like that nutty flavor though, plus now I don't feel bad feeding these to Gavin for breakfast. 
    • Next time I'm trying a juice with a sharper flavor (pomegranate? orange?), just to see what happens to the filling flavor.
    • It doesn't look or feel like this made that much, however once you cut these into bars it makes quite a bit!  My bars are probably 2"x3"...something like that.
    • If you ask your husband to take baked goods out of the oven for you, expect that there will be a corner of it missing.
    It's really become important to have some kind of grab-and-go snack around.  Rob and I are usually in a hurry most mornings to get out the door, plus it's nice to have handy snack available.  I really like the granola bar recipes I've been making, however it's nice to add a new snack bar to the mix too. And of course it REALLY makes me feel good knowing I'm giving my little family something that's not just tasty, but super healthy for them too!
    Pin It

    Thursday, April 14, 2011

    BLT's with Beer Bread and Guacamole

    I really don't have the time or energy anymore to keep up with cooking shows like I used to.  When Gavin was a baby (and before he was born too) I would watch Food Network on Saturday mornings the way most kids watch cartoons.  I love all the great ideas!

    Nowadays I'm lucky if I can get a foodie magazine read before the next issue comes along.  But I do have one guilty Food Network pleasure that consistently pops up on the DVR: Diners, Drive-ins, & Dives.

    This isn't really a cooking show; it's a guy touring the U.S. checking out funky, unique restaurants and sampling some of their most popular dishes.  And most of the time he'll learn how to make those dishes too.  I have found that I get some of the best ideas from watching what other creative chefs are doing, like this one.

    BLT's on Beer Bread with Guacamole
    Inspired by a restaurant that I cannot for the life of me remember on Diners, Drive-Ins, & Dives. 

    1 lb bacon
    Mayonnaise
    Sliced tomato
    Leaf lettuce

    For the bread:
    12 oz warm beer
    3 cups all-purpose flour
    1 tsp salt
    2 tbsp dark brown sugar OR honey
    1 packet OR 2 1/4 tsp active dry yeast

    For the guacamole:
    2-3 ripe avocados
    1 small tomato, seeded and chopped
    1/2 small onion, finely chopped
    1-2 cloves garlic, minced
    Juice of one lemon

    1.  To put together the bread, add all ingredients to the breadmaker according to manufacturer's instructions.  Bake using the white bread setting.  Let cool at least 1 hour before slicing.
    A little dense but really good flavor!
    2.  To put together the guacamole, cut the avocados in half and spoon the flesh into a bowl (remove the big seed either with a spoon or knife).  Add the remaining ingredients, plus a good pinch of salt.  Mash together with a fork.  For an extra kick toss in a seeded, finely chopped jalapeno.
    No, I don't use conventional guac ingredients... and I don't care! ;)
    3.  Preheat oven to 400.  Cut strips of bacon in half and lay on a baking sheet.  Bake for about 20 minutes (when you can smell it, it's probably just about done).  Drain on a paper towel-lined plate.
    I prefer the anti-stovetop-splatter method
    See? Crispy bacon WITHOUT the grease stains or burned fingers!


    4.  Assembly!  Toast 2 slices of beer bread.  Spread some mayonnaise on the bottom piece of toast.  Layer on a generous helping of bacon, lettuce, and sliced tomato.  On the top piece of toast spread a generous amount of guacamole (1/4 cup worth?).  Slice the sandwich in two and enjoy with kettle chips.
    Commence drooling in 3...2....


    This is how I put together this sandwich.  Do you have a bakery close by that you love and makes awesome beer bread?  Use that!  Have your own spectacular guacamole recipe?  Go for it!  My own sandwich did not use the restaurant's recipes at all....I just intensely desired to make my own version once I saw how deliciously yummy theirs looked.  And I have to say that even though I ate this beauty only a few days ago now, I'm already craving it again!
    Pin It