Tuesday, July 31, 2012

Creamy Skillet Penne with Broccoli and Sausage

One of the things I love most about recipe-sharing is that you acquire some that, had you just seen them in a cookbook or magazine, you wouldn't normally have made it.  But when it comes recommended by a fellow trusted cook, suddenly you give the recipe a second glance.


Thank you, Trusted Cooks, for expanding my horizons!

Creamy Skillet Penne with Broccoli and Sausage
Recipe from my mom, who I think got it from Cooks Magazine
Prep time: 15 minutes   Cook time: 20 minutes  

1 lb hot or sweet Italian sausage, casings removed
1 onion, chopped fine
1 red bell pepper, seeded and sliced thin
8 ounces whole wheat penne (about 2 ½ cups)
3 garlic cloves, minced
¼ tsp red pepper flakes
1 cup wine
2 cups low-sodium chicken broth
½ cup heavy cream (or use your son's whole milk, that works fine too)
8 ounces fresh broccoli florets*, cut into 1-inch pieces
½ cup grated Parmesan cheese
1 tbsp finely chopped fresh basil
2 tsp balsamic vinegar
Salt & pepper to taste

*One large head of broccoli should yield about 8 ounces of florets.  Alternatively, bags of cut broccoli florets are available in the produce section of most supermarkets, or you can package your own at supermarket salad bars.

1.  Cook sausage in large nonstick skillet over medium-high heat, breaking up pieces with wooden spoon, until no longer pink, about 5 minutes.  Drain sausage on paper towel-lined plate.
I used a really mild sausage since I was feeding this to little ones
2.  Cook onion and bell pepper in sausage fat until softened, about 8 minutes.  Add penne and cook, stirring often, until pasta is lightly toasted, about 3 minutes.  Stir in garlic and pepper flakes until fragrant, about 30 seconds.  Stir in wine, broth, and cream and bring to boil.  Reduce heat to medium, cover, and simmer, stirring occasionally, until pasta begins to soften, about 8 minutes.
Red wine gives an interesting pink color.  But white wine is good too!  Use what you have.

3.  Add the drained sausage back into the skillet and stir.  Arrange broccoli on top of pasta and continue to cook, covered, until broccoli is bright green and tender and pasta is al dente, about 8 minutes.  Off heat, stir in Parmesan, basil, and vinegar.  Season with salt and pepper.
I love fresh broccoli.
According to all the cooking rules in my head and in my home, I never should have made this recipe.  For one thing, the ingredient list is just a little longer than I'd prefer.  Plus I don't usually cook a whole lot with italian sausage.  Nothing against it!  There are several things I make that I really like it in.  But it's not a go-to meat for me.  And the final strike against this recipe is the bell pepper.  Rob hates bell peppers.  Passionately.  I know, it hurts my cooking soul a little.

But when I spent that week at my mom's last month, she made this one night for dinner.  I inhaled firsts.  I savored seconds.  And I briefly contemplated thirds before my stomach posted a "No Room Left in the Inn" sign.  It suddenly didn't matter to me that it had peppers in it; I had to have this recipe.

And though I miss Rob whenever he's on a business trip or working late, my taste buds totally celebrate the opportunity to savor flavors I don't normally get.  Yum!!
Pin It

Monday, July 30, 2012

Spiderman-Themed Birthday Party

Ok so first off, I PROMISE that I'm not going to go all "Mommy Blog" on you.  This is my space where I can indulge all my foodie-ness and I want to keep it that way.  However my older boy's 5th birthday party has been SO CONSUMING of my time, effort, and mental faculties the last few weeks, I thought I'd let you know how it came off.

Keeping the food as a central focus of course. ;)

When planning Kieran's birthday a couple months ago, it was only natural to ask Gavin what them he'd like for his birthday party.  Imagine my surprise when he insisted on a Spiderman theme.  Really?  Spiderman??  I like Spiderman, but I had no idea that Gavin was really into him.  Oh well, Spiderman it is!  Not that this would be a big thing on my part, because I totally was going to book one of those fun kids' places around here to host the party.  All I'd need to do would be get some cute themed favors, right?

And then I started researching.  And then I saw prices.  And then I maybe thought about crying.  And then I thought about smacking these HOLY FREAKING OVERPRICED places upside the head.  And then I'd resigned myself to the inevitable:

I am too cheap to spend THAT MUCH for someone else to clean up after my kid's mess.  I am going to host this party myself.  *gulp*

THANK GOD for sites like this one.  And Pinterest.  Can I get an "amen" for Pinterest?

So here's how it all worked out, when Gavin's friends arrived, we started off with crafting.  Each child had a little muslin superhero cape and a Spiderman mask to color however they saw fit.  Not only was this a nice activity to keep the kiddos occupied as everyone arrived, the crafts also made for AWESOME take-home gifts.


After crafts was games.  I decided to turn the concept of party favors into a game and made a little scavenger hunt.  It only took a few minutes but they really got a kick out of finding one of each item.  The next, and last, game was Pin the Web on Spiderman.  Yup, got a Spiderman poster and printed out a whole bunch of clip art spider webs for the little partiers to stick to the poster. 

And now what you've really been waiting for, LUNCH!!  Most kids like easy, fun party food like pizza or hot dogs.  And Gavin likes those too...but he's MUCH more likely to politely turn to me and say "I'll just have a peanut butter sandwich."  So I thought, why fight him on this?

I made A WHOLE BUNCH of little PB&J sandwiches, using this little gadget that I borrowed from my mom.  Tedious?  Yes.  But not too bad.  It only took about 15 minutes to cut out sandwich rounds from 2 1/2 loaves of white bread, which I did the day before.  And the morning of the party I spent maybe 30 minutes putting them all together.  And what could be cuter for a children's party than a platter heaping with little PB&J tea sandwiches?
About a tbsp of PB on the bottom, a tsp of jam, and a little smear of PB on top to "seal" in the jam.
Fit the press over the assembled rounds and push down to crimp the edges together.

Plenty of cute PB&J sandwiches for everyone!

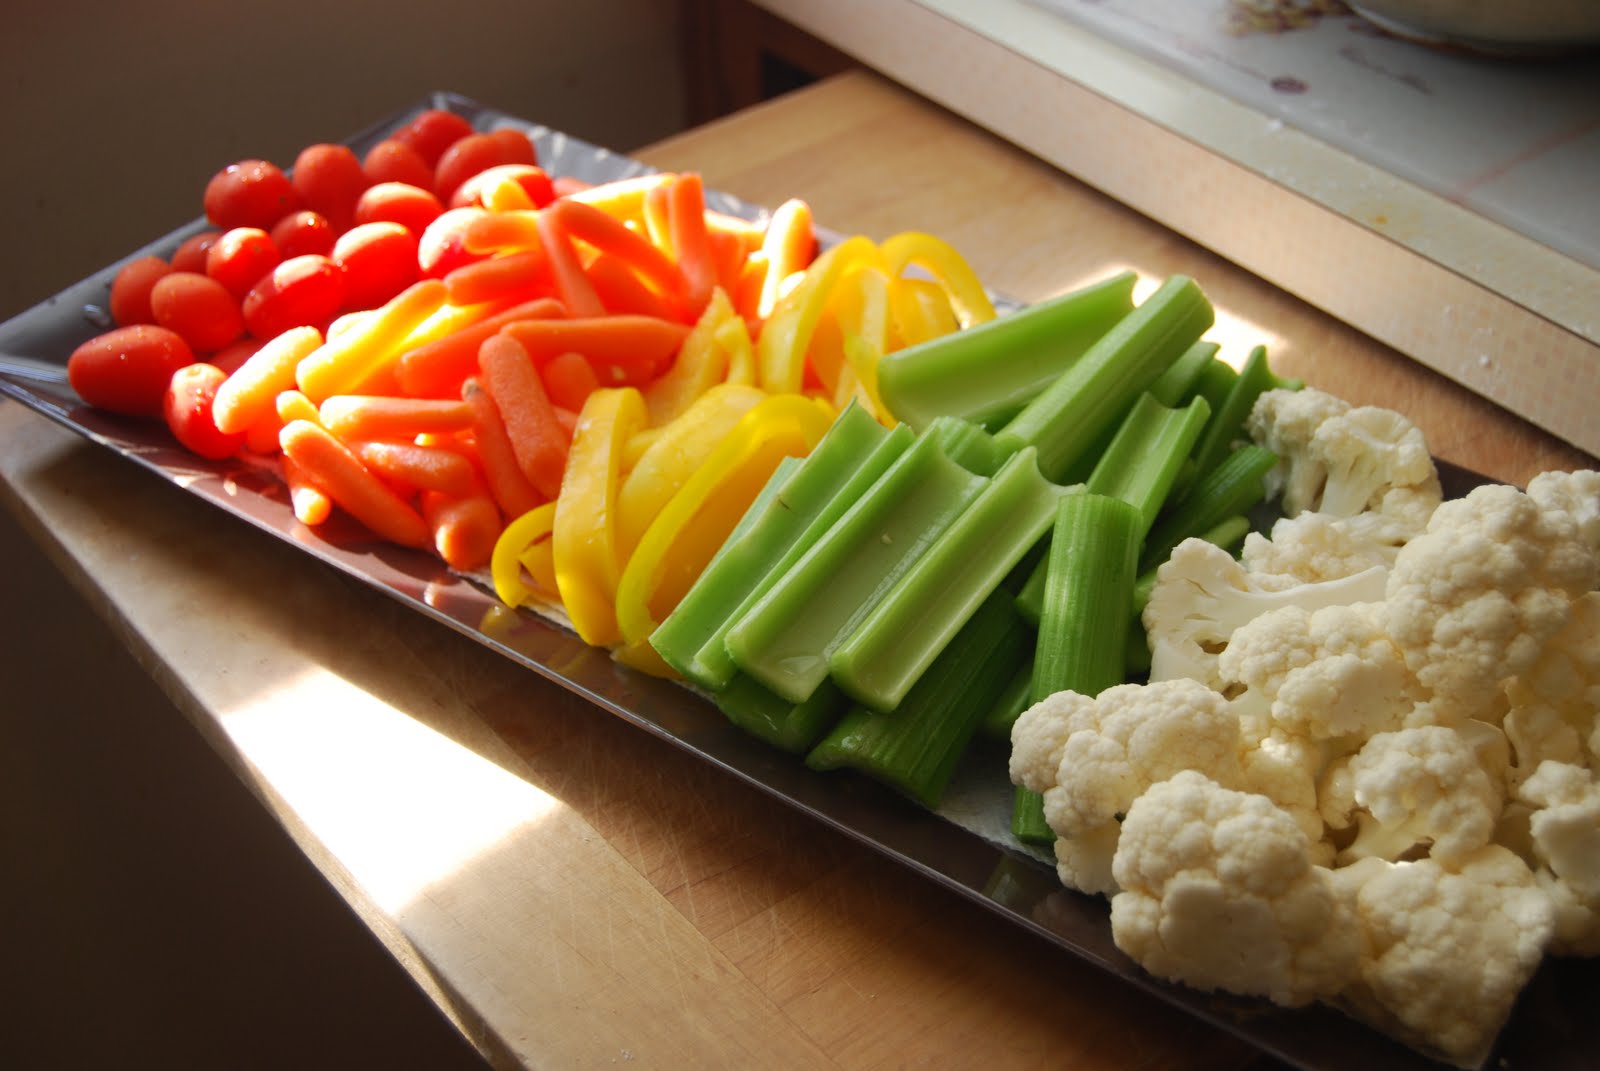
Because I knew the sandwiches would take some time to put together, I decided to keep the rest extremely simple.  I fixed up our Rainbow Snack, which is just veggies arranged according to color, and Ranch dip.  I also had a few bowls of fresh strawberries, blueberries, and grapes.  Easy, easy, easy!  For drinks we had milk and lemonade, and iced tea for any parents who stayed to help supervise.
We are big fans of "Rainbow Snack"

I love fresh fruit!


Now for the cake, I was all set to try something new, but Gavin requested a pudding cake.  The only think I could think of was this one, so I made that for him instead of being adventurous.  He is the birthday boy after all!  And, inspired by an episode of The Pioneer Woman, I had little bowls of candies and let the kids decorate the cake before we did the candles.  Chaotic? Yes.  Fun?  YOU BET!!  And what a load off my mind to not have to try and create this amazing masterpiece of a cake.  They loved decorating it themselves!
My big boy poses with his custom cake.


Was this all the crazy, hectic, whatonearthamIDOING madness I thought it'd be?  Yup.  But soooo much fun. :)  And of course the planning and everything stressed me out.  But I saved some money doing it myself, AND had that bonus of having a happy little boy praising the decorations, complimenting the food, and thanking me for his Spiderman party.  Mission accomplished!!

p.s. If you are at all inspired by the candy-on-the-cake thing and you're doing a party for anyone under 7ish, do cupcakes and have the kids decorate their own little cakes.  There was a tense moment where all 6 kids wanted to be the first to put candy on and put on the most.  If I had to do that part over again, I'd do cupcakes.  Just an FYI.
Pin It

Thursday, July 26, 2012

This Week's Menu

The word of the week is DISTRACTED.  I choose to say I'm distracted rather than stressed because to admit that I'm stressed just stresses me out more.  See?!  Stressful!

And though the process of meal planning can be stressful, it ultimately helps to alleviate mine because I can spend more time thinking about the children running through my house this weekend, and less time trying to decide what to make for dinner:
  • Thursday: My big boy turns FIVE!!!  We're going to enjoy a quiet family night with pancakes.
  • Friday: Pizza! Just Kieran and me tonight so I'm not bothering with popcorn.  Rob's taking the birthday boy out for a ball game so my little man and I will bond over a movie that I like.
  • Saturday: PARTY DAY!!!  Hence my stress distraction this week.  I'm not an idiot, we're doing takeout for dinner!  I'll try to get a picture of the cute PB&J sandwiches, "Rainbow Snack", fresh fruit, and chocolate cake though before our party kiddos devour them for lunch.
  • Sunday: I haven't made pecan chicken in a while.  Some rolls and a tossed salad would round out the meal nicely.
  • Wednesday:  Leftovers!
Happy planning!!
Pin It

Wednesday, July 25, 2012

Peach Blueberry Pie

If you asked me during the fall or winter what my favorite pie is, I'd tell you it's my dad's pear-ginger. 

But once summertime hits, I want only one thing.  THIS pie.

Peach Blueberry Pie
Recipe from my dad
Prep time:30 minutes   Chill time: 45 minutes (crust)   Bake time: 55 minutes

For the crust
2 cups all-purpose flour
1/4 cup cake flour (or just use more AP flour)
1/4 tsp baking powder
1/4 tsp salt
2 sticks COLD butter, diced
4-5 tbsp COLD water

For the pie
3 cups peach slices, fresh or frozen
3 cups blueberries, fresh or frozen
1 cup sugar
3 tbsp tapioca, quick cooking
1/3 tsp salt
1 tbsp lemon juice
1 tbsp butter

1. For the crust: Put all dry ingredients into a bowl or food processor. If using a bowl, cut in the butter with a pastry cutter.  Or pulse butter in the food processor until it resembles coarse sand.
Need those little butter chunks for a good flaky crust


2.  Add in 4 tbsp of the cold water and continue to pulse the food processor (or use a fork to combine) until the dough comes together.  Add another tbsp of water if it's too dry.
If the water's not cold enough, add ice.


3.  Turn the dough out onto a lightly floured surface and shape into two disks, about an inch thick.  Wrap in plastic wrap and chill at least 45 minutes.
My disks ended up square. Not sure how but oh well.


4.  For the pie: Preheat oven to 450.

5.  Combine peaches and blueberries in a large bowl.  In a small bowl, combine sugar, tapioca, and salt.  Add to the fruit and gently mix until everything is coated in the sugar mixture.  Sprinkle lemon juice over the fruit.  Lightly toss to mix.
Oh those sparkling, sugary, summertime gems!


6.  On a flour surface, roll out one of the pie crust disks to the desired thickness and diameter you need for your pie plate. Put the bottom crust in pan and either trim or tuck the excess underneath.
Awaiting some fruity goodness


7.  Fill with the fruit.  Cut the last tablespoon of butter into small pieces and dot it on top of the fruit.  Roll out the remaining pie crust disk and place on top of the fruit.  Trim the excess and crimp the edges.  Cut several slits on top for steam to escape as it bakes.  You are welcome to brush and egg wash on top if you like but it's not necessary.
Yes, MORE butter.  Don't question, just go with it.


8.  Bake at 450 for 10 minutes.  Reduce heat and bake for 30-45 minutes or until lightly browned.
One time Dad made a smiley face with the slits.


My favorite pie really does vary depending on the season.  And my dad makes several other wonderful pies!  Sour cream apple, rhubarb, apple-pear with a crumb topping, apple-cranberry,....oh my goodness the list goes on.  But every summer, without fail, I CRAVE this pie.  This one totally hits the summertime spot!
Pin It

Monday, July 23, 2012

Chicken, Cherry, & Goat Cheese Salad

THIS is what you make when your girlfriends are coming over for lunch.

THIS is what you make when you need a light meal to impress your mother-in-law.

THIS is what you make when your almost-5-year-old has been picking on his baby brother and ohmyGOD you just need to treat yourself to something fresh and eat in relative peace for five minutes.


Oh.  Was that last one just me then?

Chicken, Cherry, & Goat Cheese Salad
Recipe slightly adapted from a cookbook my mom has that I think she got from Cooks Illustrated
Prep time: 10 minutes   Cook time: 10 minutes

2 (6oz) boneless, skinless chicken breasts
Salt and freshly ground black pepper
5 tbsp extra-virgin olive oil, divided
1/2 cup water
2 1/2 tbsp orange marmalade, divided
2 1/2 tbsp sherry OR apple cider vinegar
1 small shallot, minced
12 oz fresh cherries, pitted and halved
5 cups of some kind of salad green [Note: Field greens would be best with this, but I used what I had on-hand, which happened to be a little bagged ice berg salad and bagged romaine salad]
1/2 cup toasted chopped pecans, optional
1 cup crumbled goat cheese

1.  Pat the chicken dry with paper towels and season with salt and pepper.  Heat 1 tbsp oil in a non stick skillet over medium-high heat until just smoking.  Cook chicken until brown on one side.  Flip chicken, then stir water and 1 tbsp marmalade into skillet.  Reduce heat and simmer, covered, until chicken is cooked through, about 5-7 minutes.  LET REST on cutting board before slicing.
My pictures will show I adjusted the recipe for 2 servings, instead of 4.


2.  In a large bowl, combine the remaining 1 1/2 tbsp marmalade, vinegar, and shallot.  Slowly whisk in remaining 1/4 cup of oil (4 tbsp = 1/4 cup).  Season with salt and pepper to taste.
Just a little marmalade, but it goes so far.


3.  Add salad greens to the large bowl with the dressing, toss to combine, and divide among 4 individual plates.  Top with cherries, pecans, and goat cheese.  Slice chicken crosswise and arrange on top of salad.
Yummy dressing!


Not going to lie.. I made what should have been servings, but totally ate all of it.  No shame.  No guilt.
Pin It

Thursday, July 19, 2012

This Week's Menu

Just because I'm making mostly things I've made before in this next week doesn't mean I'm not experimenting with other new recipes.  I'm especially excited about a salad recipe I'm trying for lunch today. :) Stay tuned!
  • Thursday: Leftovers. This seems to be a trend now that Rob's been working late on Thursdays lately.  And that's just fine since this is the easiest meal for me to put together!
  • Friday: Pizza and popcorn!  Movie still to be determined...
  • Saturday: Burgers, corn on the cob, and tossed salad.
  • Sunday: Date Night!!
  • Monday: Pork enchiladas (using leftover shredded pork from Kieran's birthday party and two cans of Old El Paso enchilada sauce), rice, and steamed veggies.
  • Tuesday: BLT's, baked potato
  • Wednesday: Leftovers. 
Pin It

Wednesday, July 18, 2012

De-Lightful Ranch Dip or Dressing

Do you like Ranch?  I do.  I like love it a LOT.  Probably more than I should.  Because we all should be careful with creamy dips and dressings right?


Sure.  But we can be a little less careful with this one.

De-Lightful Ranch Dip or Dressing
Recipe ever so slightly adapted from Ellie Krieger
Prep time: 5 minutes

2/3 cup Greek yogurt (if you want dressing, use 1/3 cup yogurt and 1/3 cup low fat buttermilk)
3 tbsp mayonnaise
1 1/2 tsp lemon juice
1 tsp Dijon mustard
1/2 tsp onion powder
1/4 tsp garlic powder
1 tbsp finely chopped chives
Salt

1.  Combine all ingredients in a small bowl.  Season to taste with salt.
Other than chives, I keep all of this stuff on-hand


If you're still not sure this is at least worth a taste, to give a little health perspective on this, two tablespoons of a name brand, bottle Ranch dressing is 110 calories.  Two tablespoons of this recipe is 50 calories.  Just an FYI as we're still in swimsuit season. ;)
Pin It