Showing posts with label Dinner. Show all posts

Tuesday, March 26, 2013

Drunken Chicken

Who doesn't love Beer Butt Chicken?

Oh, sorry if that shocked you... some people I think call it Beer Can Chicken.  We've always called it what it is: you shove a mostly full can of beer into the chicken cavity and then put it (upright) on the grill for however long until it's done.  The result is always this super moist, flavorful chicken that is sooooooooooooooo goooooooooooooooooooooood.


And it's been horrible not having a grill big enough to accommodate an upright chicken.  But not anymore!

Drunken Chicken
Recipe adapted from Bobby Deen
Prep time: 10 minutes   Cook time: 1 hour, 40 minutes

1 tsp ground coriander
3/4 tsp mustard powder
1/4 tsp freshly ground black pepper
1/4 tsp ground cumin
1 bay leaf, crushed
1 tsp salt
One 5-pound chicken
2-3 carrots, roughly chopped 
1 onion, quartered
1 orange, zested and halved
One 12-ounce beer

1.  Preheat the oven to 375 degrees F.
2.  In a small bowl, combine the coriander, mustard powder, black pepper, cumin, bay leaf, and salt.  Set aside.
Mmmmm spices


3.  Place the chicken in a roasting pan and pat dry. Arrange the carrots and onions around the chicken. Scatter the orange zest on top of the chicken and place the orange pieces in the cavity.
Don't feel like hauling out your turkey-sized roasting pan for a tiny chicken?
Crumple up tin foil in an 8x10 baking dish instead.


4.  Lift the chicken skin from the chicken without removing it using your fingers. Rub the spice mixture and the salt on top of the chicken and under the skin. Pour the beer into the bottom of the roasting pan, not onto the chicken or any of the vegetables. Cover with foil and carefully transfer to the oven.
Ready to roast!


5.  Roast the chicken for 40 minutes, and then remove the foil and return to the oven and continue cooking until the internal temperature reaches 160 degrees F, 50 to 60 more minutes.
This is just after I took the foil off.


6.  Let rest for at least 10 minutes before cutting into halves or quarters. Remove the orange and skin before serving.
The aromas wafting from this are INCREDIBLE!!!!
So yeah, this is a variation of the classic Beer Butt Chicken; all the same flavors, and the same idea of using the steam from the beer to moisten the meat, but just a different technique.


I have a difficult time repeating recipes.  But this one just might become a regular monthly meal at our house.  This chicken was juicy, flavorful, and just plain DELICIOUS.  It's SUPER easy to make (come on, I put this together while sick).  And,even better, I lost count how many times Gavin declared he loooooooooooved this.  He loved it so much he asked for a second helping that was bigger than his first.  Even Kieran wanted seconds!  And that says a lot for me as Kieran usually plays with his dinner and is showing early signs of picky-ness.  Yup, I will totally be making this one again and again and again!
Pin It

Wednesday, March 6, 2013

Baked Shrimp with Tomatoes & Feta

This is a favorite dish of my parents.  And now that I've finally made it I can see why!


And if it tastes this good now, in the middle of winter, can you imagine how incredible it would be in the summertime with garden fresh tomatoes and herbs?!  Omg I can't wait!

Baked Shrimp with Tomatoes & Feta
Recipe from Ellie Krieger
Prep time: 10 minutes (longer if you need to shell the shrimp)   Cook time: 20 minutes

1 tbsp olive oil
1 medium onion, diced
2 cloves garlic, minced
2 (14.5-ounce) cans of diced tomatoes, undrained
1/2-3/4 tsp dried herb of choice (I used basil this time)
1 1/4 pounds medium shrimp, peeled and deveined
Salt & freshly ground black pepper
2/3 cup crumbled feta cheese (about 3 ounces)

1.  Preheat the oven to 425 degrees F.
Pantry staples in my house so this one's easy!

I buy frozen shrimp and thaw in cold water; it only takes a few minutes.


2.  Heat the oil in an oven proof skillet over a medium-high heat. Add the onion and cook, stirring, until softened, about 3 minutes, then add the garlic and cook for 1 minute. Add the tomatoes and bring to a boil. Reduce the heat to medium-low and let simmer for about 5 minutes, until the tomato juices thicken.
Let those juices concentrate and thicken up.


3.  Remove from the heat. Stir in the herbs and shrimp and season with salt and pepper. Sprinkle the feta over the top. Bake until the shrimp are cooked through and cheese melts, about 12 minutes.
Just before baking...

...just after baking. Melty, cheesy goodness!

So Rob commented, in between mouthfuls, that this would be awesome over some hot pasta.  And he's right... but I REALLY loved this with some warm, crusty bread to help soak up all those delicious juices!
Pin It

Wednesday, February 27, 2013

Chicken Pot Pie Soup

Every year for our birthdays, Mom would let us choose whatever we wanted for dinner.  Didn't matter what it was, she would make it for our Birthday Dinner.  I don't think my brother ever chose anything but Swiss Chicken.  When I was very little I usually asked for "roast beast" with mashed potatoes.  But later I remember asked for chicken pot pie.

Mom did not like to make chicken pot pie.

Don't get me wrong we all loved to eat this heavenly concoction of comfort food!  But the recipe my mom used was a seriously From Scratch Recipe and it was pretty time-consuming.  She lovingly labored over making the crust, chilling the crust, rolling out the crust, and setting it in the pan.  Sometimes she'd even do a lattice top.  She'd poach a couple of chicken breasts, chop up the meat, and then get started on the filling for my beloved birthday dinner.  Whew!!
My little dino-lover got a stegosaurus pastry.


And as much as I loved and still love this pie, I like to think that if I'd truly realized all the work that went into this one dinner, I would have asked her to look for a soup recipe like this one instead.
I thought my little Padawan would appreciate a TIE fighter pastry.


Exact same flavor. SO. MUCH. EASIER!!

Chicken (or Turkey) Pot Pie Soup
Recipe adapted from Taste of Home Magazine
Prep time: 20 minutes   Cook time: 30 minutes

2 tbsp butter
1 cup peeled, diced potatoes (about 1/2" little cubes)
1 medium onion, chopped
3 medium carrots, diced
1/2 cup flour
Salt and freshly ground black pepper
3 cups chicken stock
2 1/2 cups milk
2 cups shredded or chopped cooked chicken or turkey 
1 cup-ish frozen peas
1 cup-ish frozen corn
Prepared pie crust [This could be store-bought or a secret family recipe. Whatever YOU prefer!]

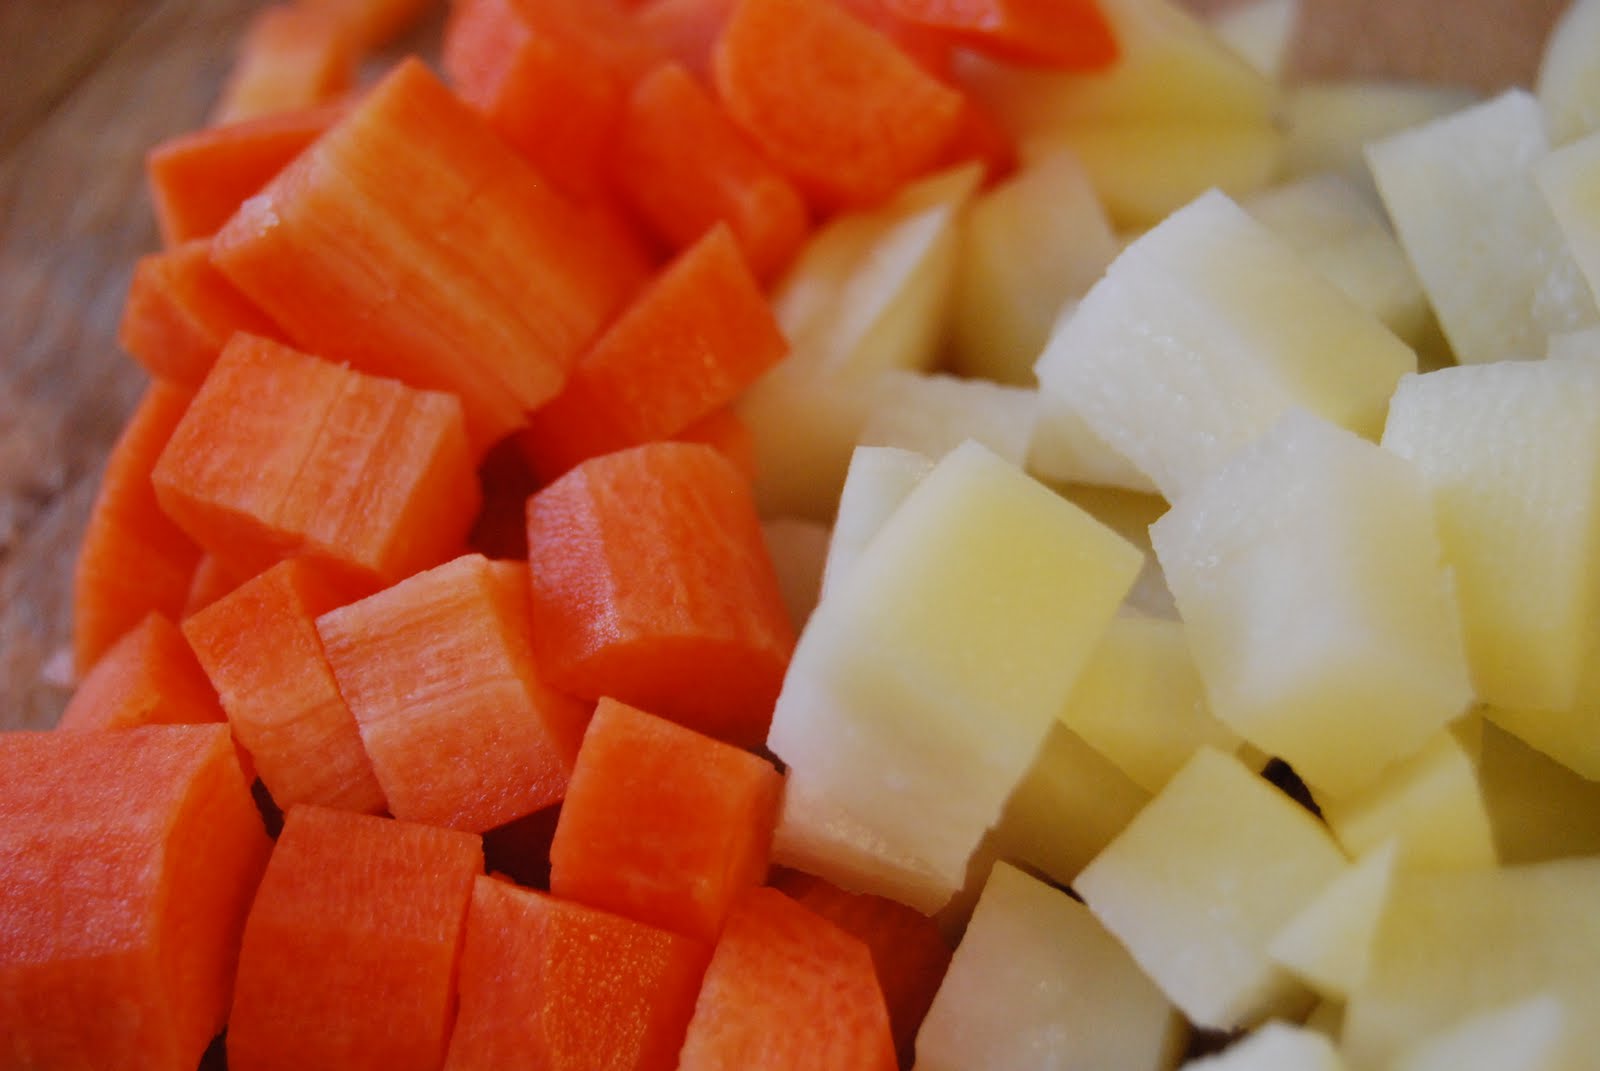
1.  In a Dutch oven, melt the butter over medium-high heat.  Add the potatoes, onion, and carrots; cook and stir until the onion is tender, 5-7 minutes.
To keep this soup quick-cooking, do a smaller dice on your veggies.

Potatoes chopped but have to wait?  Keep them in a bowl of cold water to prevent oxidizing.


2.   Stir in the flour and season with salt and pepper; let the flour toast a few minutes.  Gradually whisk in the chicken stock and milk.  Bring to a boil, stirring occasionally.  Reduce heat; simmer, uncovered for about 15-20 minutes or until potatoes are tender.  Stir in the remaining ingredients and heat through.
Toasting the flour so the soup doesn't taste like flour.

I used leftover Christmas turkey for this actually.

Dump. Stir. Done.


3.  Preheat the oven for 425.  While the soup simmers and oven heats up, roll out your preferred pie crust to your desired thickness.  I like a thicker pastry for this so mine was about 1/4" thick.  Using cookie cutters, cut out pieces of dough and lay on a baking sheet. You could use a round cutter, heart shape, star shape, or completely embrace whatever dorkiness lies within you and your family and have some fun with the shapes.  In my house, that meant making train, dinosaur, and Star Wars shaped pastries.
Whenever I deviate from my Preferred Crust Recipe, it never turns out quite right.
But I still managed to get some shapes cut out.


4.  Bake the pastries until golden.  The time will vary depending on the thickness of the dough.  For thinner (1/8") pastries, about 10 minutes.  For thicker (1/4") crust, more like 15-17 minutes. Serve the soup topped with your fun-shaped pastries.
FUN!!

For you Thomas-aficionados out there, yes that is Percy.


I'm not sure who got the bigger kick out of the pastries: my kids or my Star Wars-loving husband who also got a TIE fighter on his soup.  It definitely added a fun element to dinner!  The soup itself is this thick, creamy, comforting bowl of goodness that warms you, heart and soul.  The pastries are flaky, but crunchy enough to  resist turning into a soggy mess. 

I think I found my new birthday dinner!
Pin It

Tuesday, February 19, 2013

Baked Chicken with Parmesan Crust

In between massive mouthfuls of food, Gavin kept repeating variations of how much he liked this and that I should make this again.


Need I say more?

Baked Chicken with Parmesan Crust
Recipe slightly adapted from Food Network Magazine
Prep time: 10 minutes  Cook time: 20 minutes

2 tbsp Dijon mustard
1/4 tsp dried thyme 
Salt 
Pinch of cayenne pepper
4 boneless, skinless chicken breast halves (about 8 ounces each)
3/4 cup grated Parmesan cheese
3/4 cup panko
Cooking spray
1.  Preheat the oven to 450 degrees F. 
2.  Mix the mustard, thyme, 1/2 teaspoon salt and the cayenne in a medium bowl. Add the chicken breasts and turn to coat completely; set aside.
There's just enough to lightly coat the chicken.


3.  In a medium shallow bowl, combine the Parmesan and panko. Dredge the chicken pieces in the panko mixture, coating evenly and heavily, and pressing the coating into the meat.
Crunchy!!


4.  Put the chicken on a rack set over a baking sheet, spray with a quick burst of cooking spray and put the sheet in the middle of the oven. Bake until the chicken is golden and cooked through, 15 to 20 minutes. Let rest 5 minutes before cutting or serving.
Golden crusty perfection.

Yes, this is yet another variation on Chicken Parm.  But I really, really like this one!  I love when the breading process is simple and minimal.  I love baking instead of frying.  And I really love when my kids pretty much do a happy dance in their chairs in between bites.  This one's a winner!!
Pin It

Wednesday, February 6, 2013

Red Beans & Rice

Ok so while I'm nursing my bruised Cooking Ego over last night's disastrous soup, I think you need to take a moment to VOTE FOR MY BIRTHDAY CAKE!!!  Today is your last chance to decide what I'm baking so make sure your voice is heard!


Then come back here and check out my new favorite comfort food.

Red Beans & Rice
Recipe slightly adapted from Food Network Magazine
Prep time: 10 minutes   Cook time: 20 minutes

1 tbsp extra virgin olive oil
1 pound turkey andouille or other smoked turkey sausage, coarsely chopped
1 medium onion, finely chopped
1 clove garlic, finely chopped
2 15 1/2-ounce cans red kidney beans, drained and rinsed
1/2 cup chicken stock
1/2 tsp ground cumin
1/2 tsp dried thyme
1 bay leaf
Freshly ground black pepper, to taste
3 cups cooked rice 
1.  In a medium pot, heat the oil over medium-high heat. Add the sausage and onion and cook, stirring frequently, until the onion is softened, 3 to 5 minutes. 
Cook until onions are translucent and meat begins to brown.
2.  Add the garlic and cook for 30 seconds. Add the beans, chicken stock, cumin, thyme, bay leaf, and pepper to taste and bring to a boil. 
Sometimes simple ingredients are the best ingredients.


3.  Cover, reduce the heat to medium low and simmer for 10 minutes.  Serve the beans over the rice.
Cover, turn the heat down, and walk away!


For many years, the most I knew about red beans and rice was that it takes hours to make and "freezes beautifully."  And even though I'd never tried it before, I had it locked into my mind that it was bland and I just wouldn't like it.  
And then we spent a long weekend in New Orleans.  And a whole new world of food possibilities opened up for me.  I learned a little bit more about the origins of this dish.  Did you know that it was developed as an easy dish to throw together on the morning of Laundry Day (which was traditionally Monday), would cook all day, and then the tired mamas would have a hearty meal ready to go at dinner time?  I did not know that, but I do know that I am frequently a tired mama who would love to have a hearty meal ready to go at the end of a long day.  So why not give this a try?
I realize this recipe is of course an accelerated version, and I do plan on trying a more traditional recipe, but I just LOVE how simple, delicious, and easy this version is.  The sausage is just a little spicy.  The beans give this an almost creamy texture, and the little bit of sauce soaks into the rice and MAKES this dish.

Love it.  TOTALLY making this again!
Pin It

Monday, January 14, 2013

Lemon-Onion Chicken

Who likes finding a yummy new recipe using the same old ingredients you always have around?! 


I DO!!!

Lemon-Onion Chicken
Recipe adapted from Melissa D'Arabian
Prep time: 10 minutes   Cook time: 20 minutes

4 boneless, skinless chicken breast halves
1-2 tsp dried thyme, divided
Salt and freshly ground pepper
3 tbsp extra-virgin olive oil
1/4 cup all-purpose flour
1/2 large red onion, thinly sliced
1/4 cup white wine
1 cup chicken stock
Zest and juice of 1 lemon
1 1/2 tbsp butter

1.  Heat a large saute pan over medium heat and add the olive oil.
Don't be too skimpy with the seasonings.


2.  Season the chicken with about 1 tsp dried thyme, lemon zest, and salt and pepper to taste.  Put the flour in a shallow dish. Dredge the chicken in the flour and add to the pan; cook until golden brown, about 3-5 minutes per side. Transfer to a plate and tent with aluminum foil.
GORGEOUS golden brown color.


3.  Add the red onion and remaining teaspoon of thyme to the pan and cook over low heat, stirring occasionally, until aromatic, about 5 minutes.   
I adore the color that red onions add to a plate.


4.  Combine the wine, chicken broth and lemon juice in a bowl. Turn the heat under the pan to high and deglaze with the broth mixture, scraping up the pan with a wooden spoon. Add the chicken back to the pan, turning to coat it in the sauce.  Top each piece of chicken with some of the onions, cover the pan and simmer until the chicken is cooked through, about 5-7 minutes.
Yes, I forgot to take a picture of the sauce simmering.  Oops!


5.  Uncover the pan and continue to simmer until the liquid starts to reduce, about 5 minutes. Remove from the heat and whisk in the butter. Season with salt and pepper.

As I was pulling this together, it felt a lot like a variation of chicken piccata.  Rob and I really enjoyed the flavor of this dish.  The onions really give this a deeper, earthier flavor.  The lemon zest and juice brighten the dish, without making it too perky. 

And I especially loved how, with this sauce, I could easily omit the onions in the servings I gave my boys.   Because they haven't yet discovered how awesome caramelized onions are.  But they will someday!  Just give me time... ;)
Pin It

Wednesday, January 9, 2013

Papa's Pot Roast

I have, I'm not kidding, spent years trying to improve the recipe.  And I think I've tried just about anything that you could think of:

  • I've tried making this in the slow cooker instead of the oven
  • I've tried adding herbs, fresh or dried
  • I've tried switching the water for red wine
  • I may have even tried adding some vegetables but that was really so long ago that I don't fully trust my memory there
And yet despite all my best efforts, it NEVER tastes as good as when I just stick to the recipe card as my mother-in-law wrote it.  Sometimes you just can't mess with perfection.


Papa's Pot Roast
Recipe from my mother-in-law
Prep time: 5 minutes   Cook time: 6 hours

2 1/2 - 3 lb FROZEN chuck roast [Yes, frozen solid. Just go with me on this]
Salt & freshly ground black pepper
1 pkg dry onion soup mix
1 can cream of mushroom soup
1/2 soup can water

1.  Preheat oven to 250.  

2.  Take the roast out of the freezer and give it just a super quick rinse in cold water.  Place the roast in center of heavy duty aluminum foil. Season generously all over with salt and pepper, which will now stick to the roast because it's wet.
It's a roast.  Don't be afraid of a good S&P crust.

 
2.  Sprinkle on onion soup mix and then cover with mushroom soup. Pour water around the edge of roast.
Sometimes I live dangerously do the mushroom soup before onion.

 
3.  Wrap roast with drug store type seal so juices won't come out [Side note: you really want to use HD foil for this.  Double wrapping with regular foil just isn't strong enough contain the awesome flavor]. Put wrapped roast on cookie sheet in case of leaks. Bake for 6 hours, "or until it smells so good that you just can't stand it any longer." 
Drug store Seal = folding the edges together and then rolling it down

Look at all that FLAVOR!!!!


Normally I wouldn't tell you what side dishes to make for a meal, but you pretty much HAVE to make mashed potatoes with this.  The two soups, water, and glorious meat juices come together to create this effortless gravy that begs to be spooned over some fluffy, buttery potatoes.

 Also, let me also say that Good Things Come to Those Who Wait.  Gavin has always hated anything with beef.  He's just not a Beef Eater.  But this last time I made this?  He turns to me and says "this is really good Mama." 

I'm not ashamed to admit that I teared up a little bit.  VICTORY!!!!
Pin It

Tuesday, December 11, 2012

Autumn Pork Chops

I've officially taken away all excuses about dinner.  There truly is NO REASON why you can't have a good, home-cooked meal at least once in a while.


3 ingredients.  About 30 seconds hands-on time.  VOILA, dinner is served. :)

Autumn Pork Chops
Recipe from I think Fix It and Forget It but no clue which one
Prep time: 30 seconds   Cook time: 8-10 hours

4-6 boneless pork chops
2 cups apple OR cranberry juice
Cinnamon, optional

1.  Sprinkle the pork chops with a little cinnamon.


2.  Lay the chops in the bottom of your slow cooker and cover with juice.  Cook on LOW for 8-10 hours.


These chops turn out tender and moist every time!  And after spending 8+ hours baking the previous day, I looooooooooooved that I could toss these into my slow cooker, splash in the juice, and walk away.  Absolutely one of my favorite, EASY recipes!
Pin It

Tuesday, December 4, 2012

Beef with Broccoli

Dear Chinese Food Restaurants,

I'm very sorry but... I'm breaking up with you.  I know this may come as a shock, but let's be honest here.  There's been a growing distance between us.  I know we've both tried to pretend the silence wasn't there, that things were just fine.  But they're not, and they haven't been for a long time.

You may not quite realize this but you've changed.  In the beginning, things were great!  They were amazing actually.  But now....  it's just not working anymore.

You see, I like my beef and broccoli untainted, simple, pure.  When I order B&B, I don't want bamboo shoots, onions, carrots, and a host of other veggies.  I truly just want broccoli.  And the beef?  Well, you have to admit that you've been off there too.  The flavor is just not the same.  It's not tender, and often overcooked actually.

Please know that I cherish the times we had together.  We had fun!  But it's time I moved on.  I found something else, and it works for me.  I wish you all the best, and know you'll find someone new.

With love,

Jeanna


Beef with Broccoli
Recipe adapted from Rainy Day Gal
Prep time: 10 minutes   Marinating time: at least 1 hour   Cook time: 10 minutes

For the marinade
1/2 tsp baking soda
1 tsp sugar
1 tbsp cornstarch
1 tbsp soy sauce
1 tbsp water
2 tbsp canola oil
1 to 1 1/2 lbs flank steak, thinly sliced

For the stirfry
1/2 cup soy sauce
2 tbsp brown sugar
4 cloves garlic, minced
1 tbsp grated fresh ginger
1 tsp orange zest
2 tbsp flour
1 tbsp dry white wine
3 tbsp canola oil, divided
4 cups fresh broccoli florets

1.  For the marinade: In a resealable bag, whisk together the baking soda, sugar, cornstarch, soy sauce, water, and canola oil.  Add in the steak strips, close the bag, and smush things around to get everything coated.  Refrigerate for at least one hour.
Beef: it's what's for dinner


2.  For the stirfry: In a small bowl, whisk together the soy sauce, brown sugar, garlic, ginger, orange zest, flour, and wine.  Set aside.
It helps to have everything ready to put in the pan.


3.  Heat 2 tbsp canola oil in a large skillet or wok over high heat (when you can see it shimmer, it's hot enough).  Carefully add the broccoli to the skillet and cook, stirring frequently, until they are bright green but still crisp, about 3 minutes.  Pour the broccoli onto a plate and set aside.
LOVE LOVE LOOOOOOOVE that bright green color!!


4.  Heat the remaining tbsp of oil in the skillet; again you want it shimmering hot.  Add the marinated beef and half of the sauce mixture.  Cook, stirring often, about 3-4 minutes until the meat is cooked through.  Stir in the broccoli and the remaining sauce and heat through, about 1 minute.  Serve over hot rice.
Pardon me while I go mop up my drool


I won't embarrass myself by telling you how much of this I ate.  Let's just say I was really full when I went to bed.  So not only was this flavorful and contained ONLY the ingredients I wanted, this came together in less time than it would for takeout to be delivered to my door.

Oh yeah, I found something new and I'm sticking with it!
Pin It

Wednesday, November 14, 2012

Pasta with Bacon, Tomatoes, & Cheese

I heard a few months ago that thanks to the drought we experienced over the summer, that not only will the cost of produce be going up, but also bacon prices.  So the last few weeks I've been doing what any normal bacon-love would do: stocking up every time I get groceries.  I haven't seen the price change yet at my grocery store, but until I do I'm going to keep buying packs and storing them in my freezer.


As a result, I have a nice little Bacon Stash living in my deep freezer.  And since I still have some tomatoes slowly ripening on my china cabinet, I figured that was Fate's way of telling me to make this dish.

You're welcome. ;)

Pasta with Bacon, Tomatoes, & Cheese
Recipe adapted from Rachael Ray
Prep time: 10 minutes   Cook time: 15 minutes

1 lb whole wheat penne
4 slices bacon, chopped
1 medium onion, chopped
4 garlic cloves, minced
1/4 tsp red pepper flakes
Salt and freshly ground black pepper
1/2 cup white wine
1/2 cup chicken stock or broth
1 pint grape tomatoes
1 1/2 cups shredded mozzarella
2 tbsp chopped fresh basil OR 1 tsp dried basil
1/2 grated Parmesan

1.  Bring a large pot of salted water to a boil over high heat.  Add the pasta and cook according to package directions.  Before draining, reserve about 1 cup of the starchy pasta water

2.  While the pasta cooks, preheat a large skillet over medium-high heat.  Add the chopped bacon and cook, stirring every now and then, until crispy (5-7 minutes).  Because you never remove the bacon, and keep adding liquids that will soften it a little, you want it extra crispy.
Mmmmmmmmmmmmmmmmmmmmmmmmmmmmmm.....


3.  Add the onions, garlic, red pepper flakes, and a little salt and pepper.  Cook, stirring frequently, for about 5 minutes, or until the onions start to brown.
By this point you may need a towel to wipe up the drool.


4.  Add the white wine and cook for 1 minutes.  Add the chicken stock, bring up to a bubble and let simmer for 2 minutes.
Ok so not much to look at now but AMAZING to smell!


5.  Add the grape tomatoes and cook for a few minutes, just to start them getting hot and ready to burst.  Add the cooked, drained pasta and toss to coat in the sauce.  If it looks too dry, add some of the reserved pasta water.
I also have these pear-shaped heirloom tomatoes that need eating.


6.  Turn off the heat and add the cheeses and basil.  Stir to combine.
Cheese! Glorious cheese!


This is a comforting, carb-alicious dish with BACON and CHEESE.  Anything else I need to say to convince you to try this? ;)  I do like to cut the richness of this by serving it with a tossed salad.
Pin It