Tuesday, November 29, 2011

Hard Cider Pork Loin

Happy belated Thanksgiving!!

I hope everyone had a fantastic holiday weekend.  Ours was a wonderfully jam-packed family weekend that was stuffed to the gills with love, laughter, and really freaking awesome food. :)

But now the weekend is over.  It's back to reality.  My reality includes a more-hyper-than-normal four year-old, a sick six month-old, a house to clean/decorate, parties to plan, and shopping to do.  And that's just to get things started!!

Thank God for easy, delicious recipes, like this one, so we can still eat well even if I'm running around like a crazy person.

Hard Cider Pork Loin
Recipe from Claire Robinson

2 tbsp unsalted butter, plus 1 tablespoon cold
2 1/2 lbs pork loin roast
Kosher salt and freshly cracked black pepper
1 onion, peeled and sliced
2 Granny Smith apples, cored and sliced
1 bottle, (12 ounces) hard cider, plus more as necessary


1.  Preheat oven to 375 degrees F.
I love cooking apples and onions together.


2.  Heat a large Dutch oven over medium heat. When the pan is hot, add 2 tablespoons of butter. Season the pork generously with salt and pepper, to taste, and sear on all sides in the hot pan until golden brown; set aside. Add the onions and apples and season again with salt and pepper. Cook until they begin to caramelize, then pour in the hard cider and scrape the brown bits off the bottom of the pan.
Season liberally.  Yes, it will taste better!


3.  Bring to a simmer and nestle the browned pork roast back into the pan. Cover with a lid and put in the oven to braise until the internal temperature reaches 145 degrees F on an instant-read thermometer, 25 to 30 minutes.
THAT'S the color you're looking for.


4.  Remove the pork roast from the pot and transfer to a carving board; tent with foil to keep warm. Transfer the contents of the pot to a food processor or blender and puree, then return the puree to the pan. Bring to a boil, season with salt and pepper, to taste, then reduce the heat to low and add more cider if gravy is too thick.
The delicious beginning of a beautiful gravy


5.  Add the remaining tablespoon of cold butter, whisking constantly as it melts. Remove from heat when the gravy is smooth and shiny and the butter is completely melted.  Slice pork loin roast and arrange on a serving platter. Serve with sauce and enjoy!


This pork roast is SO YUMMY!!!  And since it requires very little hands-on time, it's super easy to pull together.  I typically like this with traditional mashed potatoes and steamed veggies.  However it's also really good with cheesy polenta if you'd like to try something new and different.
Pin It

Tuesday, November 22, 2011

Pecan Toffee Tassies

Every Thanksgiving dessert table is laden with cakes, cookies, trifles, and pies.  Especially pies.

Did you know that pies can come in miniature form too?  Yeah, I love that. :)

Like baby pecan pies!


Pecan Toffee Tassies
Recipe from Paula Deen

1 (15-ounce) package refrigerated pie crusts
1/4 cup (1/2 stick) butter, melted
1 cup firmly packed brown sugar
2 tablespoons all-purpose flour
2 large eggs, lightly beaten
1 teaspoon vanilla extract
1 cup finely chopped pecans
1 (10-ounce) package almond brickle chips

1. Preheat the oven to 350 degrees F. 

2.  Unroll the piecrusts onto a lightly floured surface. Roll into 2 (15-inch) circles. Cut out 48 circles using a 1 3/4-inch fluted or round cookie cutter, OR a small water glass, re-rolling dough as needed. Place in 1 3/4-inch muffin pans, pressing on the bottoms and up the sides of each of the mini-muffin cups.
Tip I just learned: use a shot glass to help the crust down into the mini tins


3.  Combine the melted butter, brown sugar, flour, and eggs in a large bowl, mixing well. Add the vanilla. Stir in the pecans and brickle chips. Spoon the pecan filling evenly into the pie shells. Bake for 25 minutes, or until filling is set and crust is lightly browned. Cool in pans on wire racks.
Half of a cookie scoop fills these babies nicely.
So, as cute as these are, there are pros and cons to making these.  Pro is they are superdangcute, bite-sized, and a little goes a long way.  Con is they are bite-sized, and you quickly lose count of how many you've eaten as you keep grabbing "just one more."  Consider yourself warned before adding these to your dessert table. ;)
Pin It

Monday, November 21, 2011

Cranberry Orange Bagels

My kitchen has been a hotbed of activity the last few days.  Final countdown to the biggest gastrointestinal day of the year...  I cannot WAIT!!!

I'll try to get up as many things as possible that I've been making, just in case some of you are in need of some last minute help.  Most of my craziness has revolved around dessert.  But as completely satisfying as dessert can be, we all know that a truly good day starts with a good breakfast, right?

Right.

Start your day with these beauties....

Cranberry Orange Bagels
Recipe adapted from Taste of Home Best Holiday Recipes 2011

1 cup plus 2 tbsp water
3/4 cup dried cranberries
1/3 cup packed brown sugar
Zest from one orange
3 cups bread flour
1 tsp salt
1/4 tsp ground cloves
1 pkg active dry yeast (or 2 1/4 tsp if you buy yeast in bulk)
1 tbsp sugar
1 egg white, beaten with a splash of water

1.  In a bread machine pan, place the water, cranberries, brown sugar, orange zest, salt, cloves, flour, and yeast in order suggested by manufacturer.  Select dough setting (Psst!!  You'll want to check on this dough to see if it may need a tablespoon or two of water or flour.  I found the dough to be really wet for me and added a little extra flour.)
Not much to look at right now


2.  When the cycle is complete, turn dough onto a lightly floured surface.  Cover with a towel and let rise 10 minutes.  Divide dough into eight balls.  Push thumb through centers to form at least a 1-inch hole.  Stretch and shape dough to form an even ring.  Cover with the towel again and let rise for 20 minutes.
My bagel rings still don't win beauty pageants, but I'm improving!


3.  Fill a large, deep skillet with water; add sugar and bring to a boil.  Drop bagels, four at a time, into boiling water.  Cook for 45 seconds on each side.  Remove with a slotted spoon and drain on paper towels.


4.  Place bagels on a parchment-lined baking sheet.  Brush the tops with the egg white wash.  Bake at 400 for 18-22 minutes or until golden brown.  Remove to wire racks to cool.

I like my bagels as God intended: under MOUNDS of cream cheese.
I am a HUGE fan of the cranberry and orange flavor combination.  And since I discovered that making bagels really isn't quite as hard as I remembered, finding this version has me doing happy dances in the morning, even before my coffee!
Pin It

Thursday, November 17, 2011

Spiced Almonds

The turkey and side dishes get way too much attention.  An awesome holiday tradition I love revolves around pre-dinner games and appetizers.

I love to play Trivial Pursuit with my brother.  I know, NERD ALERT!!  I never said I was any good at it, but it's something he and I really enjoy playing, especially before Thanksgiving dinner.  My mom makes all these yummy snacks and he proceeds to cream me in everything but Entertainment.

I can always count on the Entertainment category to stop him.

Anyway, I unfortunately won't be seeing my bro for Turkey Day this year, but the spirit of that tradition of games and snacks is definitely on my mind.  And this snack is AWESOME to nibble on whether you're playing Trivial Pursuit, Monopoly, or Dominoes.

Spiced Almonds
Recipe ever so slightly tweaked from Ellie Krieger

2 cups raw almonds
1 tbsp maple syrup
1/2 tsp curry powder
1/2 tsp dried rosemary
1/4 tsp salt
1/8 tsp cayenne

1.  Preheat the oven to 325.
Not an expected flavor combo, but totally awesome!!


2.  In a medium bowl, combine all ingredients until the nuts are evenly coated.  Pour onto a greased baking sheet and bake 15-20 minutes, stirring once.  Let cool on baking sheet.
I dare you to stop at just one.
 These will keep in an airtight container in the fridge for up to two weeks.
Pin It

Wednesday, November 16, 2011

Orange Chicken

Even though Gavin has improved DRASTICALLY in the last few weeks with at the very least trying some of the new dishes I make, I'm always on a quest for recipes that I'm pretty durn positive he'll like.

Is there a kid out there who doesn't like juice??
Mmmm, a little sweet, a little tart, a LOT good.


Orange Chicken
Recipe slightly adapted from Four-Ingredient Cookbook

6-8 chicken breasts
Salt & freshly ground black pepper
1 cup flour
2 tbsp extra-virgin olive oil
1 can orange juice concentrate, thawed
2-3 green onions, chopped

1.  Preheat oven to 375.  Heat the oil in a large skillet over medium heat.
Alwaysalwaysalwaysalways season the meat!!


2.  Sprinkle both sides of the chicken breasts with salt and pepper.  Dredge lightly in flour and add to the hot skillet.  Brown the chicken on both sides before placing in a lightly greased baking pan.
Brown.

3.  Scatter green onions over top of the chicken breasts.  Drizzle with the orange juice.  Cover pan with foil and bake, covered for 1 hour.  Uncover and bake an additional 15 minutes.
Ready for drizzling!
 As with most chicken dishes, I do think rice is a great companion to this dish.  I like to drizzle the thickened orange sauce over it...sooo yummy!  Add a green salad or steamed veggie of your choice and you're set!
Pin It

Monday, November 14, 2011

Cranberry Sauce

It's my favorite time of year!!  There's a crispy bite in the air.  Sweatpants and cozy blankets become the evening norm.  People tend to be a little nicer, a little more considerate (after all, Santa is watching).

And then there's The Food.  Yes, I meant to capitalize that.  Because there's your day-to-day food and then there's Holiday Food.  God bless Holiday Food!!

One of my favorite things about the holidays, and yes I have a lot of favorite things, is the chance to get together with family.  This year is thankfully no exception!  And instead of imposing on the host to make the entire Thanksgiving Dinner with all the trimmings, we are doing things potluck style.  Of course I asked to pleasepleaseprettyplease bring the cranberry sauce.

And I ain't talking about the stuff in the can either.  Trust me, of everything on your table, cranberry sauce is the EASIEST thing to make and so flavorful, you'll forget all about the convenience of the canned kind.

Cranberry Sauce
Recipe from Rachael Ray

1 cup water
1 cup sugar
1 cinnamon stick 
2 tsp grated fresh ginger 
2 tsp orange zest 
1/4 tsp salt 
1/8 tsp ground cloves 
One 12-ounce bag fresh cranberries

1.  In a medium saucepan, combine the water with the sugar, cinnamon stick, fresh ginger, orange peel, salt and cloves. Cook over medium heat, stirring constantly, until the sugar is dissolved. Stir in the cranberries and bring to a boil, then lower the heat and simmer, stirring, until slightly thickened, about 8 minutes.
Seriously kick-butt flavors going on


2.  Transfer the mixture to a bowl and remove the cinnamon stick. Let cool.

Gorgeous ruby gems!
Can we talk about how easy this is?  First, you make a simple syrup (equal parts water and sugar, boiled until the sugar dissolves).  Then you add a whole bunch of stuff to it that taste FANTASTIC with cranberries: fresh ginger, orange zest, cloves, cinnamon.  Add your berries and let it boil until it's thickened and looks like cranberry sauce.  See?  Easy!

This is a truly amazing complement to your turkey dinner.  It's also quite fabulous stirred into your morning oatmeal with some toasted pecans or walnuts.  Mix it will a little yogurt, or use as an refreshing alternative on top of ice cream.  If you really want to go crazy, add a dollup of Dijon mustard and slather all over a pork tenderloin for a couple hours before roasting.  Y.U.M.  

Believe me when I say you'll be doubling this recipe just to make sure you have leftovers to play with!
Pin It

Friday, November 11, 2011

Bagels

The first time I made bagels, I remember lots of steam, sweating in a hot kitchen, and itty-bitty honeyed hockey pucks that molded after about three days.  Yeah, NOT my most glamorous baking moment.  It's anyone's guess, really, as to why I've been so wanting to try making bagels again.

But I reallyreallyreallyreally wanted to.

In my bread machine cookbook, there's this recipe for bagels that has been staring at me, taunting me, for years.  But I couldn't make them.  No...not after my disastrous failure!  But.  But.

But.

I kept looking at it.  I kept reading it over.  Sure it was a little involved but each step seemed manageable.  That's right Jeanna, just focus on the steps.  Don't freak out over the whole recipe.  One step at a time.  I know I'm a dork but sometimes I really have to break down a recipe into each step and ask myself if I can handle that one step.  If you are easily overwhelmed by recipes I definitely recommend giving it a try.  Don't look at the overall cook time.  Don't look at the number of steps, just look at each step individually and ask "Can I do that?"

Anyway, where was I?  Oh right!  The best part...


Bagels
Recipe slightly adapted from Better Home & Garden's Bread Machine Baking

1 cup water
2 tsp canola oil
3 cups bread flour
1 tbsp sugar
3/4 tsp salt
1 tsp yeast
1 egg white, beaten with a splash of water

1.  Add all ingredients except the egg white to your bread machine according to the manufacturer's directions.  Set to dough setting.
Mine says to put liquids in first, then flour & seasonings, ending with yeast.


2.  Remove dough from machine and punch down.  Cover and let rise 10 minutes.
Dough ball!


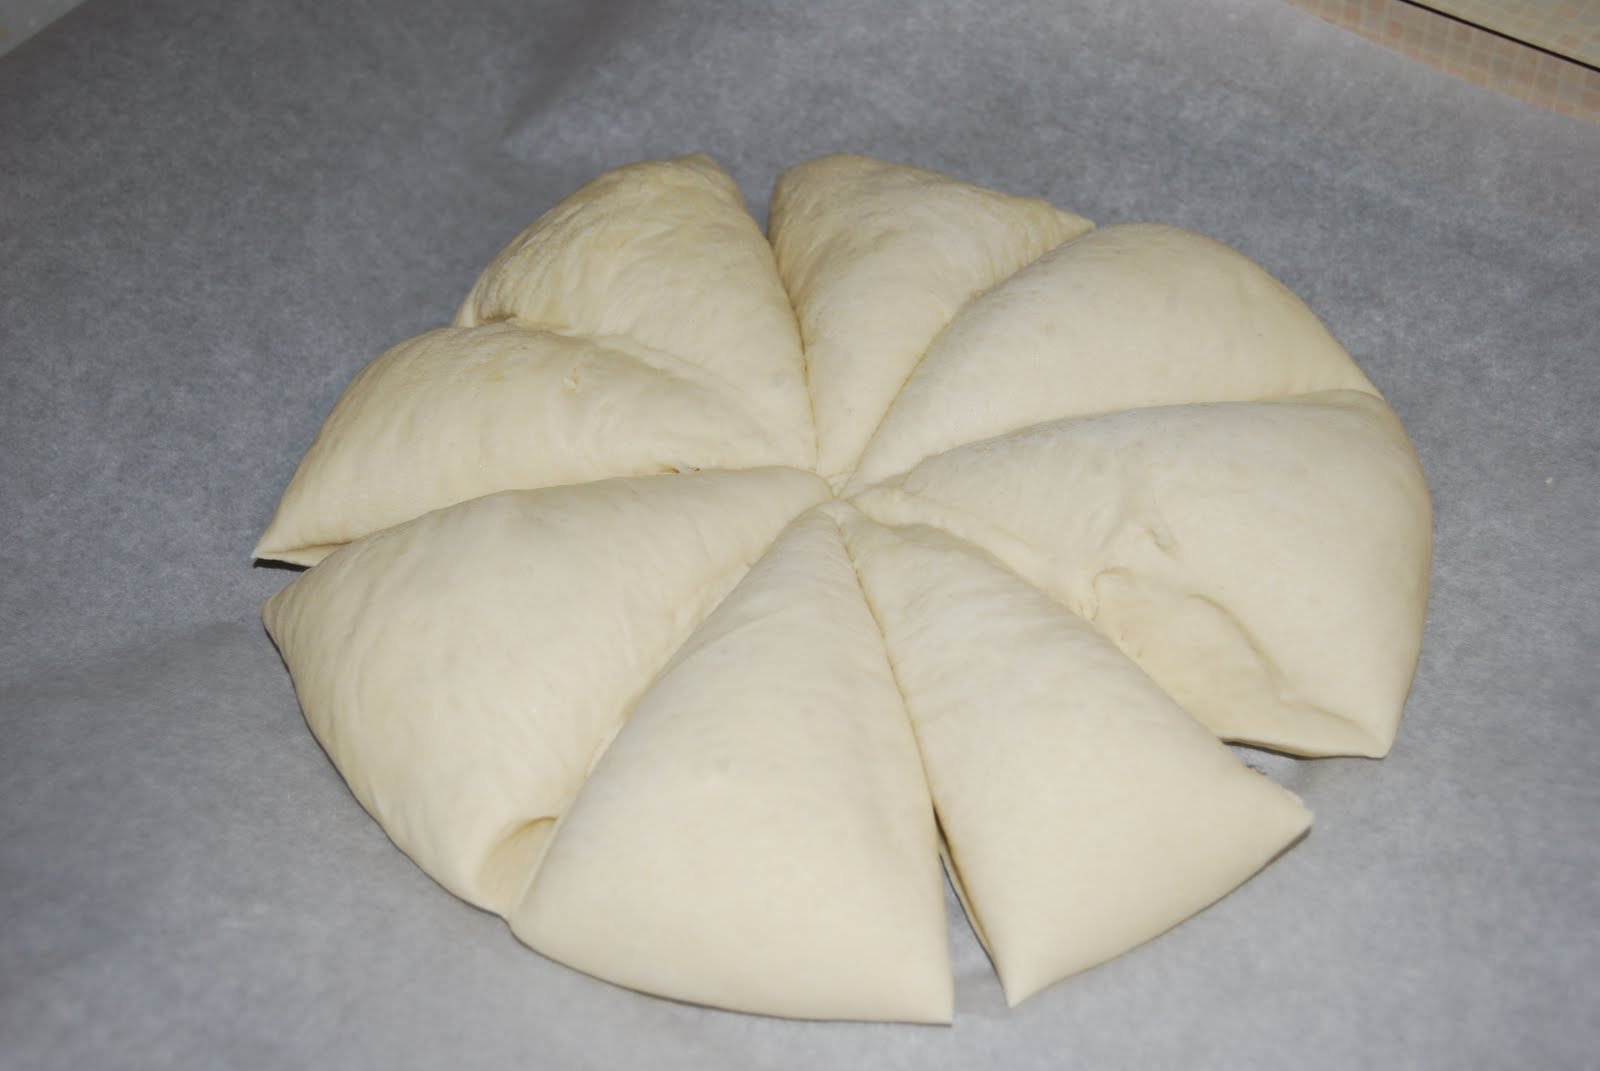
3.  Divide into 8 pieces, roll into a ball and punch a hole through the middle, pulling a little to stretch out the ring.
Looks kinda like a pizza here.


4.  Lay on a baking sheet lined with parchment paper.  Once you make the first dough ring, start a 20 minute timer.  Quickly make the seven remaining rings.  Cover and let rise.
Don't be afraid to stretch the dough for thinner rings.  They're going to puff up.


5.  In a large pot or deep skillet, bring 6 cups of water and 1 tbsp of sugar to a boil.  Boil the rings, four at a time, for 45 seconds on each side.  Drain on paper towels and then return to the parchment lined baking sheet.  Brush tops with the egg white.
KEY STEP: boiling first gives bagels that outer chewiness.


6.  Bake in a 400 degree preheated oven for 15-20 minutes, or until the tops are browned.  Cool on wire racks.
BAGELS!
 Yes, I just gave you a recipe for plain bagels.  Don't look at me like that....I will share recipes for other, fancier bagel flavors.  But in the meantime there's a LOT you can do with these.  If you like toppings (sesame seeds, poppy seeds, dried minced onion, toasted pumpkin seeds), sprinkle those on top right after brushing with the egg white.  Experiment with flavored cream cheeses or different kinds of jelly.  OR cook up some eggs and sausage to make a killer homemade bagel breakfast sandwich.  See?  Plain bagels suddenly aren't so boring after all. ;)

Oh, and for an FYI, I'm paranoid about fresh breads going bad so I keep these in the fridge.  Since I like mine toasted and under a small continent of cream cheese, I don't worry about the fridge drying them out.
Pin It