Showing posts with label flour. Show all posts

Wednesday, February 12, 2014

Oatmeal Pan Bread

This is a Special Occasion Bread.

And by that I mean that this isn't going to be as "hands-off" as some of the other breads I've posted, like this one and this one. BUT that does NOT mean that this recipe is difficult! I only mean that this one maybe demands a slight bit more of your focus and attention. That's all. No special equipment, no crazy ingredients. Just your brain and your hands. Ok? Great!


Now, are you ready to make, and consume, the best bread you've ever had in your life?

Herbed Oatmeal Pan Bread
Recipe from my mother-in-law
Prep time: 20 minutes   Rise time: 1 hour total   Bake time: 25-30 minutes

Bread:
2 cups water
1 cup rolled oats
2 tbsp butter
3 3/4 to 4 3/4 cups all-purpose flour
1/4 cup sugar
2 tsp salt
4 1/2 tsp active dry yeast (two of those little packets)
1 egg

Herb Topping:
6 tbsp butter, melted and divided
1 tbsp grated Parmesan cheese
1/2 tsp dried basil
1/4 tsp dried oregano
1/4 tsp garlic powder

1. Grease a 9x13 baking pan (OR two 8 or 9-inch square pans if you want one tonight and the other for tomorrow). Set aside.

2. Bring water to a boil in a medium saucepan; stir in rolled oats. Remove from heat and stir in the 3 tbsp butter. Cool to 120-130 degrees F.
No thermometer? Touch it. If it's tingly hot, but you're not screaming in pain, it's good to go.


3. In a large bowl, combine 1 1/2 cups flour, sugar, salt, and yeast; blend well. Add the rolled oats mixture and egg. Blend with an electric mixer at low speed until moistened; increase speed to medium and beat for 3 minutes. By hand, stir in 1 3/4 cups to 2 1/2 cups flour to form stiff dough.
Add in the oatmeal.

Sorry about that finger slipping into the shot.

Looking kinda soupy but we'll tighten it up!

Stir, stir, stir

Use those muscles!


4. On a floured surface, knead in 1/2 to 3/4 cup flour until dough is smooth and elastic, about 5 minutes. Shape dough into ball; cover with large bowl. Let rest 15 minutes. Punch down dough to remove all air bubbles.
Nice and smooth and ready-to-rise

Cover and maybe tidy up the kitchen a bit.

A little bit bigger than before

Got any aggression you need to let out?


5. Press the dough into the greased pan. Using a sharp knife, cut diagonal lines 1 1/2" apart, cutting completely through the dough. Repeat in opposite direction creating diamond pattern. Cover loosely with greased plastic wrap and a cloth towel**. Let rise in a warm place until light and doubled in size, about 45 minutes.
The dough might take some coaxing to press into the corners.

Cut carefully.

We're getting closer! This is ready to cover and rise again.


**Get Ahead: To bake at a later time, at this point let stand at room temperature for only 20 minutes. Remove cloth towel and refrigerate 2 to 24 hours. Remove plastic wrap from dough; let stand at room temperature 30 minutes. Bake as directed below.

6. Heat oven to 375 F. Uncover dough. Redefine cuts by poking the tip of the knife into the cuts until the knife hits the bottom of the pan; do not pull the knife through the dough. Spoon 4 tablespoons of melted butter over the cut dough. Bake for 15 minutes.
This pan stayed in my fridge for 24 hours before looking this pretty.

BUTTER


7. While the bread bakes, combine the cheese, basil, oregano, and garlic powder in a small bowl. Brush remaining 2 tablespoons butter over the partially baked bread. Sprinkle with the herb topping. Bake an additional 10 to 15 minutes or until golden brown. Serve warm or at room temperature.
This little bowl will take this bread over the top.

Half-baked and ready for the fun stuff!

Omg it just keeps getting better!


I watched my mother-in-law make this bread for years, in awe, before I finally felt confident enough to make this myself.  I mean, come on, the need to measure the temperature of an ingredient?  Kneading??  Clearly this was some crazy Laura-Ingalls-Wilder-esque recipe that was much too difficult for me to handle.

I knew, after my first time making this, that I could not have been more wrong. This. Is. EASY.

Because after making some oatmeal (touching it to make sure it was hot but not too hot), stirring up some dough, punching dough, and watching a clock, I had the most amazing bread I've ever eaten. These rolls are light but hearty. Buttery golden, and pure herb-y deliciousness. I won't tell you that you'll stop at seconds. Rather, I'll just say that no one will judge you for having fourths.

And that's why this is Special Occasion Bread.
Pin It

Tuesday, January 7, 2014

Pizza Dough (in bulk)

My bread machine broke.

Ok, to be fair, the actual machine didn't break, but the pan that mixes and bakes all that yeasty goodness broke.  And because this was a wedding shower gift about a decade ago, I'm having problems finding replacement parts for it.

I have, however, had a much easier time finding a replacement pizza dough recipe.  Much as I love the beer dough I've been making the last few years, this one is just plain AWESOME.  It's simple.  It's easy.  And it makes a LOT.


And when you're feeding three hungry males the same meal every single week, a recipe that makes a ton is always appreciated.

Pizza Dough (a.k.a. Olive Oil Dough)
Recipe from Artisan Bread in 5 Minutes a Day
Prep time: 5 minutes   Rise time: 2 hours   Bake time (for pizza): 15-18 minutes

2 3/4 cups warm water
1/4 cup extra-virgin olive oil
1 1/2 tbsp yeast
1 1/2 tbsp kosher salt (Or any other course salt.  If you want to use table salt, you'll need to decrease this by a quarter)
1 tbsp sugar
6 1/2 cups all-purpose flour

1.  Mix the water, EVOO, yeast, salt, and sugar in a 5-quart container.
The yeast and EVOO do battle over who is the most fragrant.


2.  Mix in the flour, without kneading, using a spoon, a 14-cup food processor (with dough attachment), or a heavy-duty stand mixer (with dough hook).
Lots of flour.

Lots of dough.


3.  Cover (NOT airtight) and allow to rest at room temperature until the dough rises and collapses (or flattens on top), approximately 2 hours.
Cover. Walk away. Come back and make pizza.


4.  The dough can be used immediately after the initial rise, though it is easier to handle when cold.  Refrigerate in a lidded (NOT airtight) container and use over the next 12 days.

5.  To make a pizza, sprinkle the surface of the dough with a little flour and, using a serrated knife, cut of 1/4 of the dough.  Just like with the Artisan Bread, stretch the surface of the dough around to the bottom on all four sides, rotating the ball as you go.  Place on a floured surface, dust the ball with more flour and, using your hands or a floured rolling pin, flatten to your desired pizza shape and thickness.

From here it's pretty straightforward.  Decorate your pizza with whatever toppings you like.  I like to bake mine on a pizza stone in a 425 F oven.  My boys share a smaller, cheese pizza, which I do for about 15 minutes.  Rob and I usually share a larger, thinner, pepperoni pizza which takes 18-20 minutes.

Another thing I like about this dough is it's versatility.  Sure I mainly use it for pizza, but it can also be used for focaccia.  I'll have to save the Caramelized Onion & Rosemary Focaccia for another post though. ;)
Pin It

Monday, March 18, 2013

Basic Artisan Bread

I have been torturing my friends on Facebook for the last week talking about this bread.  Yes, it really is THAT easy.  Yes, it really is THAT good.


Still not sure?  Find out for yourself!

Basic Artisan Bread
Recipe from Artisan Bread in 5 Minutes a Day
Prep Time: 5-10 minutes   Rising Time: 2 hours, 40 minutes   Cook Time: 30 minutes

3 cups lukewarm water
1 1/2 tbsp granulated yeast (1 1/2 packets)
1 1/2 tbsp kosher salt
6 1/2 cups all-purpose flour

1.  Pour the warm water in a large bowl OR 5-quart container with a lid.  The water should be a little bit warmer than body temperature, but not so warm that you get that tingly "wow that's hot!" feeling in your fingers.  You can get this temp right from your tap water.
I have my flour on stand-by


2.  Add the yeast and salt to the water; don't worry about it dissolving.
Yes, my container is "dirty" from the last batch.
I'm taking the lazy route to SOURDOUGH!!


3.  Mix in the flour but kneading is unnecessary.  Just stir it up with a spoon.  If your container has weird crevices or corners, you may need to get in there with your hands. But again, do NOT knead the dough.
Just a mass of sticky dough.


4.  Cover the container with the lid (this should NOT be an airtight container!!) and let the dough rise for 2 hours.
I cannot stress the importance of LABELING enough here.

Nice and puffy.  Now into the fridge with this beauty!


That's it!  You've just mixed up four pounds of bread dough in a few simple minutes.  Great job!!!  Take a moment to bask in how awesome you are.

Now what? 

You could move right into the baking part of this recipe, however it's best to let this dough sit 24-hours before baking.  So I would recommend putting your container in the fridge until the next day.

BAKING DAY
1. Take a pizza peel and sprinkle a little cornmeal in the middle of it (about a tablespoon).  If you don't have a pizza peel and aren't interested in buying one you could also use a rim-less or inverted cookie sheet.
Cornmeal will help the dough to slide off MUCH better than flour.


2.  Sprinkle the surface of the refrigerated dough with flour.  Pull up and cut off a 1-pound (grapefruit sized) piece of dough using a serrated knife. Hold the mass in your hands and add a little more flour as needed so it won't stick to your hands.
I just dusted the section I was pulling out but you can flour over the whole thing.


3.  Gently stretch the surface of the dough around to the bottom on all four sides, rotating the ball a quarter-turn as you go.  Most of the dusting flour will fall off; THAT'S FINE.  This is not an exact science, you just want a smooth, round of dough with a reasonably flat bottom. This step should only take about 30 seconds.
This is also how my pizza dough looks before I flatten it.


4.  Place the dough in the middle of the cornmeal on the pizza peel and let rest/rise, uncovered, for about 40 minutes.  If it doesn't rise all that much THAT'S OK.  More rising will occur as it bakes.

5.  About 20 minutes before baking, put a pizza stone OR inverted cookie sheet on the middle rack of the oven.  Preheat to 450. Place an empty broiler tray for holding water on any other shelf that won't interfere with the rising bread.

6.  Lightly dust the surface of the bread dough with about a teaspoon of flour.  Make a few 1/4" deep slashes in the dough using a serrated knife in whatever pattern you choose (cross, scallop, tic-tac-toe, etc).
Why yes, I used a steak knife.  And your point is...?

The little flour dusting helps the knife cut through without sticking.


7.  With a quick forward jerking motion of the wrist, slide the loaf off the pizza peel and onto the preheated stone. Quickly but carefully pour 1 cup of HOT water from the tap into the broiler tray and close the oven to trap the steam.  Bake for 30 minutes.
Into the hot oven with you!

Steamy

I won't tell, or judge, if you lick your screen.


YOU HAVE FRESH, ARTISAN BREAD!!!!  Isn't that exciting?!?!?!  Wasn't that SO STINKING EASY??  My family has always been really into carbs so this is quickly becoming an exciting, regular addition to our dinner table.  Kieran even gets so excited he does his version of tap dancing when he sees me pull the raw dough out.  It's so cute!

Now, there a couple things I want to point out:
  • Make sure the container you use to keep the dough is NOT an air tight one.  I'd originally intended to use some of my new Tupperware for this but, after some more reading, realized that wasn't going to work.  Rob picked up a 5-pack of regular old shoe storage containers for $5.
  • Get a roll of masking tape and LABEL.  Especially if you think you might have more than one bin of dough sitting in your fridge (I have two currently; I'll tell you more about the second batch later).  I label the end of the bin with what kind of dough it is AND I put the "Use By" date on top.  This dough will last up to 14 days.   
    A little labeling goes a long way.
  •  Don't think you can go through 4 pounds of dough in 14 days?  Then portion it out into 1-lb pieces and FREEZE IT.
  • As long as your dough does not contain any eggs, washing it in between batches isn't necessary.  Over time the bits of dough from previous batches will sour and you will end up with your very own sourdough bread starter!
Pin It

Monday, April 9, 2012

Pretzel Buns with Grilled Hot Dogs

Facebook conversation:

Me: Just remembered I committed to making pretzel buns today. Hmmm, suppose I should actually check out the recipe now.

Friend: Or just head over to Metro Market and pick up a dozen.

Me: Too easy. I need to see if they're really as easy to make as Food Network tells me they are. Plus if I can pull off pretzel buns, then I can try big, soft, chewy pretzels and completely kiss my waistline goodbye.


My friends, consider my waistline obliterated.  Because if I can make these so completely and utterly distracted as I was at the time, you can TOTALLY pull these off!

Pretzel Buns with Grilled Hot Dogs
Recipe from Jeff Mauro

1 cup milk
1/4 cup brown sugar
2 tbsp honey
1 packet active dry yeast, or 2 1/4 tsp
2 tbsp unsalted butter
2 large cloves garlic, minced or grated
3 cups all-purpose flour, plus more for dusting
1 cup bread flour
1/2 cup baking soda
Pretzel salt or coarse ground sea salt, for sprinkling
8 beef hot dogs

1.  In a small saucepan, heat the milk, 1/2 cup water, sugar and honey to 105 to 110 degrees F. Add to the bowl of a stand mixer. Sprinkle the yeast over the water mixture and wait for at least 10 to 15 minutes until the yeast blooms.

My Observations: Be aware that 105-110 is just barely above body temperature.  So unless your 10 month-old is super fussy and refusing to nap like he totally should be doing, DON'T WALK AWAY.  If you overheat the milk, don't panic.  Just turn off the heat and let it cool off a bit.
No thermometer?  Use your own judgement.  If it feels warm, you're fine.

2.  In a separate saucepan over medium heat, add the butter and garlic and cook until the butter is melted and the garlic is fragrant, 2 to 3 minutes.


3.  Combine the all-purpose flour and bread flour in a mixing bowl.


4.  Add the flour mixture to the bowl with the blooming yeast, and then add in the melted butter and garlic mixture. Mix on medium speed until the dough has come together and is smooth and elastic in texture and pulling away from the sides of the bowl, 5 to 7 minutes.

My Observations: Not having a fancy schmancy mixer with a dough hook is no excuse to avoid this recipe.  It just means we get to burn more calories as we use the "dough hooks" God gave us!

My dough hook

Keep kneading until it looks like this; sticky, but not totally clinging your hands anymore


5.  Line 2 baking sheets with silicone mats or parchment paper. Turn the dough out onto a lightly floured cutting board and form into a ball. Cut into 4 equal pieces, and then cut those in half to form 8 equal pieces. Using your hands, roll each piece into a ball and place onto a prepared baking sheet. Cover with a dish cloth and let them rest in a warm place for 12 to 15 minutes.
Cute little dough balls

6.  Once rested, lightly dust your work surface again and roll the balls into 7-inch logs. Place back onto the prepared baking sheet, cover, place back in the warm spot and let rest for an additional 30 minutes.
If you want hamburger buns, leave them as balls instead

7.  Preheat the oven to 425 degrees F. Place one oven rack high and one low.


8.  In a large pot, bring 8 cups water to a boil, and then add the baking soda. In batches, place the dough in the water and cook for 30 seconds on each side.

My Observations: No picture of the water itself because apparently adding baking soda to boiling water causes the water to bubble VIOLENTLY.  It'll calm down but just stand back a little as you carefully add the baking soda.

Like bagels, boiling in seasoned water before baking creates that outer chewiness


9.  Using a slotted spatula, remove the logs and place onto the prepared baking sheets. Sprinkle the logs with pretzel salt as they come out of the water, to ensure the salt sticks. Then cut 3 diagonal slits on top of the bread, not too deep.

Or you can misread the recipe and only do two slits. That's ok.


10.  Bake for 10 to 13 minutes, rotating between the top and bottom racks of the oven halfway through the cooking.
I could just snack on these as is.

I mentioned I was distracted when I made these... that may or may not have been an understatement.  My intention was to make these during Kieran's morning nap, as we had plans to be out later in the day.  Oh the best laid plans of mice and men, right?

Well, my morning didn't go as I wanted, but I thought "hey, I can adjust.  I'll just get these started during lunch and finish them off while the boys nap this afternoon."  You really can start laughing anytime now.  It's ok.  Lunch was hectic, as our earlier outing took longer.  And with the added stress of Gavin's sassy behavior, plus Kieran's crankiness from a growth spurt and teething, I was really getting frazzled.

And of course, on this day of all days, when I had something I NEEDED to accomplish and I DESPERATELY needed a break from my kids, my beloved boys randomly decided they were not tired and refused to nap.  That's right.  I measured, kneaded, boiled, and baked all to the tune of Kieran fussing about every 10-15 minutes.

But you know what?  The buns turned out REALLY REALLY GOOD.  They are soft and chewy, a little bit sweet initially, the way a pretzel should be, but toward the end of the bite there's this fantastic garlic taste.  AWESOME with the smokey, grilled hot dogs!  Add some fries and some kind of vegetable or fruit salad and you have truly spectacular summertime meal.

Now if you'll excuse me I need to go find some giant pretzel recipes to try.  I can feel my waist expanding already in anticipation.
Pin It

Friday, November 11, 2011

Bagels

The first time I made bagels, I remember lots of steam, sweating in a hot kitchen, and itty-bitty honeyed hockey pucks that molded after about three days.  Yeah, NOT my most glamorous baking moment.  It's anyone's guess, really, as to why I've been so wanting to try making bagels again.

But I reallyreallyreallyreally wanted to.

In my bread machine cookbook, there's this recipe for bagels that has been staring at me, taunting me, for years.  But I couldn't make them.  No...not after my disastrous failure!  But.  But.

But.

I kept looking at it.  I kept reading it over.  Sure it was a little involved but each step seemed manageable.  That's right Jeanna, just focus on the steps.  Don't freak out over the whole recipe.  One step at a time.  I know I'm a dork but sometimes I really have to break down a recipe into each step and ask myself if I can handle that one step.  If you are easily overwhelmed by recipes I definitely recommend giving it a try.  Don't look at the overall cook time.  Don't look at the number of steps, just look at each step individually and ask "Can I do that?"

Anyway, where was I?  Oh right!  The best part...


Bagels
Recipe slightly adapted from Better Home & Garden's Bread Machine Baking

1 cup water
2 tsp canola oil
3 cups bread flour
1 tbsp sugar
3/4 tsp salt
1 tsp yeast
1 egg white, beaten with a splash of water

1.  Add all ingredients except the egg white to your bread machine according to the manufacturer's directions.  Set to dough setting.
Mine says to put liquids in first, then flour & seasonings, ending with yeast.


2.  Remove dough from machine and punch down.  Cover and let rise 10 minutes.
Dough ball!


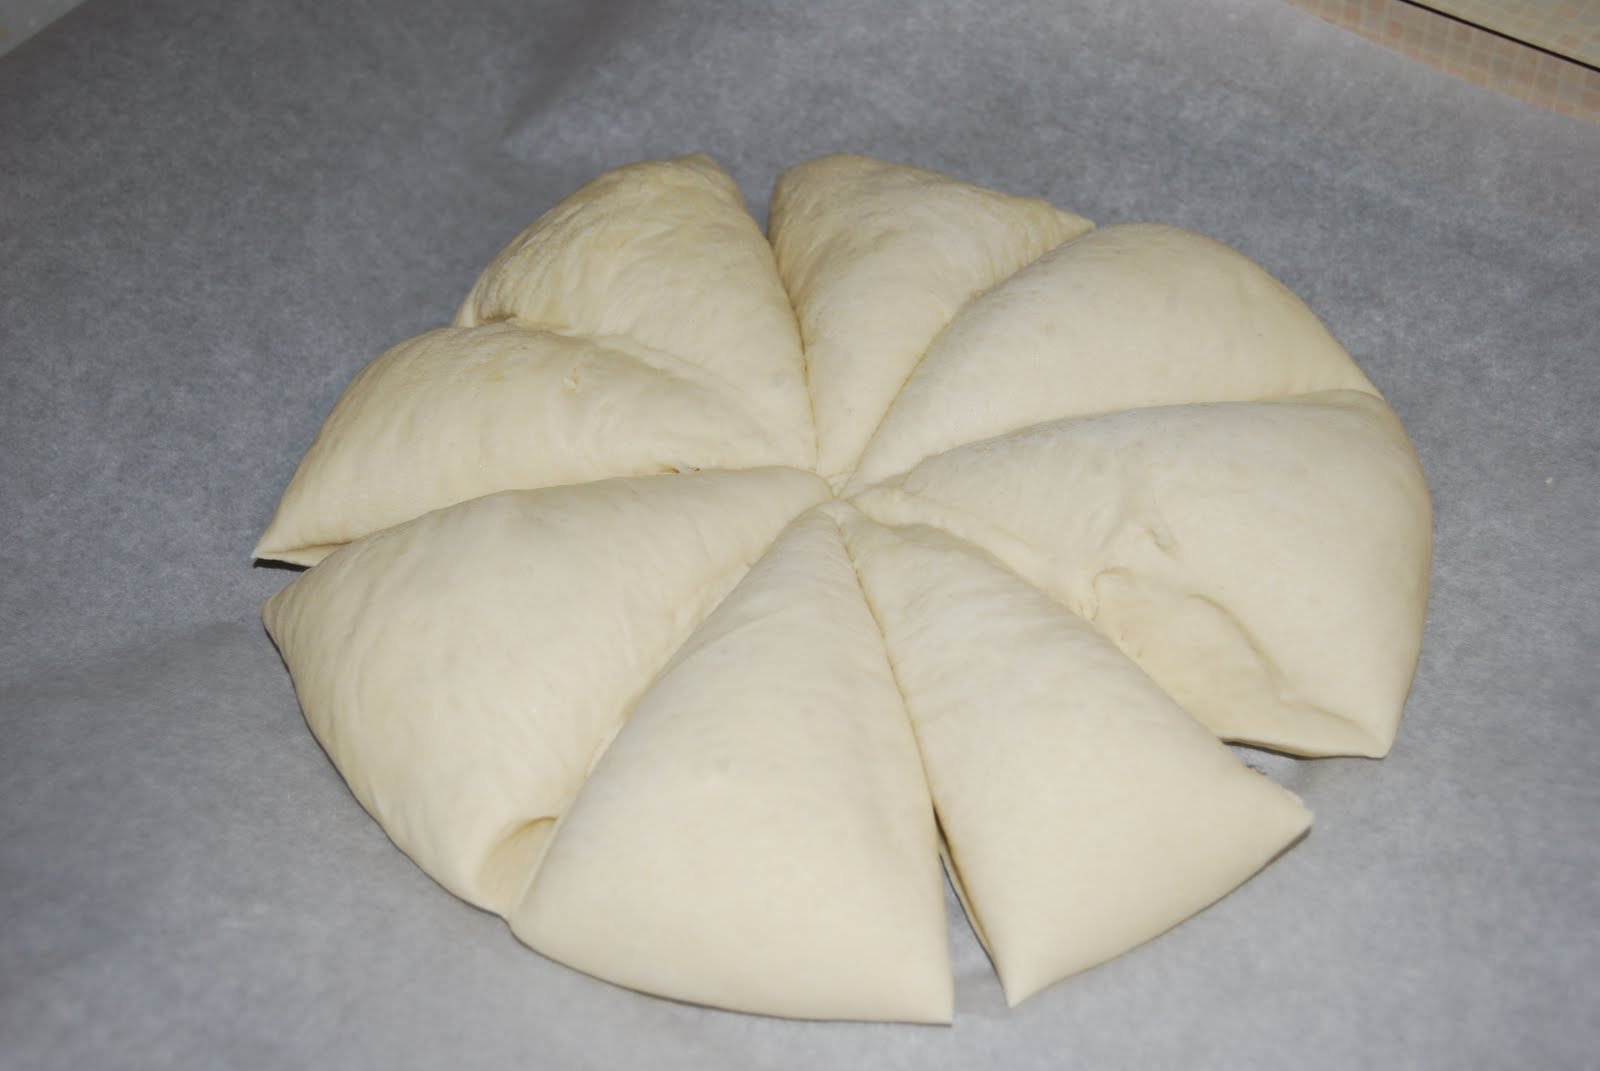
3.  Divide into 8 pieces, roll into a ball and punch a hole through the middle, pulling a little to stretch out the ring.
Looks kinda like a pizza here.


4.  Lay on a baking sheet lined with parchment paper.  Once you make the first dough ring, start a 20 minute timer.  Quickly make the seven remaining rings.  Cover and let rise.
Don't be afraid to stretch the dough for thinner rings.  They're going to puff up.


5.  In a large pot or deep skillet, bring 6 cups of water and 1 tbsp of sugar to a boil.  Boil the rings, four at a time, for 45 seconds on each side.  Drain on paper towels and then return to the parchment lined baking sheet.  Brush tops with the egg white.
KEY STEP: boiling first gives bagels that outer chewiness.


6.  Bake in a 400 degree preheated oven for 15-20 minutes, or until the tops are browned.  Cool on wire racks.
BAGELS!
 Yes, I just gave you a recipe for plain bagels.  Don't look at me like that....I will share recipes for other, fancier bagel flavors.  But in the meantime there's a LOT you can do with these.  If you like toppings (sesame seeds, poppy seeds, dried minced onion, toasted pumpkin seeds), sprinkle those on top right after brushing with the egg white.  Experiment with flavored cream cheeses or different kinds of jelly.  OR cook up some eggs and sausage to make a killer homemade bagel breakfast sandwich.  See?  Plain bagels suddenly aren't so boring after all. ;)

Oh, and for an FYI, I'm paranoid about fresh breads going bad so I keep these in the fridge.  Since I like mine toasted and under a small continent of cream cheese, I don't worry about the fridge drying them out.
Pin It