Showing posts with label garlic. Show all posts

Monday, May 6, 2013

Open-Face Smoky Sweet Potato Burgers with Roasted Garlic "Cream" & Avocado

Sweet potatoes are not my favorite.

So when a friend of mine asked if I would try out a recipe for her, my gut instinct was to say "no, I don't really do sweet potatoes."  But that would make me a total hypocrite in the eyes of my son.  Almost every night at dinner, we talk about how our tastebuds are always changing.  Which makes it really important that we keep trying new things, and even re-trying old things that we didn't like before.  There are a number of foods that I hated as a child but looooooooooooove now.

So how could I, in good conscience, tell my friend "thanks, but no thanks."  I couldn't.

Dang it.


Thank you GOD for giving me a conscience.  Because otherwise I would never have known how FREAKING INCREDIBLE these burgers are.

Open Face Smoky Sweet Potato Burgers with Roasted Garlic "Cream" & Avocado
Recipe slightly adapted from How Sweet It Is
Prep time: 20 minutes   Cook time: 10 minutes

For the "cream" sauce:
1 bulb of roasted garlic
2/3 cup plain Greek yogurt [You can use sour cream if the thought of yogurt makes you cringe]
1 tsp maple syrup
Salt and freshly ground black pepper

For the burgers:
2 large sweet potatoes
1 cup cannellini beans (rinsed and drained if canned)
2 garlic cloves, minced
1/3 cup Panko bread crumbs
1/3 cup quick-cooking oats
1 large egg, lightly beaten
1 1/2 tsp smoked paprika
1 tsp onion powder
1 tsp salt
1/2 tsp pepper
1/4 tsp cumin
2-3 tbsp extra-virgin olive oil


For sandwich assembly:
1 avocado, sliced
4 thick slices whole wheat bread

1.  Preheat oven to 375.
I went ahead and roasted 2 bulbs but only used one.


2.  To roast garlic, lop off the top 1/4 of the bulb; you want to expose as many cloves as possible.  Rub off some of the excess paper and place, cut side up, in a foil lined pan.  Drizzle the bulb with a little EVOO and let sit for 10 minutes.  Cover the pan (or ball up the foil around the bulb) and roast for 45 minutes; let cool.
Roasted Garlic = Garlic Candy


3.  Squeeze out the cooled garlic cloves into a bowl and mash up with a fork.  Add in the yogurt, maple syrup, salt, and pepper.  Mix to combine and set aside until ready to use.
If you don't like garlic chunks than zip this through the food processor.


3.  Pierce the potatoes all over with a fork and place in the microwave.  If you have a Potato button on your microwave, fabulous!  If not, microwave on High for about 10 minutes, flipping over halfway through.  Remove the cooked potatoes from the microwave, slice in half and let cool until you can scoop out the flesh.
Two big potatoes makes 4 MASSIVE burgers


4.  In a large bowl, coarsely mash beans with a fork. Add in sweet potato and mash together, then add in spices, salt and pepper, minced garlic, egg, panko and oats. Mix together until combined, then place bowl in the fridge for at least 15-20 minutes. This helps form them into patties.
Pat out the mixture and score with your hand to make fairly even patties.


5.  Heat a large skillet over medium heat and add 2 tbsp olive oil. Remove mixture from fridge and form into 4 equal patties, then place in the skillet once hot. Since the mixture can be wet and messy, do not move until they are fully cooked and golden on one side! This takes about 5-6 minutes. Then, add more oil if needed (this really helps cook them) and flip burgers very gently. Cook for another 5-6 minutes.
Betcha I could freeze these at this point to cook up later.
WOO HOO for a Get Ahead moment!!


6.  To assemble, smear a healthy amount of the "cream" sauce on the toasted bread.  Top with the burger and fan out some avocado sliced on top.
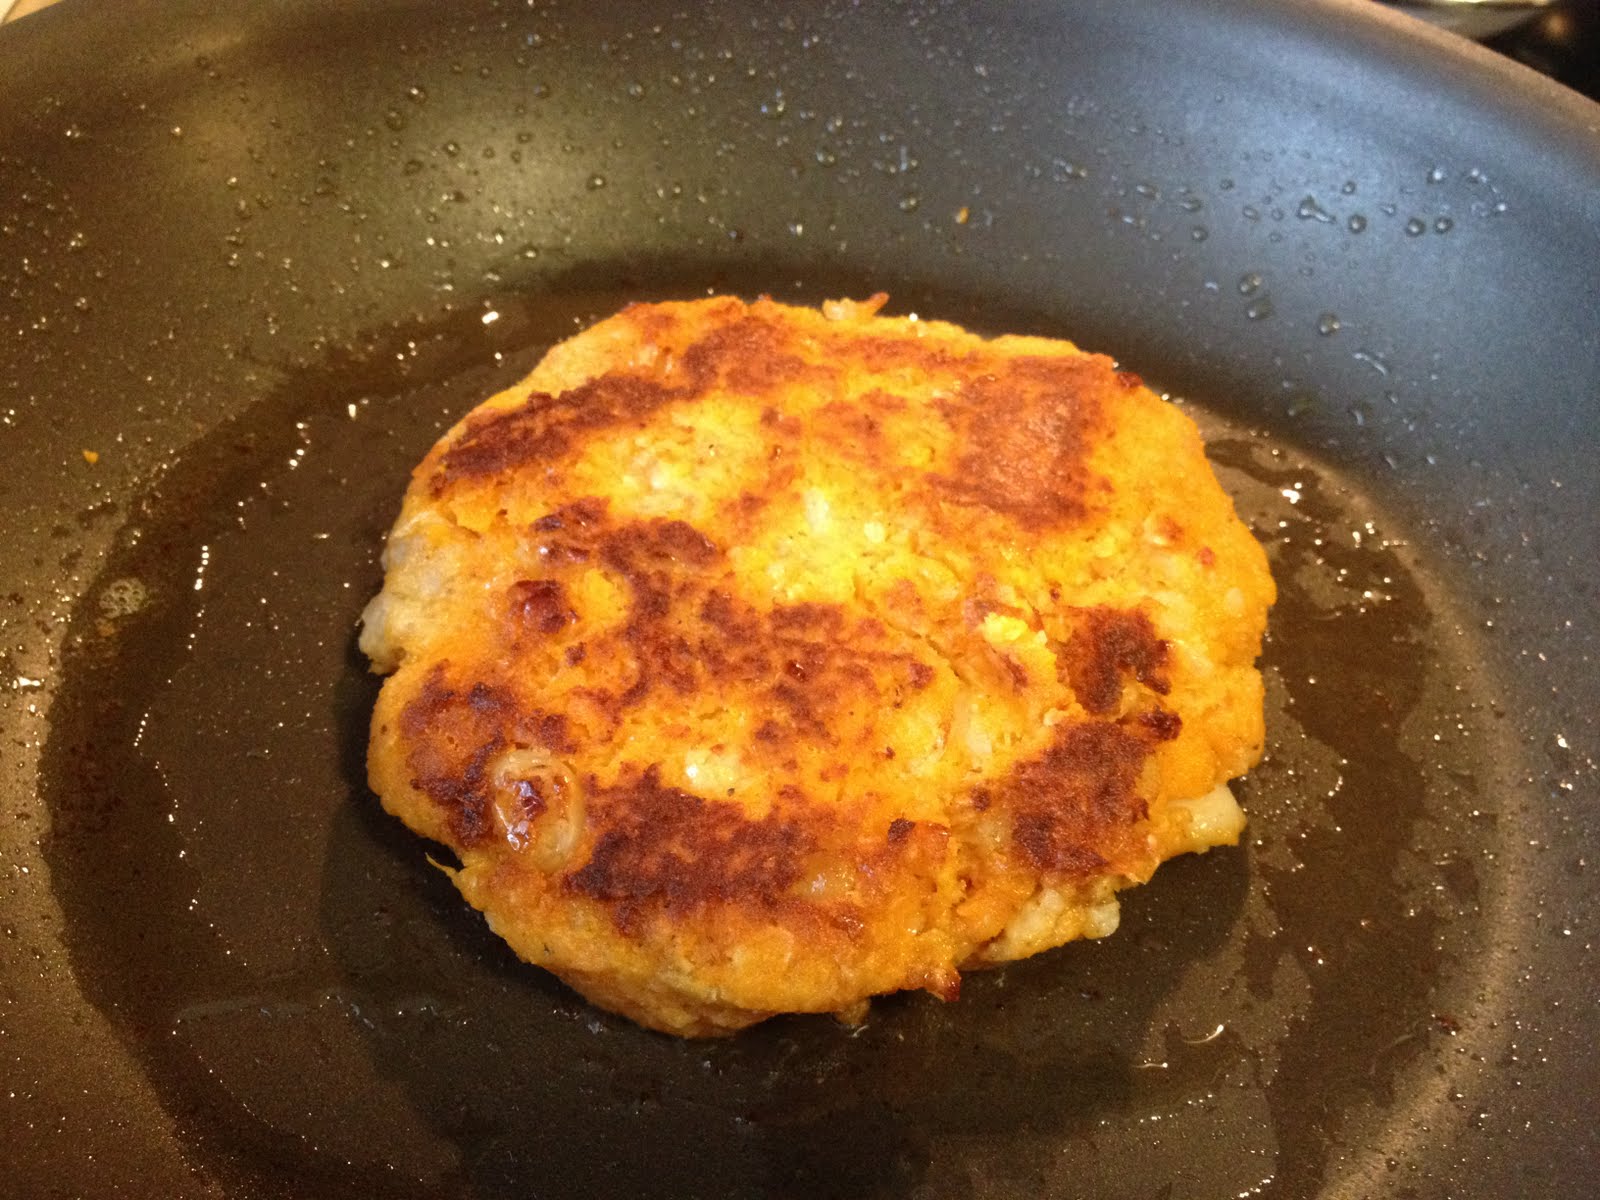
You want some good heat to get that yummy, dark crust.
But not so high that the outside burns while the inside is still cool.

As I type up this post now, I am shoveling the last leftover burger into my mouth as fast as my taste buds can handle it.  These. Are. AWESOME!!!  I used a 1/2 sharp, 1/2 sweet paprika for some really good flavor, and plenty of good quality cumin.  The natural sweetness of the sweet potato helps balance out all the spices so it's not too savory, not too sweet.  With that sharp, sweetness of the roasted garlic in the yogurt "cream" sauce, and buttery mellowness of the avocado, you get this amazing contrast of flavors just exploding in your mouth. 

I dare you to eat these and NOT fall in love.  Your taste buds will thank me later. ;)
Pin It

Monday, October 29, 2012

Garlic Chicken and Potatoes

So I'm learning a lot about myself in this week of No Cooking Dinner.  For one, I think about food, and what I'm making for dinner, and what I might bake today, and what sides am I going to make tonight, and what dessert would be good this week, way too much.  Taking all that away to focus purely on my family is weird.  But good!  Yeah, totally good and awesome therapy to put all things in perspective.  I am spending more time snuggling with Kieran on the couch, playing tic-tac-toe with Gavin, or watching the boys "race" little push carts around the living room.  It's nice to worry less about dinner, and have more time to absorb the life happening around me.
I made marinated tomatoes to round out the meal.


But anyway, I did make this dish last week, and it's fabulous.  I'm really not sure what I love more about this recipe: the minimal hands-on prep time, that it essentially all cooks in almost one dish (well, you use a little skillet to make the sauce but I'm not going to count that), or the fantastic flavor!

Garlic Chicken and Potatoes
Recipe adapted from Food Network Magazine
Prep time: 5 minutes   Cook time: 35 minutes

2 lbs small red-skinned potatoes, cut into 1-inch pieces
3 tbsp extra-virgin olive oil, divided
1/2 tsp ground cumin (optional)
Salt and freshly ground pepper
4 cloves garlic, minced
2 tbsp packed brown sugar
1 1/2 tbsp lemon juice
Pinch of red pepper flakes
4 boneless, skinless chicken breasts
2 tbsp chopped fresh parsley

1.  Preheat oven to 450 degrees F. Toss the potatoes with 1 tablespoon olive oil, the cumin, salt, and pepper to taste. Spread in a large baking dish and roast until the potatoes begin to brown, 20 to 25 minutes.
Little potato cubes with just a touch of cumin.


2.  Meanwhile, heat the remaining 2 tablespoons olive oil in a small skillet over medium low heat. Add the garlic and cook, stirring frequently, until lightly golden, about 1-2 minutes [Keep a close eye on it! Minced garlic burns quickly]. Remove from the heat and stir in the brown sugar, lemon juice and red pepper flakes.
My pan is dark so you can't see the warm brown color of the sauce real well.


3.  Remove the baking dish from the oven, push the potatoes to the sides and arrange the chicken breasts in the middle. Season the chicken with salt and drizzle with the garlic mixture. Return to the oven and bake until the chicken is cooked through and the potatoes are tender, 15 to 18 minutes.
Just shove things aside to make room.


4.  Remove from the oven; transfer the chicken to a cutting board and slice. Add the parsley to the baking dish and toss with the potatoes. Serve the chicken with the potatoes and lemon wedges. Drizzle with the pan juices.
Almost finished!


If you're like me, you may be thinking that Garlic Chicken is going to have that strong, spicy GARLIC flavor to it.  You'd kinda be wrong though.  The garlic ended up having this sweeter, almost roasted flavor to it, which was oh-so-lovely on the juicy, tender chicken!  The potatoes cooked up to this soft, comforting perfection.  Truly this was such a comfort food meal that I can't wait to make it again!!

p.s. Even GAVIN liked this and asked for seconds!  That's such a rarity that I always feel compelled to let you know when I have a Gavin Approved dish.
Pin It

Wednesday, September 5, 2012

Get Ahead: Freezer Meatballs

My garden is just now starting to burst forth it's glorious bounty.  So my mind has totally gone off the PRESERVATION MODE deep-end.  I feel driven to put up as much food as I possibly can.  I just canned a whole bunch of marinara sauce. I'm anxiously waiting for more Romas to ripen so I can roast and freeze them.  I'm keeping an eye out for various salsa recipes that I could can as well.  I'm obsessed. Maybe I need therapy?


So is it any wonder that I'm thinking of Make Ahead meal options for my freezer too?  Just because I'm a stay-at-home mom now doesn't mean I don't need dinner on the table in under 20 minutes on occasion.

Freezer Meatballs
Recipe slightly adapted from Real Simple
Prep time: 10 minutes   Cook time: 10-15 minutes

3 slices sandwich bread, white or whole wheat, torn into large pieces
1/2 medium onion, cut into wedges
1/4-1/2 cup fresh parsley
1/2-3/4 cup fresh basil [You want about 1 cup total in fresh herbs; use what you like]
4 garlic cloves, peeled
1/4 cup milk
1 tbsp Worcestershire sauce
2 lbs lean ground beef or turkey
2 large eggs
Salt and freshly ground black pepper

1.  Combine the bread, onion, herbs, and garlic in a food processor; pulse until finely chopped.  Transfer to a medium bowl, add the milk and Worcestershire sauce, and let stand for 5 minutes.
I love when my food processor does the work for me.


2.  Add the beef, eggs, 1 tbsp salt (yes, it's a lot but you're using TWO pounds of meat here), and 1 tsp pepper and gently combine.
Be careful not to over mix the meat.


3.  Scoop about two tablespoons worth of beef mixture into your hands and roll into a ball.  I used my cookie scoop (aka melon baller) to make this part easier and faster.
I sterilize my scoop in the dishwasher after such non-cookie uses.


TO COOK IMMEDIATELY: Place however many meatballs you're using on a foil-lined broiler pan and broil, turning once, until cooked through, 8-10 minutes.
A dollup of marinara sauce + cheese + favorite sandwich bread = GREAT meatball sandwich


TO FREEZE AND COOK LATER: Freeze the uncooked meatballs on a wax paper or parchment-lined baking sheet(s) until firm. Transfer to a freezer bag and freeze up to 3 months. To cook, broil the frozen meatballs as above, adding 2-4 minutes to the cooking time.  No thawing necessary!!!!
Ready to go for later!!


I cooked up 10 of these right away to eat as meatball sandwiches and then freeze the rest.  I have to say that it never ceases to amaze me how YUMMY simple recipes can be.  There are no weird ingredients here; just run-of-the-mill things you probably have on-hand.  And the fresh herbs? Using fresh will definitely make a difference but if it's the dead of winter and your grocery store is charging an arm and a leg for them, use a couple tablespoons of good quality dried ones. 
Pin It

Tuesday, March 20, 2012

Black Bean Burgers

A while back my cousin asked me about veggie burgers.  Although I loooooooooove to experiment with new flavors and textures, I'm married to a Committed Carnivore.  Creating a dish that is normally, primarily, made of meat and making it completely from non-meat ingredients just hadn't crossed the threshold of my mind.  Sure I may have played around with adding veggies to burger patties, but a whole patty made completely from vegetables??  Yeah no.  I got nothing.

But her request stuck with me.  It bothered me that I had no answer.  I haaaaate when I can't help someone out.  So I thought on it.  And thought.  And thought.  Why couldn't I make some veggie burgers, alongside some regular ones for Rob to eat?
So pretty AND yummy!


Why not?

Black Bean Burgers
Recipe adapted from AllRecipes, based on recommendations by a reviewer

1 (15.5oz) can black beans, drained and rinsed
1/2 green bell pepper, cut into 2 inch pieces
1/2 onion, cut into wedges
3 cloves garlic, peeled
1 egg
1 tbsp chili powder
1 tbsp cumin
1 tsp Sriracha or hot sauce of choice
1/2 cup Panko

1.  After rinsing the canning juices off the beans, dry on a paper towel-lined plate*.  Transfer beans to a medium bowl and mash until thick and pasty.
Use a fork, potato masher, or, like I did, your hands.


2.  In a food processor, finely chop bell pepper, onion, and garlic. Line a sieve with a paper towel or coffee filter.  Pour pepper mixture into the liner and press out as much of the liquid as possible*.  Then stir into mashed beans.
You'll be amazed how much water is in this.

 
3. In a small bowl, stir together egg, chili powder, cumin, and chili sauce. Stir the egg mixture into the mashed beans. Mix in bread crumbs until the mixture is sticky and holds together. Divide mixture into four patties. 
Press into an even layer and score for equal patties


4.  Lay patties on a baking sheet lined with parchment or wax paper.  Freeze at least one hour.
Ready for freezing!


5.  FOR GRILLING: Preheat an outdoor grill for high heat, and lightly oil a sheet of aluminum foil. Place frozen patties on foil, and grill about 8 minutes on each side.  FOR BAKING: Preheat oven to 375 degrees and lightly oil a baking sheet.  Place frozen patties on baking sheet, and bake about 10 minutes on each side. FOR FRYING: Heat 1 tbsp of canola oil in a frying pan.  Fry frozen patties about 5-8 minutes per side, until edges get that yummy crispiness.
I wanted that flat-top-grill texture to my burger.

*You want to remove as much moisture as you can from the bean mixture to help prevent the patties from falling apart as you handle/cook them.  Freezing them also helps with this.

I really wasn't sure what to expect from this.  I'd had the occasional veggie burger before but usually stuck with meat burgers.  At first, I wasn't too sure about the texture... I mean, it's just mashed up beans in the shape of a circle, right?  I chose to fry mine because I wanted that crisp burger-esque edge to them.  The result?  DANG tasty!! 

I also love that with this recipe you can make up a bunch of patties and keep them in the freezer.  Since there's no need to thaw them before cooking, this makes for an EASY long-day dinner with a tasty pile of chips and crisp salad.
Three more ready for later meals.  Woo hoo!!


p.s. Despite the amount of chili powder and hot sauce, these are NOT spicy.  It's just enough to give the flavor a little kick.  If you like spice, maybe use a hot pepper instead of a bell pepper.

Pin It

Monday, February 6, 2012

Roasted Garlic & Bacon Dip

It is entirely possible that when I tasted this dip, I squealed like a 10-year-old girl who'd just been given a basket of puppies and kittens to play with.  And then maybe I proceeded to dance around the kitchen.
My thighs say "control yourself."  My mouth says "who asked you?"


Entirely possible...

Roasted Garlic & Bacon Dip
Recipe adapted from Food Network Magazine

2 bulbs garlic
6 strips bacon
2 cups plain Greek yogurt
1/2 cup mayonnaise
2 green onions, chopped
3-4 dashes Worcestershire sauce
Salt and freshly ground black pepper

1.  Preheat oven to 400.
Foil packet doesn't have to be pretty; just ball it up around the bulb.


2.  Lay out bacon strips on a broiler pan.  Cut off the tops of the garlic bulbs, drizzle with extra-virgin olive oil, and wrap in aluminum foil.  Place bacon and garlic in the preheated oven and bake until the bacon is crisp and the garlic is soft.  The bacon will take about 30ish minutes (your nose will tell you when it's done) and the garlic about 45 minutes.  Let both cool.
If the cloves still have some shape, mash them up a little with a fork or whisk.


3.  Squish the garlic pulp into a medium bowl with the yogurt, mayonnaise, onion, and Worcestershire sauce.  Whisk to combine.  Crumble the bacon and stir into the dip.  Season with salt and pepper.
You want the bacon extra crisp so it won't get too soggy in the dip.


I'd recommend making this at least a few hours, or even a full day, ahead of time.  That way the flavors have a chance to hang out, get to know each other and work out any issues.  Enjoy this dip with potato chips, fresh veggies, baked potatoes, a spoon.... 


Pin It

Sunday, October 30, 2011

Rosemary Pork Tenderloin

The other night, as this was baking and the glorious aroma of it was scenting the air, I made an off-hand comment about this dish being a meat log covered in meat.

Really, that pretty much sums it up.  If you like Pig, you'll LOVE this.

Rosemary Pork Tenderloin
Recipe slightly adapted from Claire Robinson

1/3 cup Dijon mustard
1-2 tsp freshly ground black pepper
1 tbsp chopped fresh rosemary leaves, PLUS 4 sprigs rosemary, with hard woody stems
5 large garlic cloves: 2 cloves minced, 3 cloves smashed
2 pork tenderloins, about 1-pound each
6-ish slices bacon, cut in half

1.  In a small bowl, whisk together the Dijon mustard, fresh ground black pepper, chopped rosemary, and minced garlic and mix well. Rub the mustard mixture over the surface of the tenderloins and wrap in plastic wrap. Marinate in the refrigerator at least 1 hour (I marinated mine for close to 6 hours). 
Simple ingredients. Strong flavors.


2.  Preheat oven to 375 degrees F. 
The bed for the tenderloins


3.  Place rosemary sprigs and smashed garlic in the center of a baking dish. Remove the plastic wrap from the tenderloins and top each with slices of bacon. 
Tucked in with a bacon blanket


4.  Place the baking dish in the oven and bake for 25 to 30 minutes or until an instant-read thermometer, inserted in the tenderloins, registers 160 degrees F. Remove from oven when desired doneness is reached and let sit for 5 to 10 minutes on a cutting board before slicing.
Took this pic with my phone.  Not too shabby!


Yup, a log of tender pork, covered in a bacon blanket.  I don't think it gets any better than that!
Pin It

Monday, October 17, 2011

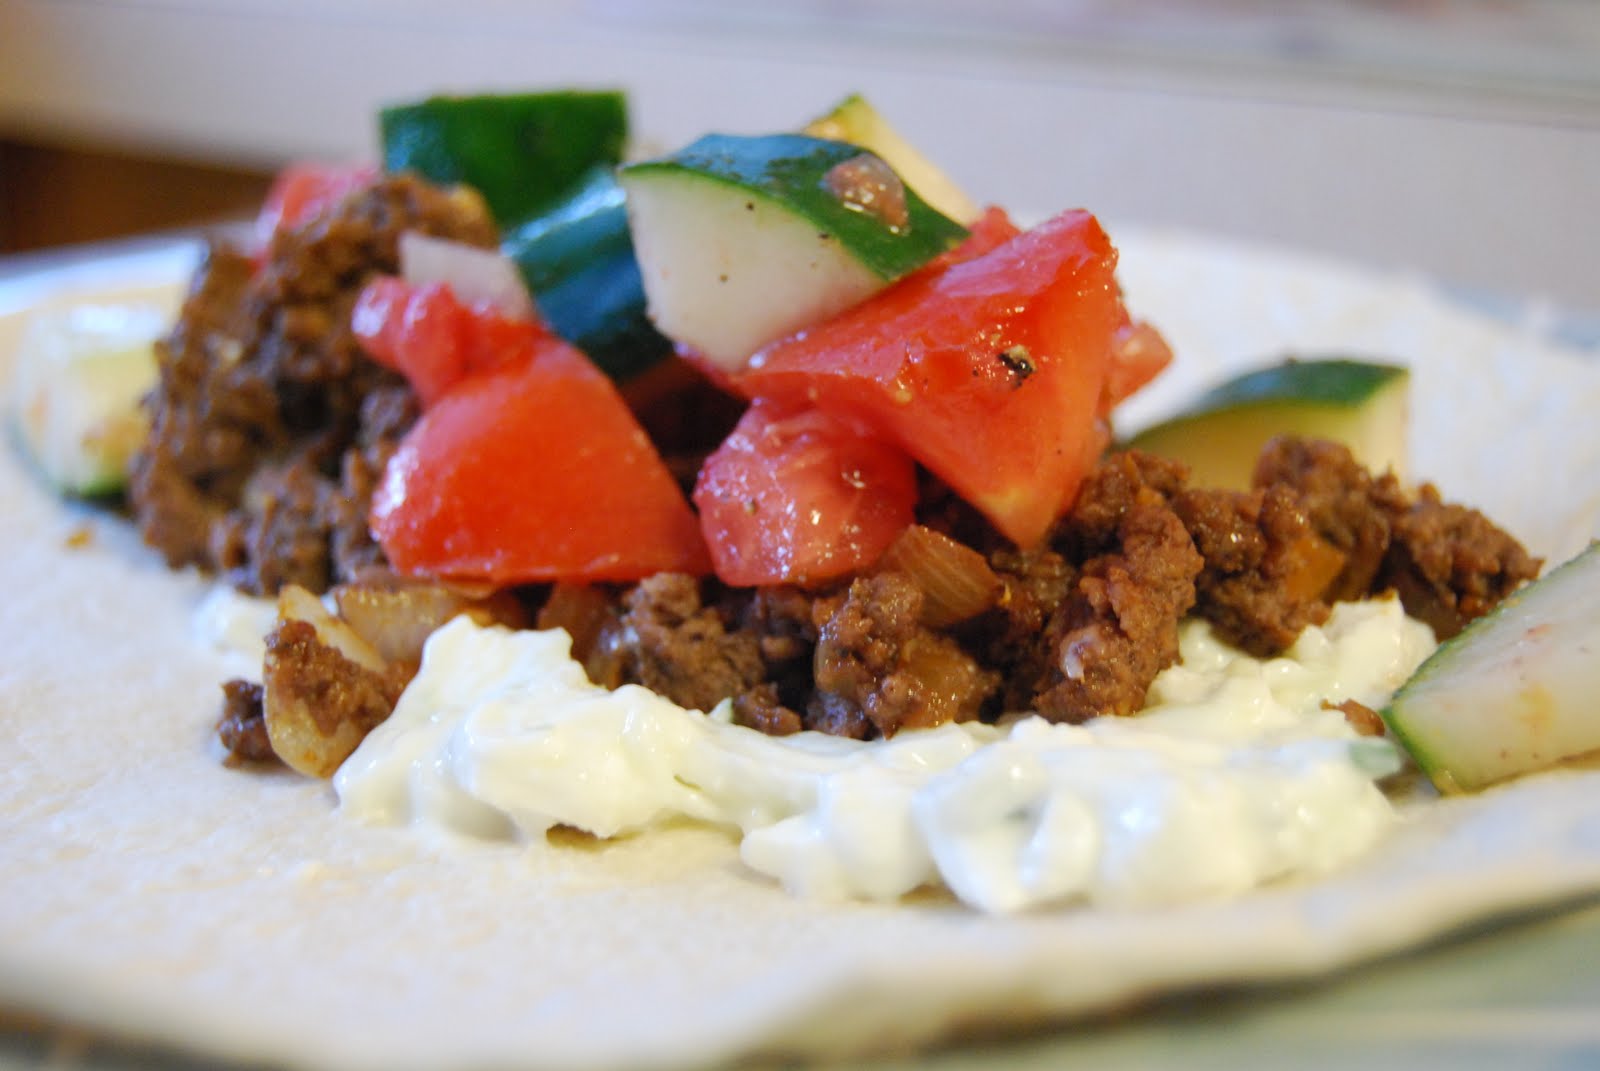
Greek Taco

A little while ago a friend was wondering aloud what on earth she was going to do with all the cucumbers that had exploded out of her garden.  And being the helpful person that I am, I went digging around online for recipes.  This one looked so good I couldn't resist taking the extra step of testing it for her first.

You know, for the sake of our friendship..... ;)

WARNING: Do NOT freak out at the length of the ingredient list!  There are several components to this dish, but each is easy and FAST to put together.  And I'm willing to bet you have just about everything in your pantry or fridge anyway.

Greek Tacos
Recipe adapted from Jeff Mauro

For the relish: 
1 tbsp extra-virgin olive oil
 
1 tbsp red wine vinegar

2 firm tomatoes, seeded and diced

1 cucumber, seeded and diced

1/2 onion, diced

Freshly ground black pepper


For the tzatziki:
1 cucumber, seeded and chopped
Salt
1 cup whole-milk Greek yogurt
1/2 cup crumbled feta cheese
1 clove garlic, minced or pressed


For the meat:
1 lb lean ground beef
Kosher salt and freshly ground black pepper
1/2 onion, minced
1 tsp dried oregano
4 cloves garlic, minced
1 tbsp tomato paste [Don't want to waste a whole can? Get tomato powder and mix in a little water]
2 tbsp dry red wine

Also don't forget:

4 flour tortillas

1.  For the relish: Toss the olive oil, vinegar, tomatoes, cucumbers and onions in a bowl and adjust the seasoning if necessary. Cover and let sit at least 1 hour to marry the flavors. 
Need a reason to use up excessive garden goodness?  Now you have one.


2.  For the tzatziki: Grate the cucumber on the large holes of a box grater and place in a fine-meshed strainer or cheese cloth fitted over a bowl. Salt the cucumber and let sit 10 minutes. Then squeeze out any excess moisture. Add the strained cucumber into a bowl with the yogurt, feta, and garlic. Adjust the seasoning if necessary. 
Love, love, LOVE fresh garlic and onion


3.  For the meat: Heat a large skillet over medium-high heat. Add the beef, sprinkle with salt and pepper and cook until the meat gets nice and golden brown, 10 to 12 minutes. With a slotted spoon, remove the beef and reserve. Lower the heat to medium and saute the onions in the meat juices until soft, about 5 minutes. Add the oregano and garlic and cook until fragrant. Season. Add the tomato paste and cook until it caramelizes. Deglaze with the red wine and scrape any bits up that have adhered to the pan. Add the beef back in, stir and set aside.
Red wine should always be used to deglaze pans.


4.  Smear the tzatziki on the tortillas, then place on the beef mixture and top with cucumber tomato relish. Roll up and enjoy!
Prepare yourself for a flavor explosion


Pin It

Wednesday, September 21, 2011

Roasted Tomatoes

I am a busy mom.  You all know this, right?  Right.  When it comes to cooking for my family, I'm ALL about easy, fast, healthy, delicious.  I do not have time to stand around in my kitchen prepping ingredients.  I do not have time to babysit my stove or oven.  This mama's got stuff to do and places to go!!

Except when it's tomato season.  Because, for this recipe, I break all my rules.

Roasted Tomatoes
Recipe adapted from Rachael Ray

3 lbs ripe plum tomatoes (about 15-20) 
Extra-Virgin olive oil
Fresh thyme, springs removed from stems
Garlic Powder

1.  Position a rack in the middle of the oven and preheat the oven to 375°. Stem the tomatoes and slice them in half lengthwise. Gently squeeze out the seeds or scoop them out with a spoon or your fingers.  This process has become rather therapeutic for me actually, instead of tedious like I first thought it would be.
Yup, these beauties are from MY garden.  I love that.


2.  Lay the tomatoes, cut side up, in a single layer on a baking sheet lined with parchment paper.  Can we take a moment to talk about the parchment paper?  Do NOT think that coating the pan with a non-stick spray, or the EVOO in the recipe is enough to prevent a Baking Sheet Disaster here.  The way that these are roasted, charred bits are inevitable.  Charred bits and JUICES sticking to the pan are inevitable.  Have you ever tried to scrub juice that's been charred onto a pan?  Yeah, not pretty.  Just ask Rob. Learn from my early mistakes: get the parchment paper.
Thyme is staying fresh in a beer-tasting glass


3.  Drizzle with a little olive oil and sprinkle with the thyme and garlic powder.  I choose to use powder as opposed to fresh here because fresh garlic burns more easily. Roast for 40 minutes. Increase the oven temperature to 400° and roast the tomatoes until caramelized, about 20 minutes more.
Season to taste: everyone gets a little thyme and a little more garlic


4.  Turn off the oven and leave the tomatoes inside for 10 minutes, then remove to a rack and let cool completely. Peel if desired. The tomatoes will keep for up to 5 days in the refrigerator or for up to 6 months in the freezer.
Yum

Serve these as-is along side a beautiful steak.  Layer with fresh mozzarella and basil for a gorgeous salad.  Chop them up to use in a roasted tomato spaghetti sauce or salsa.  Or, as you'll see later on, use them to make a glorious roasted tomato soup.  Possibilities, I love them.
Pin It

Tuesday, September 13, 2011

Lemon Garlic Rosemary "Roast" Chicken

The slow cooker and I have been making up for lost time.  Years ago, when I got my first one, I was all kinds of excited to try these great foods.  Roasts.  Soups.  Yumminess.

I did not get yumminess.  I got the opposite of yumminess.  So opposite that I rarely used my slow cooker until the last year or so. As long as I have a recipe to guide me, I can usually pull off a decent, if not a really great dinner.  Rarely do I venture away from a recipe with the slow cooker (yes, those early attempts were that awful).

Except when it comes to "roasting" a chicken in one.
Super moist.  Super delicious.


Rob's grandmother told me this concept.  It was so simple, and so easy, there really isn't a way to screw it up.

Lemon Garlic Rosemary "Roast" Chicken

1 (4-5lb) whole chicken
1/2 stick butter, softened
Zest and juice of one lemon
1 bulb garlic, plus 1 clove
2 long stems fresh rosemary, divided
Salt & freshly ground black pepper

1.  Remove rosemary from one of the stems and finely chop; about 1 tbsp.  Mince one clove garlic.  In a small bowl, combine the softened butter, zest and juice of one lemon (do not discard the hollowed out lemon!!), minced garlic, chopped rosemary, salt and pepper.
If you forget the garlic clove, just sprinkle in some garlic powder


2.  In the bottom of your slow cooker, lay 5-6 crumbled balls of aluminum foil.  These will act as your roasting rack and will keep the chicken up out of the fatty juices that will collect at the bottom of the pot.


3. Take the chicken and discard the neck and giblets from inside the chest cavity.  Rinse the bird all over, inside and out, and pat dry.  Tuck the wings underneath and place in slow cooker.  Season the cavity with salt and pepper.  Slice garlic bulb in half and place inside the chicken, along with the remaining lemon rind and rosemary stem.
These will flavor the bird from the inside out


5.  Using your fingers, loosen the skin over the breasts, creating a pocket for the butter.  Scoop half the butter with a spoon, put into this pocket, using your fingers to slide the butter off the spoon.  Massage the butter around so that as much of the breast is covered as possible.  Repeat with the other side.
You could also chill this as a log, slice disks, and put those under the skin.


6.  Dribble a little EVOO over the chicken and season with salt and pepper (are you seeing the Flavor Layers we're building here?  If you have kitchen twine, feel free to tie up the legs.  Cover and cook on LOW for 4-5 hours.
I don't have kitchen twine.  Chicken is just as yummy without it.


Whenever I make this, I usually get everything together early enough that the chicken sits at WARM for at least an hour or two.  This resting time does AMAZING things to the moistness of the meat.  That, and the flavored butter bath.

What I really love about this foil concept is that you can make this chicken using whatever flavors you like.  Go with just a citrus selection of oranges, lemons, tangerines, and limes.  Do garlic and various fresh herbs (thyme, rosemary, oregano, sage...).  Whatever floats your boat!

A word of caution now: if you are a Skin Person then I'd recommend roasting the chicken in a roasting pan in the oven, instead of the slow cooker.  The slow cooker doesn't get hot enough to get the skin brown and crispy.  Still use whatever flavor combo you want, just cook it in a 350 preheated oven for about an hour or so. 
Pin It

Thursday, April 14, 2011

BLT's with Beer Bread and Guacamole

I really don't have the time or energy anymore to keep up with cooking shows like I used to.  When Gavin was a baby (and before he was born too) I would watch Food Network on Saturday mornings the way most kids watch cartoons.  I love all the great ideas!

Nowadays I'm lucky if I can get a foodie magazine read before the next issue comes along.  But I do have one guilty Food Network pleasure that consistently pops up on the DVR: Diners, Drive-ins, & Dives.

This isn't really a cooking show; it's a guy touring the U.S. checking out funky, unique restaurants and sampling some of their most popular dishes.  And most of the time he'll learn how to make those dishes too.  I have found that I get some of the best ideas from watching what other creative chefs are doing, like this one.

BLT's on Beer Bread with Guacamole
Inspired by a restaurant that I cannot for the life of me remember on Diners, Drive-Ins, & Dives. 

1 lb bacon
Mayonnaise
Sliced tomato
Leaf lettuce

For the bread:
12 oz warm beer
3 cups all-purpose flour
1 tsp salt
2 tbsp dark brown sugar OR honey
1 packet OR 2 1/4 tsp active dry yeast

For the guacamole:
2-3 ripe avocados
1 small tomato, seeded and chopped
1/2 small onion, finely chopped
1-2 cloves garlic, minced
Juice of one lemon

1.  To put together the bread, add all ingredients to the breadmaker according to manufacturer's instructions.  Bake using the white bread setting.  Let cool at least 1 hour before slicing.
A little dense but really good flavor!
2.  To put together the guacamole, cut the avocados in half and spoon the flesh into a bowl (remove the big seed either with a spoon or knife).  Add the remaining ingredients, plus a good pinch of salt.  Mash together with a fork.  For an extra kick toss in a seeded, finely chopped jalapeno.
No, I don't use conventional guac ingredients... and I don't care! ;)
3.  Preheat oven to 400.  Cut strips of bacon in half and lay on a baking sheet.  Bake for about 20 minutes (when you can smell it, it's probably just about done).  Drain on a paper towel-lined plate.
I prefer the anti-stovetop-splatter method
See? Crispy bacon WITHOUT the grease stains or burned fingers!


4.  Assembly!  Toast 2 slices of beer bread.  Spread some mayonnaise on the bottom piece of toast.  Layer on a generous helping of bacon, lettuce, and sliced tomato.  On the top piece of toast spread a generous amount of guacamole (1/4 cup worth?).  Slice the sandwich in two and enjoy with kettle chips.
Commence drooling in 3...2....


This is how I put together this sandwich.  Do you have a bakery close by that you love and makes awesome beer bread?  Use that!  Have your own spectacular guacamole recipe?  Go for it!  My own sandwich did not use the restaurant's recipes at all....I just intensely desired to make my own version once I saw how deliciously yummy theirs looked.  And I have to say that even though I ate this beauty only a few days ago now, I'm already craving it again!
Pin It