Showing posts with label ginger. Show all posts

Tuesday, May 6, 2014

Teriyaki Meatball Bowls

The secret to the fabulous-ness of this one is not in the sauce, it's in the meatballs.


Teriyaki Meatball Bowls
Recipe adapted from Budget Bytes
Prep time: 15 minutes   Cook time: 40 minutes

Meatballs:
1lb ground pork
1 egg
1/2 cup Panko
1 clove garlic, minced
2 inches fresh ginger [Yes, two. Don't freak out and definitely don't skimp]
1/2 tsp soy sauce
2 green onions, sliced
Freshly ground black pepper

Teriyaki Sauce:
1 tbsp cornstarch
1 tbsp cold water
1/2 cup white sugar
1/2 cup low-sodium soy sauce
1/4 cup cider vinegar
1 clove garlic, minced
1/2 tsp ground ginger
1/4 tsp freshly ground black pepper

Bowls:
Rice, enough to yield 1/2-1 cup of cooked rice per bowl
Fresh green beans OR pea pods, cut into 1" ish pieces and lightly steamed
Sesame seeds

1. Preheat the oven to 400 F.

2. Meatballs: In a large bowl, combine the meatball ingredients, using a microplane to finely grate the two inches of ginger. Mix, using your hands, until evenly combined.
I'll admit: I was scared of this much ginger too. Trust me; just go with it!


3. Line a baking sheet with parchment paper. Roll the meatball mixture into small balls, about one tablespoon each (1 recipe yields about 30ish meatballs). Place the meatballs on the baking sheet and bake until golden brown, about 35-40 minutes.
I was a little generous and ended up with 24 meatballs.

These smelled even more amazing than they looked.


4. While the meatballs are in the oven, begin cooking the rice according to package directions.
I use my microwave to steam so did this actually a few minutes before the meatballs were done.


5. Teriyaki Sauce: (psst! This same sauce also appears here on my blog!) While the rice simmers and the green beans or pea pods steam, cook the teriyaki sauce. In a medium to large saucepan over low heat, combine all of the sauce ingredients. Let simmer, stirring frequently, until the sauce thickens and bubbles. Turn off the heat and let sit until the meatballs are done. The sauce will continue to thicken slightly as it cools.
Teeny bit of sauce in a great big pot


6. When the meatballs are done, transfer them from the baking sheet to the saucepan. Gently stir to coat.
This is why you need a bigger pot.


7. Assembly: Place 1/2 to 1 cup of rice in the bottom of each person's bowl. Top with about five meatballs and a drizzle of extra sauce. Scatter a few green beans or pea pods, then sprinkle the top with a few sesame seeds.
Layer 1: Rice. This is about 1/2 cup.

Layer 2: Meatballs and sauce

Layer 3: Steamed veg of your choice

Layer 4: Sesame seeds


This recipe is definitely going to be one of my staples! Not only is it fantastically flavorful from all the ginger, garlic, and soy sauce, but it's also easily adaptable to something even simpler. On a tough day, I could quickly turn this into a truly effortless meal using bottled sauce and microwave or instant rice.

You might think about using some pre-made frozen meatballs but I'd advise against it. For the very reason I alluded to earlier: the secret is in those meatballs. What's the secret? All that ginger. These little meatballs really pack quite the punch! So feel free to make whatever prep or assembly shortcuts you need to, but NOT with the meatballs. The spicy punch of the ginger is balanced out by the sweet-and-salty tang of the teriyaki sauce. The combination of which is a total Happy Flavor Bomb in your mouth.

Actually, to help myself out down the road, I plan on making up a few pounds of these beauties this summer and freezing them raw, just like I do my beef ones. Then for dinner time, it's a simple matter to pull out a few and bake them up while putting together everything else. You know me: I love my Get Ahead Options!
Pin It

Monday, November 14, 2011

Cranberry Sauce

It's my favorite time of year!!  There's a crispy bite in the air.  Sweatpants and cozy blankets become the evening norm.  People tend to be a little nicer, a little more considerate (after all, Santa is watching).

And then there's The Food.  Yes, I meant to capitalize that.  Because there's your day-to-day food and then there's Holiday Food.  God bless Holiday Food!!

One of my favorite things about the holidays, and yes I have a lot of favorite things, is the chance to get together with family.  This year is thankfully no exception!  And instead of imposing on the host to make the entire Thanksgiving Dinner with all the trimmings, we are doing things potluck style.  Of course I asked to pleasepleaseprettyplease bring the cranberry sauce.

And I ain't talking about the stuff in the can either.  Trust me, of everything on your table, cranberry sauce is the EASIEST thing to make and so flavorful, you'll forget all about the convenience of the canned kind.

Cranberry Sauce
Recipe from Rachael Ray

1 cup water
1 cup sugar
1 cinnamon stick 
2 tsp grated fresh ginger 
2 tsp orange zest 
1/4 tsp salt 
1/8 tsp ground cloves 
One 12-ounce bag fresh cranberries

1.  In a medium saucepan, combine the water with the sugar, cinnamon stick, fresh ginger, orange peel, salt and cloves. Cook over medium heat, stirring constantly, until the sugar is dissolved. Stir in the cranberries and bring to a boil, then lower the heat and simmer, stirring, until slightly thickened, about 8 minutes.
Seriously kick-butt flavors going on


2.  Transfer the mixture to a bowl and remove the cinnamon stick. Let cool.

Gorgeous ruby gems!
Can we talk about how easy this is?  First, you make a simple syrup (equal parts water and sugar, boiled until the sugar dissolves).  Then you add a whole bunch of stuff to it that taste FANTASTIC with cranberries: fresh ginger, orange zest, cloves, cinnamon.  Add your berries and let it boil until it's thickened and looks like cranberry sauce.  See?  Easy!

This is a truly amazing complement to your turkey dinner.  It's also quite fabulous stirred into your morning oatmeal with some toasted pecans or walnuts.  Mix it will a little yogurt, or use as an refreshing alternative on top of ice cream.  If you really want to go crazy, add a dollup of Dijon mustard and slather all over a pork tenderloin for a couple hours before roasting.  Y.U.M.  

Believe me when I say you'll be doubling this recipe just to make sure you have leftovers to play with!
Pin It

Monday, September 19, 2011

Pear-Ginger Pie

I was probably about 7 years old.  We were living in California at the time and preparing to leave in  the coming months.  It was my brother's birthday and I'm not sure why exactly but he didn't have a cake that year.  He had pie. 

He had this crazy, amazing pie with looooong skinny candles in it.  And once I tasted it, I don't really remember anything else about that night.

But I'll never forget my dad's first pie.

Pear-Ginger Pie
Recipe from my dad

Flaky Pie Dough (double crust):
2 cups unbleached all-purpose flour
¼ cup cake flour
¼ tsp baking powder
¼ tsp salt
2 sticks unsalted butter
5-6 tbsp water
 
1.  Mix dry ingredients together, cut in the butter using either your fingers or a pie crust mixing tool until it is like meal with no large pieces of butter.  Add the water and toss with a fork until the dough holds together.  

2. Cut the dough into two and form two separate 4-6 inch disks and wrap each in plastic.  Chill for at least 45 minutes.
 
Pear and Ginger Pie:
2 ½ pounds of firm, ripe pears (about 6-8 pears)
1 inch piece of fresh ginger, peeled and finely grated
1/3 cup sugar
3 tbsp unbleached all-purpose flour
2 tbsp unsalted butter
 
Glaze:
1 egg
Pinch of salt
 
1.  Preheat the oven to 450 degrees.  Roll out one of the dough disks into an 11 inch crust  that is 1/8 to ¼ inch thick.  Fit without stretching into a 9 inch pie pan.  Trim the dough even with the edge of the pan.
Little sprinkling of the flour-sugar mixture

2.  Peel, quarter and core the pears and cut each quarter crosswise into 5 or 6 slices.  Place the pears in a large bowl and toss with the grated ginger.
Some of my pears were on the small side, so I used 9 total for this pie

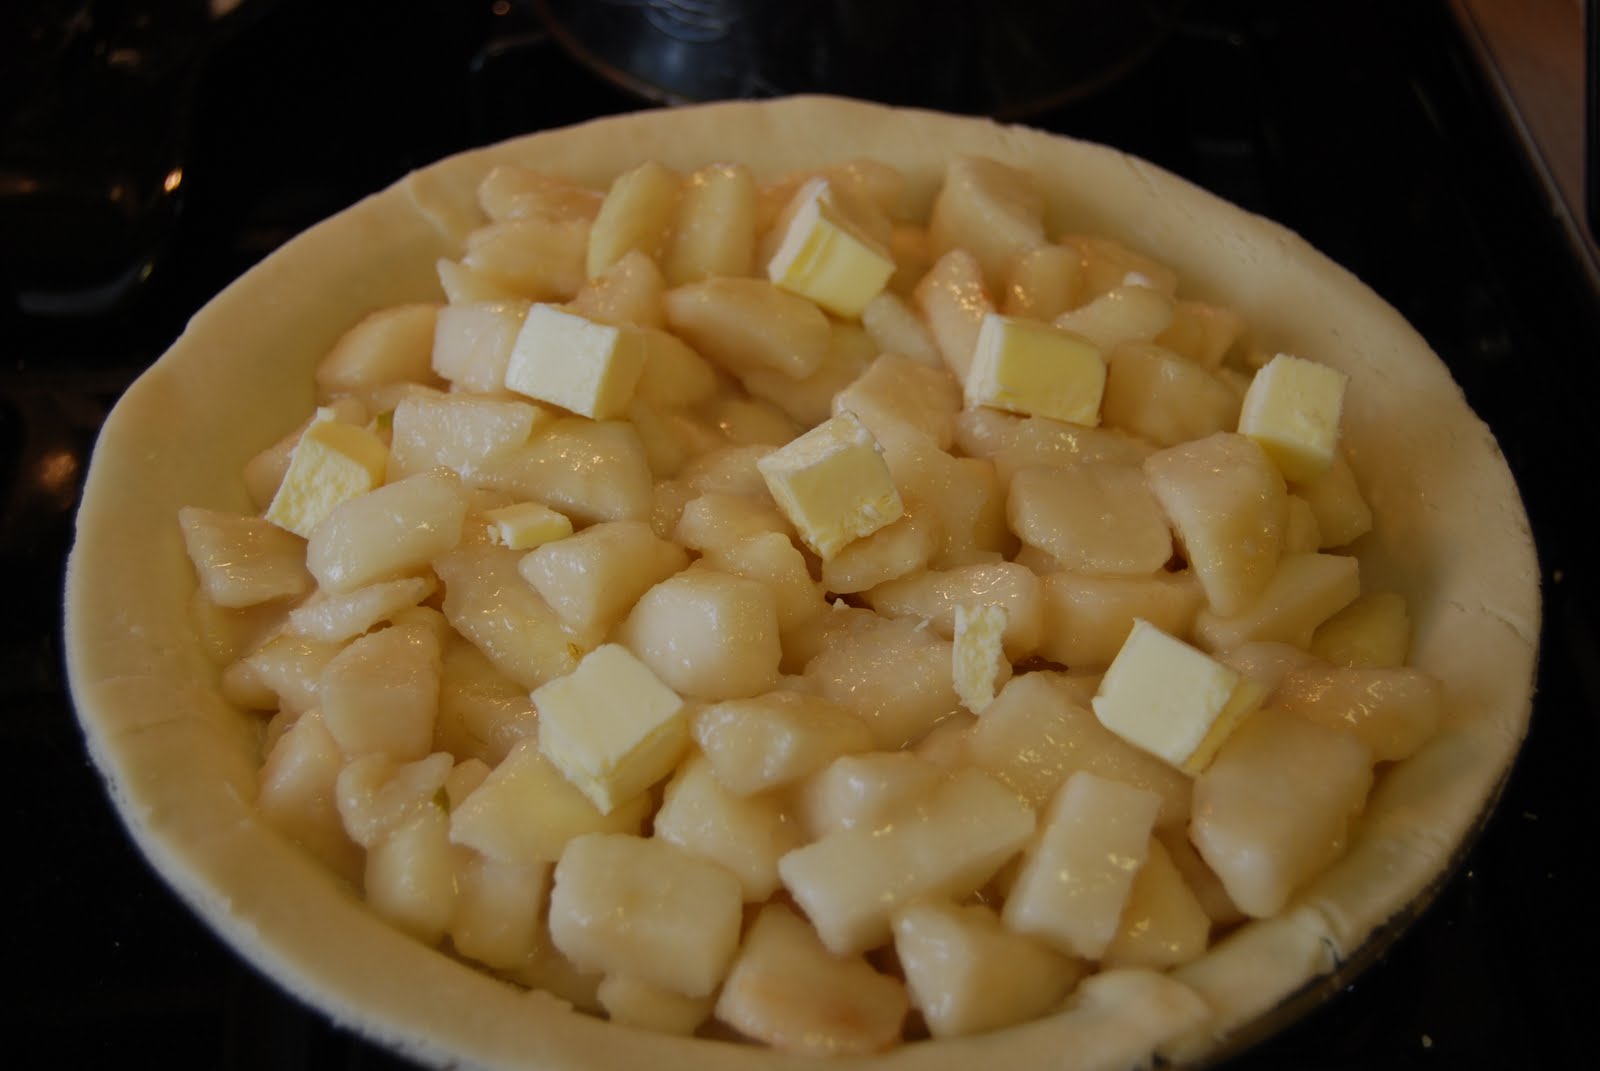
3.  Combine the sugar and flour and sprinkle 2 tbsp of the mixture over the pastry in the pan.  Pour the remaining sugar and flour over the pears and toss gently to mix.  Turn the filling into the prepared pastry shell and smooth the top as much as possible.  Dot the filling with the butter.
Butter makes everything better, except the way my pants fit.

4.  On a lightly floured surface, roll out the remaining dough to an 11 inch disk and fold the dough in half.  Place the folded dough on the surface of the filing and line up the fold with the center of the pie.  Unfold the dough.  Trim the edge of the dough so that there is an even ½ inch edge of overhang.  Tuck the excess dough under the edge of the bottom crust.  Flute the edge of the crust.  Cut 3 or 4 vent holes in the center of the top crust.  Beat the egg and salt together and paint the top of the pie with the glaze.
Glossy!!

5.  Bake the pie on the bottom rack of the oven for 15 minutes.  Yes, the bottom rack; do not freak out.  Unless your oven does crazy temperature things, the crust will NOT burn.  After 15 minutes, reduce the oven temperature to 350 degrees and bake for 35 minutes longer, or until the crust is deep golden and the juices are just beginning to bubble up.  Let the pie cool on a rack.  Serve warm or at room temperature.
*drooooooooooooooooooooooooooooooool*
 
Recommended by the Pie Man himself:
Enjoy 2 – 3 glasses of white wine while you are preparing the pie.
 
Pin It