Showing posts with label Side Dish. Show all posts

Tuesday, January 29, 2013

Tomato Basil Quinoa Salad

I'm bored. 

Yup, as much as I cook every single day... As much as I experiment with new dishes, I. Am. BORED. 

I'm bored with our side dishes.  I'm just not that kind of person (yet) who can experiment with a new main dish while also putting together a multi-step side dish that also requires me to examine a recipe.  So I'm left with the usual Side Dish Suspects: nuking some potatoes, rice, boiling pasta, maybe mashing potatoes because that doesn't require much thought, more plain rice, my bread maker...

*yawn*

Not only am I bored with the process of making my brainless sides, I'm bored with my ingredient options.  What other kinds of starches can I play with that my family won't clearly balk at eating?


Duh Jeanna.  Grains!  And what better one to start with than quinoa?  Oh, and FYI, it's pronounced "KEEN-wa".  Not "kwi-NO-ah" as my husband likes to tease me by saying. ;)

Tomato Basil Quinoa Salad
Recipe slightly adapted from Diva Dish
Prep time: 15 minutes   Cook time (if you need to make the quinoa for this): 25 minutes

2 tbsp balsamic vinegar
1 tbsp extra virgin olive oil
1/4 tsp garlic powder
Zest of one small lemon
Salt and freshly ground black pepper
2 cups prepared quinoa [This is about 1/2 cup unprepared if you don't have leftover lying around and need to make some just for this salad]
3 1/2 cups diced tomatoes
2 cups spinach, chopped
1 cups packed basil, chopped

1. In a small bowl, whisk together the vinegar, EVOO, garlic powder, lemon zest, salt, and pepper, and set aside. 
I love balsamic dressing.  L.O.V.E.


2. In a large bowl add quinoa, tomatoes, chopped greens, and dressing. Mix until combined, and add more salt and pepper to taste.
Quinoa Before.

Quinoa After (1 cup uncooked = about 4 cups cooked)


3. Refrigerate until ready to serve.
My boys inhale tomatoes.

Basil and spinach... I think I need a bigger bowl.


I think I have a new favorite salad.  This salad is bright, lemony, and refreshing!  I love the texture of the quinoa; it's kind of like rice but has a firmer texture with a slight crunch as you chew it.  It's awesome!!  Now, if you don't like quinoa, can't find it, or can't afford it (it's a little pricey), feel free to use rice or pasta in this salad.  It'll be just as yummy!

Oh and can you imagine how good this would be at the height of tomato and basil season???  *drooling!!*

[Ok so I looked it up, and before anyone flames me let me just say that though I called quinoa a grain, it is technically a seed.  See?  I learned something new!  And I'm sharing my new-found knowledge with all of you.  Everybody wins!]
Pin It

Tuesday, January 15, 2013

Twice-Baked Potatoes

How have I gone 30 years without discovering the awesomeness of twice baked potatoes?!?


HOW???

Twice-Baked Potatoes
Recipe adapted from Ree Drummond
Prep time: 15 minutes   Cook time: 1 hour, 20 minutes

4 baking potatoes, washed
2-3 tbsp canola oil
3 tbsp butter
1/3 cup crumbled bacon, optional
1/2 cup sour cream
1/2 cup Cheddar or Jack cheese (or a mix of both), plus more for topping
2 tbsp-ish milk
Salt and freshly ground black pepper
1 tbsp finely chopped chives

1.  Preheat the oven to 400 degrees F.

2.  Place the potatoes on a baking sheet. Rub them with the canola oil and bake for 1 hour, making sure they're sufficiently cooked through.
Can you tell which ones are for Mommy & Daddy and which are for the kiddos?


3.  In a large mixing bowl, combine the butter, bacon (if using), and sour cream. Remove the potatoes from the oven. Lower the heat to 350 degrees F.
PERFECTLY cooked with a nice crispy skin thanks to the oil.


4.  With a sharp knife, cut each potato in half lengthwise. Scrape out the insides into the mixing bowl, being careful not to tear the shell. Leave a small rim, about 1/4", of potato intact for support. Lay the hollowed out potato shells back on the baking sheet.
Leave some potato flesh to give the shell some structure.


5.  Smash the potato filling into the butter, bacon, and sour cream. Add the cheese, milk, salt, pepper, and chives to taste and mix together well.  
Yes, I could totally just eat this as is.  You would too; admit it.


6.  Fill the potato shells with the filling. Top each potato with a little more grated cheese.  Now here's what's really cool: at this point you could freeze the potatoes to bake up another time.  If you decide to take advantage of this Get Ahead moment (yesyesyesyesyesYES!!!), omit the chives; use them for garnish instead after baking.  If you plan to eat right away, then bake at 350 until the potato is warmed through and the cheese is nice and melty, 15 to 20 minute (psst! It'll be closer to 30 minutes if the potatoes are sharing an oven with another dish).
Mere moments away from glory.


These. Are. Amazing!!!  And yes, sort of time consuming to make, but sooooo worth the effort!  Especially now that I know I can freeze them for another time.  And the flavor is outstanding... if you like sour cream/onion/cheddar potato chips then these are right up your alley.

Ok so you run along and discover for yourself how incredible these are.  I have to go redesign my garden to include a little potato patch so I can make a TON of twice-baked potatoes for my freezer.   Cheers!
Pin It

Wednesday, June 13, 2012

Strawberry Jam

I was going to show this off as a Make It Monday recipe, but honestly, Gavin didn't really do anything with this one. Except watch.  Not much I could have him do since making jam requires sharp knives and stirring frighteningly hot, bubbling liquids over a blazing stove.  He did count the scoops of sugar for me so that's something!


Anyway, last week we went out and picked strawberries.  A lot of strawberries.  Dare I say a CRAP-TON of strawberries.  I'm looking at my refrigerator now and really questioning my sanity.  But this is what I wanted, I remind myself.  I have one son who inhales PB&J sandwiches like they're candy, and another who will probably be the same or pretty close.  I need to start stockpiling.

Strawberry Jam
Recipe from the box of Sure-Jell

About 8 cups whole strawberries, washed and hulled
4 cups sugar
1 box Sure-Jell OR 6 tbsp fruit pectin

NOTE: This is the canning version.  If you don't have canning equipment please do NOT let that stop you from making your own jam!!  Sure-Jell also has recipes and instructions to make freezer jam, which I've done before and it's AMAZING.
To just make a batch or two, buy a box.  To make more jam, get a jar of pectin.


1.   First thing to do is crush the strawberries.  You can either do this with a potato masher, 1 cup at a time, or with a food processor.  If you use the food processor, pulse the berries a few times, making sure to not overdo it.  You want a few chunks in your jam.  Your goal is to end up with 6 cups of crushed berries.
I like lots of berry chunks in my jam.


2.  Carefully measure out the sugar into a bowl.  Scoop 1/4 cup of that sugar into a separate, smaller bowl and mix in the pectin.  [NOTE: Yes, you do want to measure out the sugar into a bowl, ready to go, and not have to waste time scoop it in later when you need it fast.]
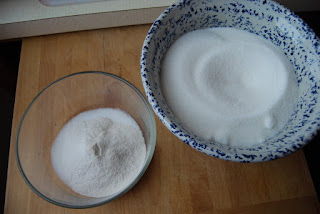
Left, pectin mixture. Right, just sugar.


3.  In a large stockpot, combine the berries, and sugar/pectin mixture.  Bring to a boil over high heat, stirring constantly.


4.  Once the jam reaches a rapid boil (yes, while still stirring), quickly pour in the remaining 3 3/4 cups sugar.  Stir to combine and boil for exactly one minute more.  Remove the jam from the heat and skim the foam off the surface.
Foamy

Not quite so foamy.


See?  That's not so bad is it?  Making jam is totally doable.  And you can store it in a variety of ways: freezer containers or by canning.  Freezer jam is easier to make, but canned jam is easier to store.  So, if you feel up to learning to can, keep reading:

1.  Fill your canning pot with enough water that once your jars are submerged, they will be covered by 1-2 inches.  Cover and bring to a boil.  FYI, this could take 30-60 minutes depending on the size of your pot.

2.  Make sure your jars are sterilized.  You can do this by dipping them in the boiling canning water OR by running them through the dishwasher, especially if you have a Sanitize setting.  SIDE NOTE: If you are going to put the jam in the glass jars immediately after making it, make sure to sterilize the jars right before filling them.  Putting a hot substance into cold glass containers is a recipe for disaster.

3.  Fill each jar to within 1/4" to 1/8" of the top.  Wipe the rims with a damp cloth before topping with a two-piece lid (that's the flat circle thingy and the separate metal rim).  Screw the rim down to just gently tighten.  No, you don't want jam to escape or water to get in, but you also want air to escape from the jar.  Trust me, bad things happen if you tighten the lids too much before processing.  More about that tomorrow.


4.  Stack the jars around the rack and submerge.  Boil the jars for 10 minutes, adding more time as necessary based on your elevation.


5.  Carefully remove the jars from the pot with tongs and put on either a wooden cutting board or towel-covered cabinet.  Again, we're trying to avoid a scenario of an extreme temperature change with these glass jars.  Let the jars sit out for 24 hours.  Then tap the button in the middle of each lid.  If it stays down, CONGRATULATIONS!  You did it!!  If the button pops back up, YAY you get to eat jam right now!!  Or you can toss those jars in the freezer.  Either way is fine.

The canned jam will keep for up to one year on the shelf.  Frozen jam will keep for about the same amount of time.


Now, let's talk about what reasons you may have for NOT making jam:
  • I have no need to make so much jam.  No problem!  They make little packets of pectin that result in only a couple jars worth of jam.


  • I am NOT spending my precious time standing over a hot stove and stirring!  Two words for you: instant pectin.  Also, you may want to consider using smaller fruit that requires less prepping to make your jam.  OR you could take some time to prep your fruit one day, and make the jam the next.


  • Ok so I have a little bit of time, but no way do I have an entire day's worth to can.  Nobody said you have to can the same day you make the jam.  I promise you will not spend an eternity in Jam Hell for making the jam one day, pouring it in a bowl, and canning it a day or two later.  It really is ok!

  • I'm too intimidated to can, but I still want to make enough jam for the coming months.  Two years ago I was terrified of canning.  Then my mother-in-law told me about freezer jam.  So I got my little box of Sure-Jell, crushed my berries, sterilized my Ziploc containers in the dishwasher, and was popping my jam into the freezer a mere two hours after I started.  
And if you're still not convinced enough to make jam, well, show this post to some of your foodie friends.  A person can only benefit from being friends with someone who loves to make, and share, jam. ;)
Pin It

Monday, May 14, 2012

Bacon Jam

No, the title is not a typo.  I really did make bacon jam.  In a slow cooker.  And angels began singing.


The world is now a better place.

Bacon Jam
Recipe from Martha Stewart

1 1/2 lbs sliced bacon, cut crosswise into 1-inch pieces
2 medium yellow onions, diced small
3 garlic cloves, smashed and peeled
1/2 cup cider vinegar
1/2 cup packed brown sugar
1/4 cup pure maple syrup
3/4 cup brewed coffee


1.  In a large skillet, cook bacon over medium-high, stirring occasionally, until fat is rendered and bacon is lightly browned, about 20 minutes. With a slotted spoon, transfer bacon to paper towels to drain.
Let us pause a moment to savor this truly glorious sight.


2.  Pour off all but 1 tablespoon fat from skillet (reserve for another use); add onions and garlic, and cook until onions are translucent, about 6 minutes.


3.  Add vinegar, brown sugar, maple syrup, and coffee and bring to a boil, stirring and scraping up browned bits from skillet with a wooden spoon, about 2 minutes. Add bacon and stir to combine.
I know, it doesn't look like much at this point.


4.  Transfer mixture to a 6-quart slow cooker and cook on high, uncovered, until liquid is syrupy, 3 1/2 to 4 hours. Transfer to a food processor; pulse until coarsely chopped. Let cool; the liquid will thicken as it cools.  Refrigerate in airtight containers, up to 6 weeks.
Pulse a few times to break it down, but not too much.  Still want some bacon bits!


Ok so let's just first talk about the elephant in the room here: this sounds WEIRD.  I'm totally not disputing that one.  I mean, come on, jam has always been associated with fruit; a sweet treat to put on toast and sandwiches.  Jam is peanut butter's best friend.  But BACON jam???  Whoa.

I was intrigued.  Not only because I happen to LOVELOVELOVE the combination of sweet and salty, but also I've always said that everything is better with bacon.  How could I not at least give this recipe a whirl?

My taste buds are THRILLED with this whirl.  Of course it's salty from the bacon, with little bits of that wonderful bacon-y crunch.  You also get this sweetness from the brown sugar, maple syrup, AND the caramelized onions.  That's right, the onions really come through with that sweet glorious flavor they get from getting happy in bacon fat.  I can also taste the cider vinegar in this, which helps to balance out the sweet and salty with just an edge of a bite.  This has such FANTASTIC flavor!!

So now begs the question, what do I do with this?  I could let myself be intimidated by the weirdness of this condiment.  Or I could take a step back and ask, well, what dishes do I like with bacon?  This is awesome on an English muffin with some egg and a little hot sauce.  Spread a little of this on your cheeseburger for a new twist on a bacon cheeseburger.  This would make a creative addition to a cheese platter.  Use it on a grilled cheese sandwich.  Or how about trying this in place of traditional strips of bacon on a BALT (bacon-avocado-lettuce-tomato) sandwich?  When you take the time to think about it, there really are lots of options for this jam.
Pin It

Tuesday, January 10, 2012

Balsamic Glazed Brussels Sprouts

I know what you're thinking.  And let me just say, before you rush to judgment, that I've been where you are.  I used to haaaate brussels sprouts... and then I got pregnant with my second child. 

We were at a holiday gathering a year and a half ago with friends, and one was putting together this sprout dish that just smelled INSANE.  While normal, non-pregnant people were having seconds or thirds of things like turkey, mashed potatoes, or pie, I was popping those little suckers into my mouth like candy.

Well, as with the PB & J Obsession with my first-born, I fully expected this newfound taste for sprouts to go away after the baby was born.  It hasn't.  In fact, I reallyreallyreally want to make some!

So when I saw this recipe, all rational thoughts flew out of my head, I knew I had to make them.  Now!

Balsamic Glazed Brussels Sprouts
Recipe from Ree Drummond

3 lbs (ish) fresh brussels sprouts
Extra virgin olive oil
1 cup balsamic vinegar
3/4 cup sugar
A handful or two of dried cranberries

1.  Preheat the oven to 375 degrees F.
Aren't they cute?!


2.  Trim/clean the sprouts, then cut them in half. Arrange on a baking sheet and toss with the olive oil. Roast until brown, 25 to 30 minutes.
I could fit these easily on one large baking sheet, but you may need two.


3.  Combine the balsamic vinegar and sugar in a saucepan. Bring to a boil, then reduce the heat to medium-low and reduce until very thick.  Psst!  You won't quite be able to tell how thick this is while it's bubbling away.  I recommend letting it reduce by about half; I think this took about 15 minutes?  I'll be honest though that I was not watching the clock.  As it cools it will get thicker.

4.  Drizzle the balsamic reduction over the roasted sprouts, then sprinkle on the dried cranberries.

Sweet.  Festive.  Fabulous.
 A little time saving hint for you: if you are making these for a special occasion, clean and trim these the day before.  That alone will save OODLES of time as you're trying to orchestrate the remaining dishes for your holiday feast.
Pin It

Monday, November 14, 2011

Cranberry Sauce

It's my favorite time of year!!  There's a crispy bite in the air.  Sweatpants and cozy blankets become the evening norm.  People tend to be a little nicer, a little more considerate (after all, Santa is watching).

And then there's The Food.  Yes, I meant to capitalize that.  Because there's your day-to-day food and then there's Holiday Food.  God bless Holiday Food!!

One of my favorite things about the holidays, and yes I have a lot of favorite things, is the chance to get together with family.  This year is thankfully no exception!  And instead of imposing on the host to make the entire Thanksgiving Dinner with all the trimmings, we are doing things potluck style.  Of course I asked to pleasepleaseprettyplease bring the cranberry sauce.

And I ain't talking about the stuff in the can either.  Trust me, of everything on your table, cranberry sauce is the EASIEST thing to make and so flavorful, you'll forget all about the convenience of the canned kind.

Cranberry Sauce
Recipe from Rachael Ray

1 cup water
1 cup sugar
1 cinnamon stick 
2 tsp grated fresh ginger 
2 tsp orange zest 
1/4 tsp salt 
1/8 tsp ground cloves 
One 12-ounce bag fresh cranberries

1.  In a medium saucepan, combine the water with the sugar, cinnamon stick, fresh ginger, orange peel, salt and cloves. Cook over medium heat, stirring constantly, until the sugar is dissolved. Stir in the cranberries and bring to a boil, then lower the heat and simmer, stirring, until slightly thickened, about 8 minutes.
Seriously kick-butt flavors going on


2.  Transfer the mixture to a bowl and remove the cinnamon stick. Let cool.

Gorgeous ruby gems!
Can we talk about how easy this is?  First, you make a simple syrup (equal parts water and sugar, boiled until the sugar dissolves).  Then you add a whole bunch of stuff to it that taste FANTASTIC with cranberries: fresh ginger, orange zest, cloves, cinnamon.  Add your berries and let it boil until it's thickened and looks like cranberry sauce.  See?  Easy!

This is a truly amazing complement to your turkey dinner.  It's also quite fabulous stirred into your morning oatmeal with some toasted pecans or walnuts.  Mix it will a little yogurt, or use as an refreshing alternative on top of ice cream.  If you really want to go crazy, add a dollup of Dijon mustard and slather all over a pork tenderloin for a couple hours before roasting.  Y.U.M.  

Believe me when I say you'll be doubling this recipe just to make sure you have leftovers to play with!
Pin It

Wednesday, September 21, 2011

Roasted Tomatoes

I am a busy mom.  You all know this, right?  Right.  When it comes to cooking for my family, I'm ALL about easy, fast, healthy, delicious.  I do not have time to stand around in my kitchen prepping ingredients.  I do not have time to babysit my stove or oven.  This mama's got stuff to do and places to go!!

Except when it's tomato season.  Because, for this recipe, I break all my rules.

Roasted Tomatoes
Recipe adapted from Rachael Ray

3 lbs ripe plum tomatoes (about 15-20) 
Extra-Virgin olive oil
Fresh thyme, springs removed from stems
Garlic Powder

1.  Position a rack in the middle of the oven and preheat the oven to 375°. Stem the tomatoes and slice them in half lengthwise. Gently squeeze out the seeds or scoop them out with a spoon or your fingers.  This process has become rather therapeutic for me actually, instead of tedious like I first thought it would be.
Yup, these beauties are from MY garden.  I love that.


2.  Lay the tomatoes, cut side up, in a single layer on a baking sheet lined with parchment paper.  Can we take a moment to talk about the parchment paper?  Do NOT think that coating the pan with a non-stick spray, or the EVOO in the recipe is enough to prevent a Baking Sheet Disaster here.  The way that these are roasted, charred bits are inevitable.  Charred bits and JUICES sticking to the pan are inevitable.  Have you ever tried to scrub juice that's been charred onto a pan?  Yeah, not pretty.  Just ask Rob. Learn from my early mistakes: get the parchment paper.
Thyme is staying fresh in a beer-tasting glass


3.  Drizzle with a little olive oil and sprinkle with the thyme and garlic powder.  I choose to use powder as opposed to fresh here because fresh garlic burns more easily. Roast for 40 minutes. Increase the oven temperature to 400° and roast the tomatoes until caramelized, about 20 minutes more.
Season to taste: everyone gets a little thyme and a little more garlic


4.  Turn off the oven and leave the tomatoes inside for 10 minutes, then remove to a rack and let cool completely. Peel if desired. The tomatoes will keep for up to 5 days in the refrigerator or for up to 6 months in the freezer.
Yum

Serve these as-is along side a beautiful steak.  Layer with fresh mozzarella and basil for a gorgeous salad.  Chop them up to use in a roasted tomato spaghetti sauce or salsa.  Or, as you'll see later on, use them to make a glorious roasted tomato soup.  Possibilities, I love them.
Pin It

Thursday, September 15, 2011

Cheddar Buttermilk Biscuits

A while back, I had some of my cooking shows on and I was kinda just tuning in an out while doing other things.  You know what I mean, right?  I know I can't be the only one who does this.  I like the background noise and it's nice that when I tune in, I could learn something tasty.

I was lucky when I tuned into this recipe.  AND I realized at the time that I had all the ingredients just waiting to be used for this. BONUS!
Won't win a Biscuit Beauty Pageant but who cares.  They're TASTY!


Cheddar Buttermilk Biscuits
Recipe from Ina Garten

2 cups all-purpose flour, plus more as needed
1 tbsp baking powder
1 1/2 tsp salt
12 tablespoons (1 1/2 sticks) COLD unsalted butter, diced
1/2 cup cold buttermilk
1 cold large egg
1 cup grated extra-sharp Cheddar, plus more for topping (optional)
1 egg, beaten with 1 tablespoon water or milk

1.  Preheat the oven to 425 degrees.

2.  Place 2 cups of flour, the baking powder, and salt in the bowl of an electric mixer fitted with the paddle attachment OR use a regular bowl.  With the mixer on low, or using a dough cutter, add the butter and mix until the butter is the size of peas.
Butter lumps


3.  Combine the buttermilk and egg in a small measuring cup and beat lightly with a fork. With the mixer still on low, quickly add the buttermilk mixture to the flour mixture and mix only until moistened. In a small bowl, mix the 1 cup of Cheddar with small handful of flour and, with the mixer still on low, add the cheese to the dough. Mix only until roughly combined.
Don't be afraid...the dough will come together.


4.  Dump out onto a well-floured board and knead lightly. Roll the dough out to a rectangle 10 by 5 inches. With a sharp, floured knife, cut the dough into 8 rough rectangles. Transfer to a sheet pan lined with parchment paper. Brush the tops with the egg wash, sprinkle extra cheese, if desired, and bake for 20 to 25 minutes, until the tops are browned and the biscuits are cooked through. Serve hot or warm.
Those chunks of butter make these flaky and wonderful.


I normally pair these with dinner (soup, roasted chicken...), but yes, these are also really great made into breakfast sandwiches with an egg and a little bacon. ;)
Pin It

Tuesday, September 6, 2011

Whole Wheat Flat Bread

I am surrounded by Carbivores.  Don't get me wrong, I like bread as much as any living, breathing person.  But it's not something I hope for, look for, at practically every meal.  I didn't grow up seeing bread on the table all the time so it truly doesn't occur to me to have something for my own table.

Rob, bless him, does not make an issue AT ALL about the lack of carbs.  But I know he'd really love to see bread at the table more; it's comforting for him.  Also, what four-year-old doesn't want Mama to serve more bread with dinner?

When I do actually think to make something, one of the problems I run into is one I'm all too familiar with: BOREDOM!  I mean, how many times can I have our breadmaker spit out white bread, wheat bread, or oatmeal bread to complement the meal?  Cornbread only goes so far.  Tortillas pair with only certain things (in my mind).  And, much as I love them, brown & serve rolls can get old.

*sigh*

Thank God for bloggers like Joy.

Whole Wheat Flat Bread
Recipe from Joy the Baker


3/4 cup warm water, about 95 degrees [Don't freak out on me; more on the temp below]
1 package (about 2 1/2 tsp) active dry yeast
1/2 tsp granulated sugar
1 3/4 cup whole wheat flour
2 tbsp uncooked old fashioned oats
1 tsp salt
1/2 tsp coarse ground black pepper
1 tsp olive oil

1.  In a small bowl, whisk together 1/4 cup warm water, yeast and sugar.  How do you know it's around 95 degrees without a thermometer?  Stick your finger in it.  No, seriously.  If it's warm but you're not getting that "this is waaay too hot" tingly sensation, you're fine.  Set aside for 5 minutes.  The mixture will grow and foam and that’s how you know the yeast is active and alive.
Kinda looks like beer


2.  In a medium bowl, whisk together flour, oats, salt and pepper.  Create a well in the center of the dry ingredients and add the yeast mixture.  Add the remaining 1/2 cup of water.  Bring mixture together with a fork, until all of the flour bits are moistened, and the dough is shaggy.  Dump out onto a lightly floured work surface and knead a few times to bring together.
Nope, it's not too dry.  I promise.


3.  Coat the medium bowl with a teaspoon of olive oil and place dough ball in bowl.  Cover with plastic wrap and a kitchen towel and allow to rise in a warm place for 1 hour.  Dough will double in size.
Shiny, lovely dough


4.  When dough has rested and risen, dump out onto a lightly floured work surface and knead for a few turns.  Use a knife to divide the dough in half, then divide each half into six equal pieces.  Heat a non stick pan over medium heat.
"Roar!"


5.  On a lightly floured work surface, roll out each dough piece into a roughly 4 to 5-inch circle.  Place dough round in the ungreased, hot pan.  Cook on one side for 1 to 2 minutes, until browned on the bottom and slightly puffed.  Flip and cook for another 1 or 2 minutes.  Remove from pan and serve warm with whatever floats your boat.
FYI: You can totally cook these while holding a fussy baby


The bread can also be cooled and refrigerated for up to three days.  If you wait to eat them, reheat the flat breads in a warm skillet before serving.

These make a lovely, fresh complement to dinners, but don't stop there!  Smear on a little cream cheese and jam and you have breakfast-on-the-go.  I like to tear mine up to scoop out garlicky bean dip too.  Mmmmmm....

And oh yeah, in case you're thinking that yeast bread is too intimidating, you're too busy, there's no way you could make these.  YES YOU CAN.  I've made this recipe twice now, both times while managing a fussy 3 month-old.  The dough comes together in 10 minutes and then you get to leave it alone for an hour!  Sure, rolling them out requires both hands but after that, you can totally get away with this one-handed.  If I can make these while telling my baby he really should have listened to me and taken a nap earlier, you can absolutely pull this off.
Pin It

Tuesday, August 16, 2011

Basil Pesto

Would you believe that I didn't really know what pesto was until my post-college years?  Yeah, pretty crazy.
The recipe that changed everything


Rob and I hadn't been married that long, and I was just beginning to get into my crazed I-need-to-try-a-new-recipe-practically-everyday kick.  So there was this baked pasta dish that just looked amazing and oh-so-simple.  Yet the key ingredient was this foreign concoction called Pesto.  I scoured the grocery store looking for it, and when I eventually found it, was horrified to see a half inch worth of oil at the top of the jar.  Did this mean that Pesto was an oily ingredient??  Ack!  You may recall that excessive amounts of oil and I do not get along.
Beautiful leafy basil


I went ahead and bought the oily jar as it was the only one I could find and I really wanted to make that recipe.  The dish was meh...ok, but I was too scared to eat very much of it because of all that oil in the pesto.  I decided that maybe Pesto wasn't all it was cracked up to be because with that much oil in it, I certainly wouldn't be eating very much of it.

Until I found this recipe.  Oh my dear graciousness.  THIS is what Pesto is all about!

Basil Pesto
Recipe adapted from Ellie Krieger

1/4 cup chopped walnuts
1 garlic clove
3 cups loosely packed fresh basil leaves
1/4 cup grated Parmesan
1/4 cup lemon juice
1/4 cup EVOO
Salt & freshly ground black pepper

1.  In a small dry skillet, toast the walnuts until fragrant.  Add to a food processor along with the garlic.  Pulse until finely chopped.
Make sure these are finely chopped BEFORE adding the rest. Trust me.


2.  Add the basil, Parmesan, and lemon juice.  Process until very finely minced.  With the machine running, slowly pour the oil in a steady stream through the feed tube and process until well blended.  Season with salt and pepper.
I could drink this with a straw.  Is that weird?  Oh well!


You can use it immediately, store it in a container to work with later, or do what I do.  I fill an ice cube tray with it and freeze it.  Each cube is roughly 1 tablespoon and I use it all winter long in a variety of dishes.
One recipe fills about half a tray

This pesto is AH-MAY-ZING!!  Not too oily, it has a super bright flavor with the basil and lemon juice, but mellows out as you eat it with this rich, nutty background from the walnuts.  Finally, I can have all the benefits, all the wonderful flavor, of Pesto without making my stomach obscenely angry with me. 
Pin It