Friday, March 18, 2011

Chicken Piccata

It's been a long day.  Tired. Getting hungry.  Not much in the fridge.  Man, even leftovers sound daunting and that's pretty bad.  I need something fast, easy, something that's going to perk me up a bit.  Yep, chicken piccata can do that.
My prep space.  Yes, I have an app to let me access recipes on my phone.
What is chicken piccata?  It's a lightly breaded chicken breast cooked in a lemon sauce.  Now, you're probably thinking "Wait Jeanna, breaded??  I thought you said easy!  Breading means flour and eggs and breadcrumbs and goopy fingers and mess!!"  Hang on, I promised fast and easy right?  Trust me.  You'll be making this the next time you've had a long, exhausting day.

Chicken Piccata
I think I got this from Family Circle

4 chicken breast cutlets
Salt and freshly ground black pepper
3 tbsp flour
2 tbsp butter
1 shallot, finely chopped [Note: if you don't keep shallot on hand, finely chop half a small onion]
1/2 cup white wine
1/3 cup lemon juice
2 tbsp capers
1/4 cup chopped fresh parsley

1.  If you don't normally keep chicken cutlets on hand (I don't), no need to rush to the store.  Take 2 chicken breasts and cut them in half lengthwise so they're about half the thickness. 

2.  Season both sides with salt and pepper.  Dredge the chicken through the flour, shaking off the excess. (See? I told you they were only lightly breaded)

Ignore the singed edges.  I'm terrible at thawing chicken ahead of time.
3.  Heat a large skillet over medium heat; melt butter.  Add the chicken and brown on each side.  Remove chicken from the skillet and set aside, covered, to keep warm.

4.  Add the shallot (or onion) to the pan and cook a minute or two to soften.  Pour in the wine, lemon juice, and capers and stir to combine.  Be sure to gently scrape up any browned bits from browning the chicken earlier.  Bring to a simmer.
If you're distracted and add the wine first, just soften onions quick in a second pan.

5.  Add chicken back to the pan and spoon a little sauce on top.  Partially cover the pan and cook for about 5 minutes or until chicken is cooked through.  Add parsley to the dish just before serving if you have it.  If you don't? Not the end of the world.

I. Love. This. Dish.  It is fast.  It is easy. And between the lemon juice and wine it has this bright, sunshiney flavor that's impossible to be sad in the face of.  The capers bring this kind of mustardy tang to the dish, toning down that intense lemon experience just a bit.  What's even better is that the leftover chicken?  Yeah, cut that up and use on top of a fresh spinach salad.  YUMMY!!  This is a really great dish for anyone super busy but still wants a homemade dinner at the end of the day.  I kid you not, this comes together in about 20 minutes.  Wahoo!!

Oh, and in case you're wondering, even Gavin liked this.  But then, he also likes to eat lemons.  Yeah, I know, weird. ;)
Pin It

Wednesday, March 16, 2011

Glazed Salmon with Spiced Carrots

So if I were to say the word "spicy," what would be the first thing that comes to mind?  Hot? Habenero?  Fire extinguisher?  Hmmm, interesting.  Believe it or not, "spicy" does not always have to result in flames racing across your tongue, incinerating every taste bud in it's path.  I mean, I like a good kick in the mouth as much as the next person but it's nice to shake it up a little too.  Spicy just means that something has lots of spices in it: hot, mellow, sweet, or savory.
Glazes are such fun!
I love to play with spices.  You hear a lot that "fat is flavor," which don't get me wrong because it is, however some of us just don't like or can't tolerate a gallon of oil or bacon fat in our food.  So how do I get to enjoy tasty food without frying something in 10 lbs of butter?  Yup, spices.  

I tried three new recipes in one meal, which is rare for me.  Normally if I'm trying a new recipe I stick with tried and true compliments to make sure there is something in the meal that I'm guaranteed to like.  However I came across this salmon recipe, which included the carrots as part of it, and I was stumped as to what to make with it.  Potatoes would be too heavy.  Rice?  Wild rice would be great with salmon however I know there is not a chance that my 3-year-old would eat wild rice.  And, I'm sorry, plain rice just didn't see worthy enough to serve with this.  So I did some quick digging and came across a Spiced Rice recipe.  Again, not spiced as in "holy God get me some water NOW".  But spiced as in a deeper, almost more mysterious flavor.  All together, this meal worked.  Plus it easily comes together in under a half hour (bonus!!).  

Glazed Salmon with Spiced Carrots
Recipe adapted from Food Network Magazine

1 lb carrots, peeled and thinly sliced on a bias (fancy word for saying you need to angle your knife as you cut)
4 tbsp olive oil, divided
4 salmon filets (I just used one big piece of fish that was scored into 4 pieces)
2 tbsp honey or agave nectar
1 tbsp dijon mustard
2 tbsp lime juice, divided
Salt & freshly ground black pepper
1/2 tsp ground coriander
1/4 tsp cumin  (LOVE CUMIN!!!!)
Dash of cinnamon

1. Preheat broiler.  In a medium bowl, toss sliced carrots with 1 tbsp olive oil.  Spread slices on 1/2 of a broiler pan and broil 2-3 minutes until they just start to soften.

2.  In a small bowl, whisk together 2 tbsp olive oil, dijon mustard, honey, and 1 tbsp lime juice.  Brush glaze on the tops and sides of the salmon filets.  Season with salt and pepper.  Lay filets on the other side of broiler pan.  Broil for 5-7 minutes or until salmon is cooked through and carrots have softened.
Two dishes, one pan, less cleanup.  Wahoo!!
3.  Let salmon rest a couple minutes while finishing the carrots.  In a medium bowl, combine last tbsp olive oil and lime juice with the coriander, cumin, and cinnamon.  Toss in carrot slices to coat.  
Next time I may add some chopped fresh parsley for some color

I served these two lovely dishes with Simple Spiced Rice.

1 tbsp butter
1 cup uncooked rice
1/2 small onion, chopped
2 cups water
1 tsp salt
2 whole cinnamon sticks
1 small bay leaf 

1.  Melt the butter in a large saucepan over medium heat, and cook and stir in the rice and onion until the rice kernels are coated with butter and the onion is translucent, 5 to 8 minutes. The rice will give off a slightly toasted fragrance. Pour in water, and mix in salt, cinnamon stick (break it in half if it won't fit) and bay leaf. 
Toasty!
2.  Bring the mixture to a boil, and reduce heat to medium-low. Cover the saucepan, and simmer the rice until all the water has disappeared and the rice appears dry, about 18 minutes. Fluff the rice with a fork and serve. 
I love the opportunity to use cinnamon sticks in my cooking
The end result of this meal?  Lovely, lovely spiciness.  The kind that warms you through and makes you happy (which, incidentally, is probably mainly from the cinnamon that's running through this entire meal).  I'd encourage you to play around with your spices. Spicy doesn't have to be chili powder and red pepper flakes.  Cinnamon, cumin, cardamom, allspice,... these are lovely ways to wake up those taste buds and warm the soul too. ;)
Pin It

Tuesday, March 15, 2011

Cheddar-Broccoli Soup

Soup. Bread.  One of life's perfect combinations
Do you like soup?  I like soup.  Soup is just so comforting.  Plus, it's generally pretty easy to make, and make a LOT of.  Throw in some crusty bread for dunking and you have a little winter wonderland oasis in the making.

Panera's is well-known for their soups.  My favorite of theirs happens to be their creamy chicken & wild rice (YUMMMMMMMM!), however I hear their best soup seller is the cheddar-broccoli soup.  Do I have your attention now?  Yeah, I thought so.  I can't say that I have The Recipe for it as I think Panera's chefs probably have that under lock and key... but this tastes pretty durn close to it.  And like so many other soups, it's easy to make.  Does this recipe make a mega-ton?  Not in my opinion but doubling would be simple.  And though this is a creamy/cheesy soup, I love that it uses fresh broccoli.  That helps me feel not quite so guilty about the amount of butter and milk and cheese I'm tossing into the pot.

Cheddar-Broccoli Soup
Recipe from Food Network Magazine

6 tbsp butter
1 onion, chopped
1/4 cup all-purpose flour
2 cups half-and-half (or if you're like me, just use the milk you have in the fridge)
3 cups low-sodium chicken stock
2 bay leaves
1/4 tsp ground nutmeg
Salt & freshly ground black pepper
4 cups fresh broccoli florets (about 1 head)
1 large carrot, diced
2 1/2 cups (about 8 oz) grated cheddar cheese

UPDATE (10/12): Since Gavin loves broccoli but claims he hates all soups, and Kieran can't wield a spoon yet, I made broccoli cheese toasts for the boys.  Toast up a couple slabs of bread, then slather on a few tablespoons of soup.  Top with extra cheddar and put under the broiler until the cheese is melty, bubbly, golden-y goodness.  They inhaled them!!

1.  Melt the butter in a large Dutch oven or pot over medium heat. Add the onion and cook until tender, about 5 minutes.
The flour won't make much of a paste.  That's ok.
2.  Whisk in the flour and cook until golden, 3 to 4 minutes, then gradually whisk in the milk until smooth. Add the chicken stock, bay leaves and nutmeg, then season with salt and pepper and bring to a simmer. Reduce the heat to medium-low and cook, uncovered, until thickened, about 20 minutes.

3.  Add the broccoli and carrot to the pot and simmer until tender, about 20 minutes. Discard the bay leaves.
Mmmmm, two of my favorite vegetables
4.  Puree the soup in batches in a blender until smooth; you'll still have flecks of carrot and broccoli...it's OK. Return the soup to the pot. (Or puree the soup in the pot with an immersion blender; less dishes, way more fun.)

5.  Add the cheese to the soup a little at a time and whisk over medium heat until melted. Add up to 3/4 cup water if the soup is too thick. Ladle soup into regular bowls, or bread bowls if you really want to get all Panera-esque, and garnish with more cheese if you like.  I usually have a hard time finding the bread rounds for bowls so I just setup the breadmaker for a lovely, hot loaf of whole wheat or white bread.  Still tastes great!
Pin It

Monday, March 14, 2011

Individual Microwave Chocolate Cake

Yes, you read that post title correctly.  You can make cake, for your own special wonderful self, in the microwave.  Do you hear the angels singing because I sure did when I saw this recipe!!
New use for a latte mug
I love sweet baked goods.  Probably a little too much actually which is why I don't make them as often as Rob would like me to.  I'm especially drawn to cake and brownies (cookies are awesome but I prefer them fresh from the oven).  I like to make cakes and brownies but then Rob and I are "stuck" eating an entire pan of said sweetness for days on end until it's gone.  What if I want something different?  (Oh, and in case you're wondering, Gavin only gets treats when he finishes a complete dinner, which unfortunately isn't often.)
Flour, sugar, cocoa powder... all the basic goodness
Another challenge I have is timing.  Often I am craving some delectable baked good but then Rob won't be around much to help me eat it.  What's the point in making a giant layer cake if it's going to be three days before my other half will help me attack it?  *sigh*

Enter this lovely little gem.  It's quick.  It's easy.  It totally satisfies that baked chocolate craving. Yum!!
Mmmmmmmm....chocolate!

Microwave Chocolate Cake 
Recipe from Food Network Magazine

1/4 cup flour
5 tbsp sugar
2 tbsp cocoa powder
1 egg
3 tbsp milk
3 tbsp canola oil
Dash of salt
Dash of vanilla

1.  In a latte mug, whisk together the flour, sugar, and cocoa powder.  Add remaining ingredients and whisk until batter is smooth.
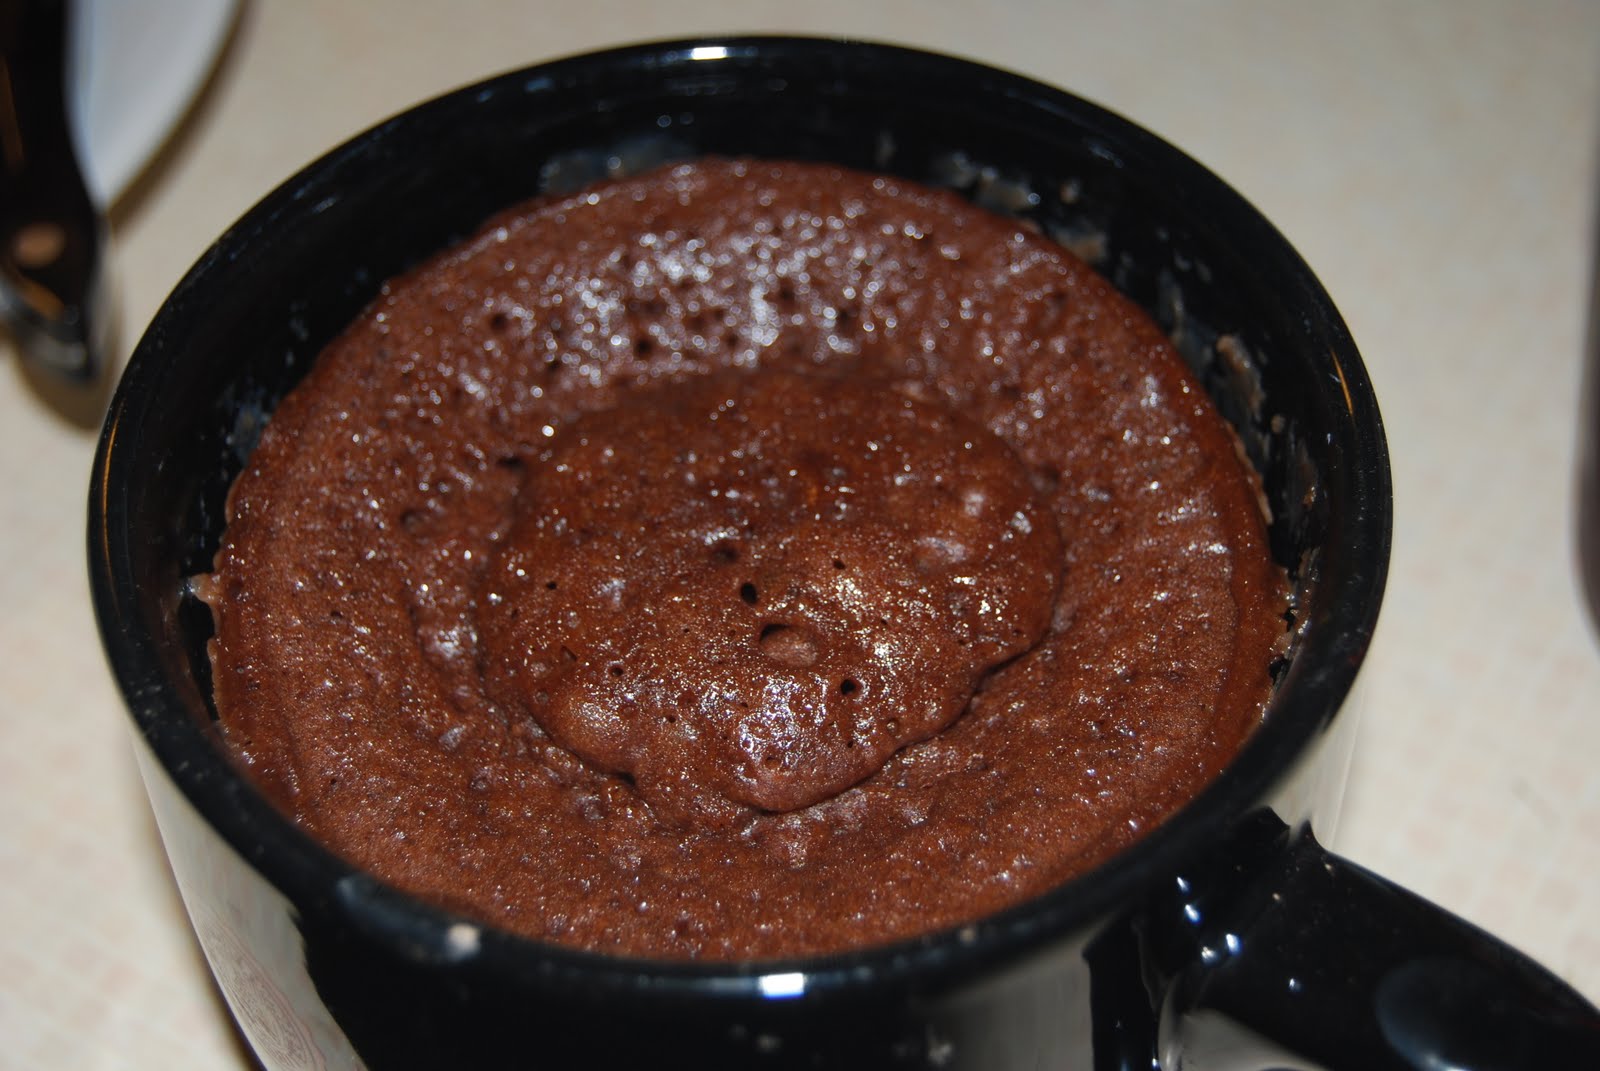
Won't win a cake beauty pageant but man is this good
 2.  Microwave on high for 2 minutes.
This is how I like to enjoy my nice warm single-serving cake
 3.  Top with favorite chocolate cake toppings (I like fresh strawberries and chocolate sauce) and enjoy!
Pin It

Saturday, March 12, 2011

Chocolate Banana Breakfast Shake

If memory serves correctly, the first time I ever had a chocolate-dipped frozen banana we were still living in Southern California.  It may have even been at Disneyland, so I would have been about 6 years old.  It didn't take long for me to realize why my mom loves them so much.  Something frothy and magical happens when a banana is frozen.  Then dip that in heavenly chocolate?  Oh my.....  Yeah, that's what this drink is like.
Milk: it does a body good.  Pass it on!
I have no problem making adjustments to recipes to suit my tastes.  However with this one I altered the name instead of the ingredients.  I could not detect much of a coffee flavor; the balance of chocolate and bananas was much more prominent.  Plus the original recipe calls this a smoothie and you've already learned about my issues with dairy in "smoothies."  So I tend to think Chocolate-Banana Breakfast Shake is a more descriptive name for this one. 

Chocolate-Banana Breakfast Shake
Recipe from So Easy (if you're looking for this recipe in the cookbook, it's Mocha Java Smoothie)


2 tsp cocoa powder
1 tbsp sugar
2 shots hot espresso OR 2 rounded tsp espresso powder dissolved in 1/4 cup hot water
2 bananas, cut into chunks and frozen
2 cups milk
1 cup ice

1.  In a small bowl, mix together the cocoa powder, sugar, and espresso until the sugar and cocoa are dissolved.
Frothy deliciousness!
2. Pour espresso mixture, milk, bananas and ice into blender and blend until smooth and heavenly.
You want to drink this right now, don't you?
As easy as this is are you still to pressed for time to make this the morning?  No biggie.  Mix up the espresso mixture the night before.  Pour that and the milk in the blender pitcher and store in the fridge.  When you're ready to go, toss in the bananas and ice and blend away!

Pin It

Thursday, March 10, 2011

Sloppy Joe's

I have mixed feelings when it comes to prepackaged mixes.  I'm all for convenience; why reinvent the wheel, right?  But sometimes mixes just feel.....mmm, limiting.  Like, here's the mix for this and that's all you can make with it.  I kinda see sloppy joe mix like that.

I came across this recipe when I'd planned to make sloppy joe's for dinner and was positive I had that little red packet in my spice cabinet.  So while the meat is browning in the pan, I open up the cabinet and rifle through the packets.  Um....let's go through them again.  ......  Okaaay, let's check elsewhere in the spice cabinet, or maybe the pantry in case Rob may have put the mix somewhere that made complete sense to him but not to me. ...... CRAP!  I have almost cooked hamburger, hamburger buns, a drive and a desire to make sloppy joe's but no SJ mix.  Think faaaaaaaaaaast!!!
Flavorlicious!

Thinking fast lead me to this.  It also lead me to never buying sloppy joe packets again because we just happen to like this version so stinking much.  And bonus that I don't have to buy anything extra for this because these are all ingredients I keep on hand.  Always.


Sloppy Joe's 
Recipe adapted from Rachael Ray

1 lb lean ground beef
1 onion, chopped
1 tbsp steak seasoning (I like to use Quebec Beef Spice from the Spice House)
1 tbsp chili powder
3 tbsp dark brown sugar
3 tbsp Worcestershire sauce
2 (8oz) cans tomato sauce
Hamburger buns

1.  Heat a large skillet over medium-high heat.  Brown beef and onions together until meat is no longer pink and onions are soft.

2.  While the beef and onions cook, in a medium bowl mix together the steak seasoning, chili powder, brown sugar, Worcestershire sauce, and tomato sauce.
Because of the chili powder, this sauce has a little kick to it

3.  Pour tomato sauce mixture into skillet.  Stir to combine.  Simmer uncovered until sauce has thickened, about 10-15 minutes.

4.  Spoon beef mixture onto hamburger buns and enjoy!

My boys like cheese on theirs.  I prefer mine plain and simple.
Pin It

Wednesday, March 9, 2011

Mango Lassie

After yesterday's gut-busting brownies, I thought perhaps I should put something up that's on the other end of the health spectrum.  Don't run away from me yet though!  I'm a firm believer that "healthy" does not have to be "bland."  Stick with me.  Trust me. :)

When it comes to smoothies, I'm pretty opinionated.  I like my smoothies with fruit and juice.  Period, end of discussion.  Once you start introducing dairy products to the blender, it ceases to be a smoothie to me.  Shakes have dairy in them.  Smoothies are juicy goodness.
Look!  A mango porcupine!
But (you knew that was coming didn't you), I was going through my cookbooks the other day and this one caught my eye.  For one, it did not claim to be a smoothie.  It also features mangoes, which I'd just picked up a couple from the store because they were on sale (yay sale!).  And being only four ingredients long (wahoo!!), I thought, "why not?"
Get ahead: cut up mangoes the night before and store in pre-portioned baggies

Prepare yourself.  These are like drinking sunshine.

Mango Lassies
Recipe from The Food You Crave

2 ripe mangoes
1 1/2 cups plain yogurt
2 tbsp honey
2 cups ice

1. Mangoes have an oval-shaped core (I know, they're weird).  So to cut the fruit off the core, you basically just cut off the two sides.  I like to score the mango halves, invert the peel, and then cut out the juicy flesh.  Thanks to the scoring it cuts off in nice neat cubes.  Whatever your method, you want to get the mango away from the core, off the peel, and diced for the blender.

2. Blend the mango for a minute until the fruit is pureed.  Add the remaining ingredients and blend until ice is crushed and the drink is a gorgeous frothy pale yellow.
Mango meets yogurt meets honey.  Yummy!
As you can see, I like to pour this into my water bottle and take along as a standalone breakfast, or have with an egg sandwich or some kind of wrap.  It's cool, it's refreshing, it's happy to look at.  I like it. :)  The plain yogurt gives this drink a bit of tang, which I happen to like.  If you like your smoothie-esque beverages a little sweeter though I'd recommend using vanilla (or strawberry!  Ooo, strawberry-mango would be a tasty combo).
Pin It